
Optimizing Aesthetics and Predictability in the Placement of Posterior Composite Resin Restorations
AESTHETICS WITH COMPOSITE RESIN: CIRCA 2018
The term “universal” seems to be used frequently in the adhesion/composite resin materials world today. It has always been a struggle to find such a material that can adequately replace two very different types of tissues, namely enamel and dentin. Dentin is more opaque yet resilient, while enamel is more translucent and brittle. The other caveat is that in the anterior area, aesthetics is an important consideration in the “success” of a dental restoration whereas in the posterior region, functional stresses of occlusion demand a focus on the physical properties for longevity and durability with less a demand for “optimal” aesthetic layering.
THE TECHNOLOGY OF EVANESCE: A “NANO-ENHANCED” COMPOSITE RESIN
Advances in composite resin technology have been largely on the filler side – changes in particle size, particle shape, or filler type to try and maximize the aesthetic potential of the material while maintaining the physical properties necessary to enable the material to withstand the stresses of masticatory forces in the oral environment. With Evanesce (Clinician’s Choice), the manufacturer reports an innovative process that optimizes the refractive index of its unique nano pigments and fillers and allows the material to “disappear” into tooth structure thus satisfying the demand for optimal aesthetics in the anterior region.
It offers three different opacities so that when layered, it can more closely mimic the natural opacities of enamel and dentin. Most of the time, the universal shade alone can provide excellent shade blending with natural tooth structure. As far as physical properties, Evanesce is comparable to nanohybrids that have been designed for optimal wear in the posterior areas.
THE MORPHOLOGY OF THE INTERPROXIMAL SURFACE OF POSTERIOR TEETH
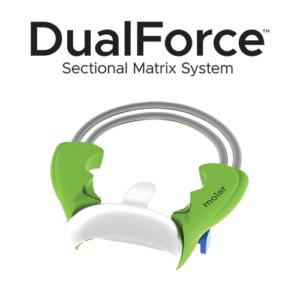
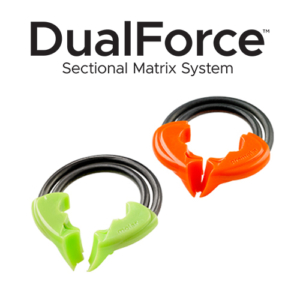
Class II (interproximal) decay and/or a failing restoration that involves the proximal surface of a posterior tooth is a common occurrence in many dental patients. A good portion of these problems can be handled utilizing directly placed restorative materials. One challenge for the dentist is to accurately recreate a physical contact to the adjacent tooth and at the same time, restore proper interproximal anatomic form given the limitations of conventional “tofflemire-type” matrix systems. The thickness of the matrix band and the ability to compress the periodontal ligaments of the tooth being restored and the tooth adjacent to it can sometimes make the restoration of proximal tooth contact arduous at best. Anatomically, the posterior interproximal surface is convex occlusally and concave gingivally (below the contact point). The interproximal contact area itself is elliptical in the buccolingual direction and located approximately one millimeter apical to the height of the marginal ridge. As the surface of the tooth progresses gingivally from the contact point toward the cementoenamel junction, a concavity exists that houses the interdental papilla. Conventional matrix systems are made of thin, flat metallic strips that are placed circumferentially around the tooth to be restored and affixed with some sort of retaining device. While contact with the adjacent tooth can be made with a circumferential matrix band, it is practically impossible to recreate the natural convex/concave anatomy of the posterior proximal surface because of the inherent limitations of these systems. Attempts to “shape” or “burnish” matrix bands with elliptical instrumentation may help create non-anatomic contact, but only “distorts”, or “indents” the band and does not recreate complete natural interproximal contours. Without the support of tooth contour, the interdental papilla may not completely fill the gingival embrasure leading to potential food traps and areas for excess plaque accumulation. Direct Class II composite restorations can present even more of a challenge to place for the dentist because of the inability of resin materials to be compressed against a matrix to the same degree as amalgam. Offering a solution to this clinical problem, this article will describe the use of an innovative sectional matrix system DualForce (Clinician’s Choice), designed to facilitate placement of composite resin and to assure optimal results, both in physiological contact and in anatomic form. When utilizing this system with the latest in composite resin technology, direct Class II tooth colored restorations can be placed that exhibit natural anatomic proximal form and have predictable proximal contact.1,2,3
TOOTH PREPARATION AND MATRIX SELECTION
Class II cavity preparations that need a matrix band for restoration will require rebuilding of the marginal ridge, proximal contact, and often a large portion of the interproximal surface as well as the occlusal surface. The goal of composite placement is to do so in such a way that the amount of rotary instrumentation for contouring and finishing is limited. This is especially true for the interproximal surface. Because of the constraints of clinical access to the proximal area, it is extremely difficult to sculpt and correctly contour this surface of the restoration. Proper reconstitution of this surface is largely due to the shape of the matrix band and the accuracy of its placement4. After removal of dental caries and old restorative material, the outline form of the cavity preparation is assessed. If any portion of the proximal contact remains, it does not necessarily need to be removed. Conserve as much healthy, unaffected tooth structure as possible. If the matrix band cannot be easily positioned through the remaining contact, the contact can be lightened using an interproximal abrasive device (ContacEZ). A sectional matrix system, such as DualForce (Clinician’s Choice), is an excellent choice for Class II composite restorations for many reasons. The matrix band is anatomically correct, and the unique design of the matrix allows for the proper restoration of interproximal anatomy as described above. Some of the other features of the DualForce system are as follows:
-
Concentric dual nickel titanium ring design increases separation force, allows the ring to be easily expanded for placement, and increases its resistance to breakage.
-
A unique independent prong design adapts intimately to most tooth shapes. This is critical to making sure the matrix has the most precise fit to the preparation margins to avoid material excess (flash) at placement and reduce finishing time. The prongs are also “nonstick” so composite materials is easily cleaned off prior to sterilization.
-
The engagement angle of the rings when placed increases stability of the ring, reduces “pop-off”, and allows for clearance from rubber dam clamps and adjacent teeth to make for better access for instrumentation.
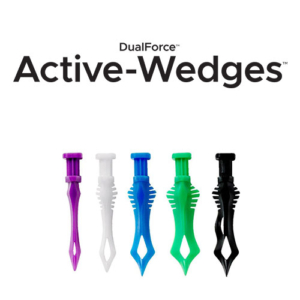
- This anatomically designed wedge features a collapsible tip that rebounds when fully seated. The black wedge has a “Deep Seal” bubble. This unique shape will seal the matrix band against root concavities that frequently exist along gingival margins of Class II proximal boxes and are very hard to adequately seal with conventional matrix and wedge armamentarium.
-
The Active-Wedge is placed using a “suture placement technique”, sliding it through the gingival embrasure apical to the gingival margin of the preparation along the lower edge of the matrix. Due to its strong internal spine, DualForce Active-Wedges provide two pounds of separation force, which is more than adequate to seal the matrix band against the side of the tooth. The ring will compress the periodontal ligament so that when the matrix band is visibly touching the adjacent proximal surface (with or without burnishing the band), DualForce Punch Pliers will be needed to remove the matrix when the procedure is complete.
-
The grip of the Active-Wedge is “ribbed”, so that a cotton plier will firmly hold the wedge while it is placed.
CASE REPORT: CLASS II POSTERIOR DIRECT COMPOSITE RESTORATIONS
The patient shown in FIG. 1 presented with radiographic decay (FIG.2 and 3) on the distal surfaces of tooth numbers 19 (36) and 21 (34).
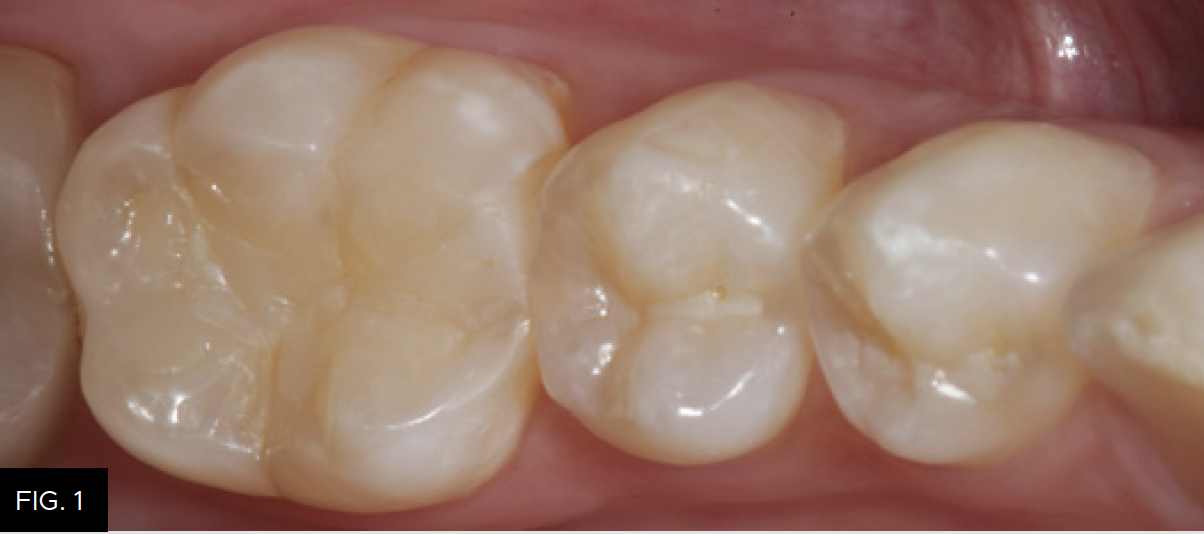
A pre-operative occlusal view of a mandibular left quadrant.
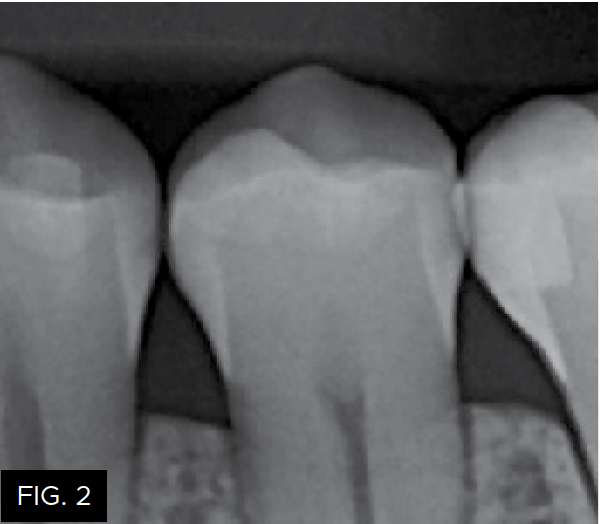
A caries detection x-ray (bite wing) shows a distal radiolucent lesion on tooth number 21 (34).
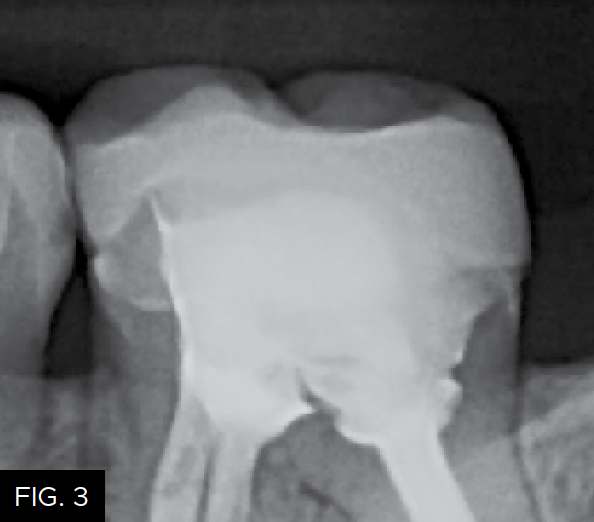
A caries detection x-ray (bite wing) shows a distal radiolucent lesion on tooth number 19 (36).
After removal of the decay and creation of the cavity outline form, the operative area is isolated with an Isolite (Isolite Systems) in preparation for the restorative process. (FIG. 4)
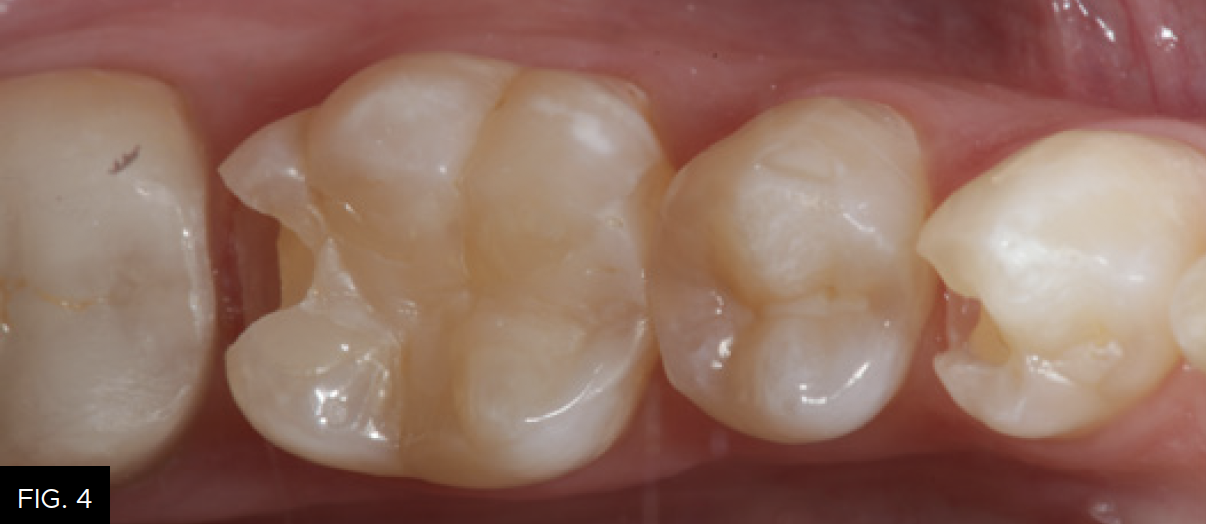
An occlusal view of the completed DO cavity preparations on tooth numbers 19 (36) and 21 (34).
The DualForce Sectional Matrix System (Clinician’s Choice) will aid in the anatomic restoration of the distal proximal tooth morphology of the mandibular first premolar and molar teeth. The appropriate matrix band size is chosen which will best correspond anatomically to the tooth being restored and also to the width and height of the proximal surface. The height of the sectional matrix should be no higher than the adjacent marginal ridge when properly placed. The tab on the matrix band is bent away from the preparation using an index finger to hold the band securely while the wedge is placed. This “tab” will also ensure that the height of the matrix band corresponds to the height of the adjacent marginal ridge so that the marginal ridge of the restoration will be located at the proper height.
Because of the concave anatomic shape when applied, the proximal contact will be located approximately one millimeter apical to the height of the marginal ridge. Next, the gingival portion of the band is stabilized and sealed against the cavosurface margin of the preparation using the appropriate size DualForce Active-Wedge (Clinician’s Choice). The size of the wedge should be wide enough to hold the gingival portion of the matrix band sealed against the cavosurface of the preparation, while the opposite side of the wedge sits firmly against the adjacent tooth surface. Once the DualForce matrix is properly wedged and ring placed, the restorative process for tooth number 21 (34) can be started. (FIG. 5)
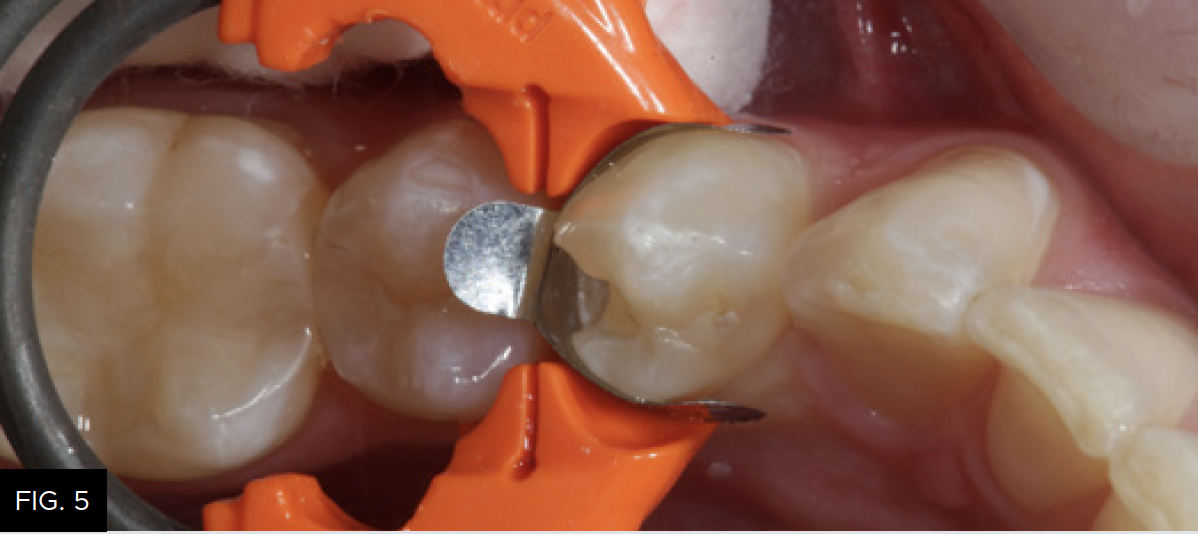
The sectional matrix (DualForce, Clinician’s Choice) is shown in place on tooth number 21 (34). Note the precise gingival seal due to the DualForce Active-Wedge and the accuracy of the adaptation of the matrix to the vertical walls of the preparation that will help eliminate flash and excess after composite placement.
A fifteen second total-etch protocol, 10 seconds on enamel margins and 5 seconds on dentin surfaces is performed using a 37% phosphoric etchant.
(FIG. 6)
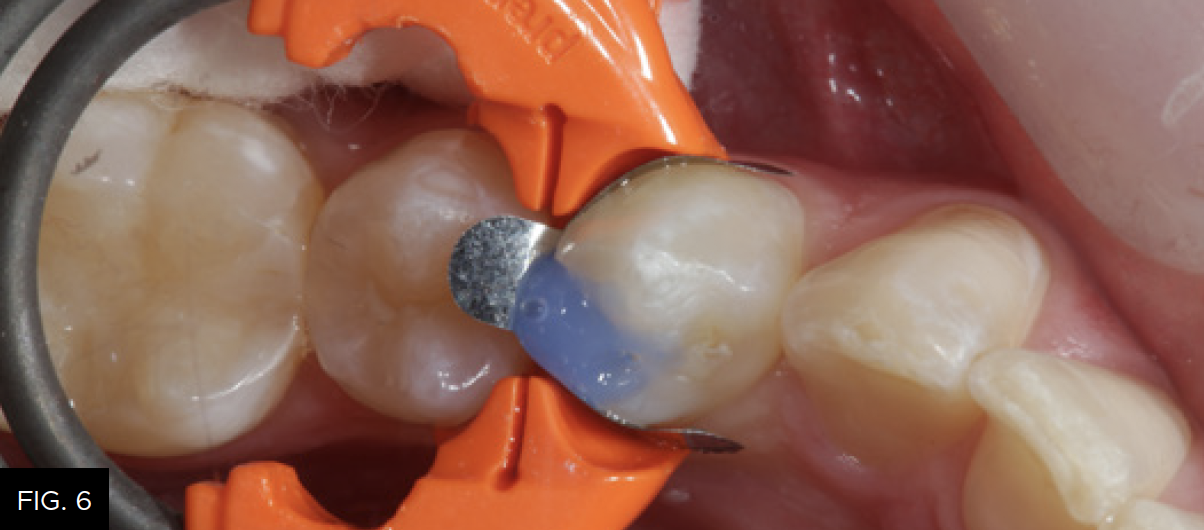
Total-etch with 37% phosphoric acid (Max Etch, Clinician’s Choice) is performed for 15 seconds, then completely rinsed with water. Any excess remaining moisture is removed with the high-volume suction device (not the air syringe!) to avoid over desiccation and collapse of exposed collagen, which could lower the bond strength of the adhesive to the dentin.
It is then rinsed off for a minimum of 15 to 20 seconds to ensure complete removal. The preparation is then air-dried and rewetted with G5 Desensitizer (Clinician’s Choice) to disinfect the cavity surface, create a moist surface for bonding, and begin initial penetration of HEMA into the dentinal tubules. A total-etch bonding agent (MPa Max, Clinician’s Choice) is then placed on all cavity surfaces. (FIG. 7) Chlorhexidine (0.2%) is included in MPa Max and will help inhibit the release of MMP’s (matrix metalloproteinases) from etched collagen that have been shown to weaken the dentin bond over time5. The solvent is evaporated by spraying a gentle stream of air across the surface of the preparation, while the adhesive is thinned until no rippling is seen. The adhesive is then light-cured for 20 seconds (Valo Grand, Ultradent). (FIG. 8)
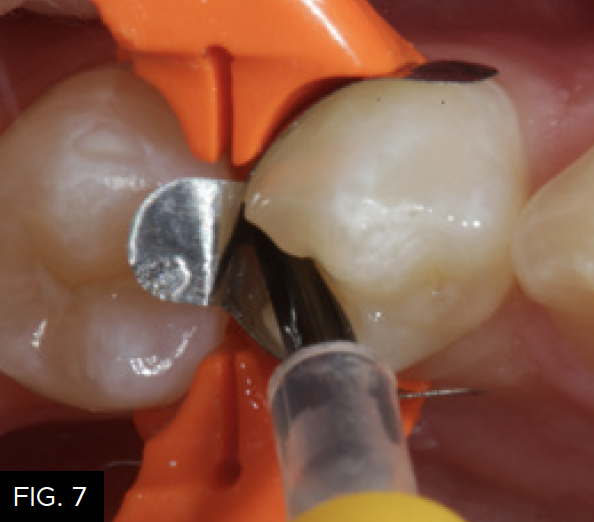
The bonding resin (MPa Max, Clinician’s Choice) is placed using a microbrush on all etched enamel and dentin surfaces.
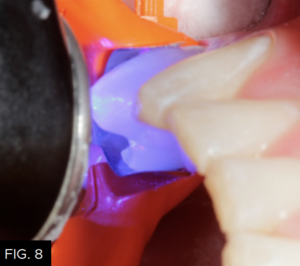
The adhesive is light-cured for 20 seconds using an LED curing light (Valo Grand, Ultradent).
The first layer of composite is placed using a flowable composite (Evanesce Flow, Clinician’s Choice) to a thickness of about .5 millimeters. (FIG. 9) The flowable composite will “flow” into all the irregular areas of the preparation lessening the chance of creating voids between the adhesive and the first layer of composite and once cured, create an oxygen-inhibited layer to bond subsequent layers of composite material. After light-curing for 20 seconds (FIG. 10), the next step is to layer in the conventional type composite material.
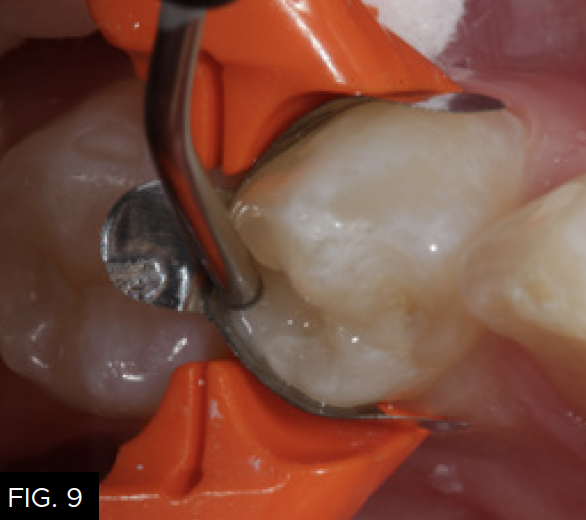
The first increment of composite, a flowable resin (Evanesce Flow, Clinician’s Choice) is placed into the preparation up to a depth of 0.5 millimeters to ensure accurate adaptation of the first increment of composite to the geometry of the cavity preparation.
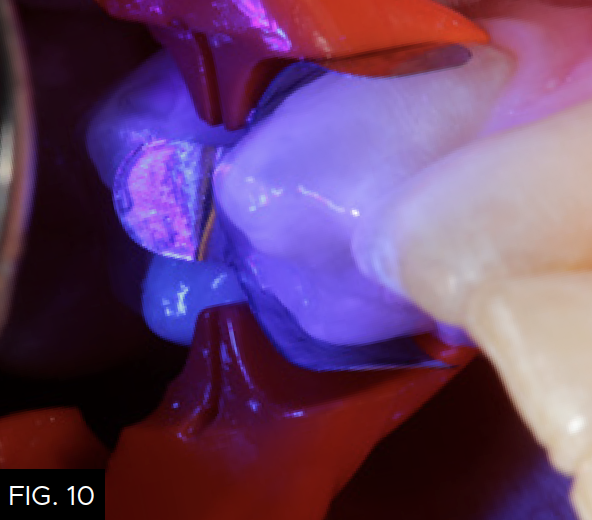
The increment of flowable resin is light-cured.
Using a unidose delivery, the first increment of composite resin (Evanesce, Clinician’s Choice) is placed into the proximal box of the preparation. A smooth ended composite placement instrument (Goldstein Flexithin Mini 4, HuFriedy) is used to adapt the restorative material to the inside of the sectional matrix and preparation. (FIG. 11)

The first increment of nano-enhanced composite (Evanesce, Clinician’s Choice) is placed using a composite placement instrument (Goldstein Flexithin Mini 4, HuFriedy).
Each increment of composite material should be no more than 2 millimeters thick. The buccal increment is placed into the facial portion of the preparation, including the facial portion of the marginal ridge. The cuspal projections are sculpted and the depressions between are created using the Flexithin Mini 4. A #2 Flat Keystone brush (Patterson Dental) is lightly dipped in resin (ResinBlendLV, Clinician’s Choice), dried thoroughly with a 2X2 sponge and used to feather the material toward the margins while smoothing the surface of the composite. After fully light-curing, occlusion is checked with articulation paper and adjusted, as needed using a thin 20-fluted carbide composite finishing bur (SS White). (FIG. 12)
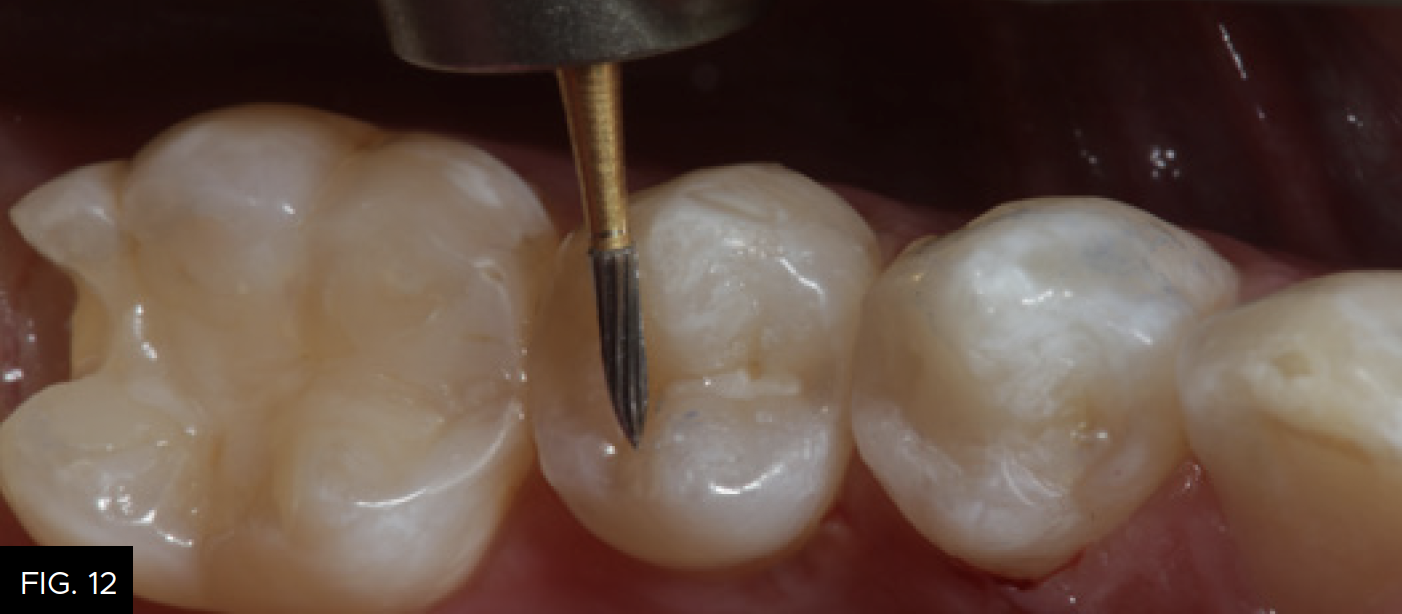
A 20-fluted carbide composite finishing bur (#9904, SS White) is used to adjust the occlusion prior to polishing the restoration.
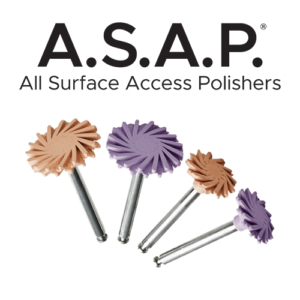
When placing composite materials using the above-described technique, very little finishing should be required except at the marginal areas. Rubber polishing abrasives (A.S.A.P. Polishers, Clinician’s Choice) are used to further polish the adjusted areas. (FIG. 13)

An A.S.A.P. Pre-polisher (A.S.A.P. All Surface Access Polishers, Clinician’s Choice) is used followed by an A.S.A.P. Final High Shine Polisher to impart a high luster surface to the composite material.
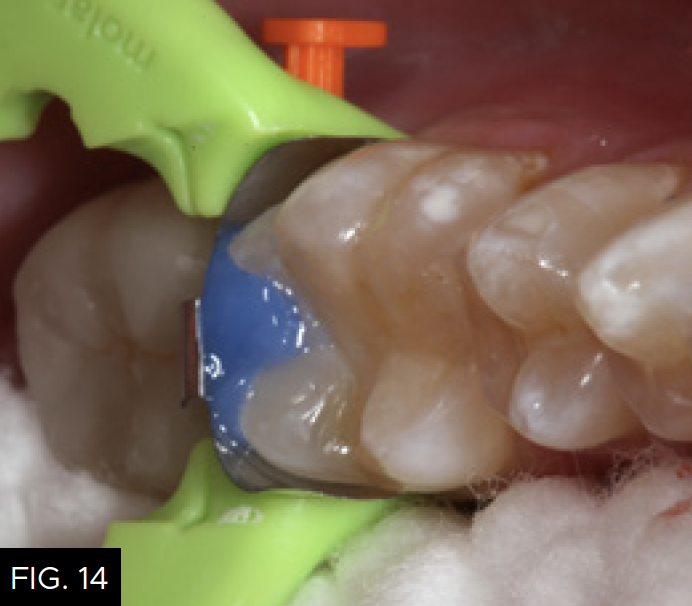
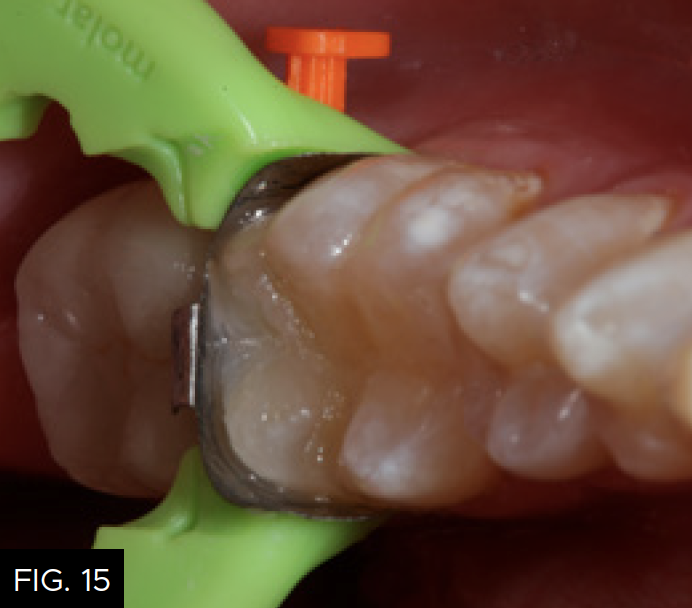
After a five-second etch of the restorative margins with 37% phosphoric acid, a surface sealant (Seal-N-Shine, Pulpdent) is placed with a microbrush, air thinned, and light-cured for 20 seconds. Surface sealants help to seal any microscopic marginal imperfections that may remain after the finishing and polishing process. The same restorative steps are performed for tooth number 19 (36). (FIG. 14 and 15)
The etching process is completed
on tooth number 19 (36).
A view down the central groove of tooth number 19 (36) is shown after placement of the composite material in the proximal box portion of the cavity preparation. Note that the marginal ridge has a definite facial and lingual component separated by a secondary groove that emanates from the distal pit of the tooth.
FIG. 16 shows an occlusal view of the completed Class II composite restorations. Notice the beautiful chameleon effect that is achieved using one shade of composite (Evanesce, Clinician’s Choice) and how well the restorative material blends with the adjacent tooth structure.6,7
CONCLUSION
A technique has been described utilizing a sectional matrix system and associated armamentarium (DualForce, Clinician’s Choice) and a nanoenhanced universal composite (Evanesce, Clinician’s Choice) to create anatomically precise Class II posterior composite restorations. The interproximal surface has also been recreated with natural anatomic contour and has a predictable, elliptical contact with the adjacent tooth. With proper occlusal and proximal form, this “invisible” direct composite restoration will service the patient for many years to come8.
REFERENCES
-
Christensen GJ, Remaining Challenges with Class II Resin-Based Composite Restorations, JADA, 2007 Nov;138(11):1487-9.
-
Boer WM, Simple Guidelines for Aesthetic Success With Composite Resin – Part 2: Posterior Restorations, Practical Procedures in Aesthetic Dentistry, 2007 May;19 (4): 243-7.
-
Shuman I, Excellence in Class II Direct Composite Restorations, Dent Today, 2007 Apr;26(4): 102, 104-5.
-
Brackett MG, Contreras S, Contreras R, Brackett WW, Restoration Of Proximal Contact In Direct Class II Composites, Oper Dent, 2006 Jan-Feb; 31(1): 155-6.
-
Pashley DH, Tay FR, Imazato S, How To Increase The Durability of Resin-Dentin Bonds, Compend Contin Educ Dent. 2011 Sep;32(7):60-4, 66.
-
Lopes GC, Vieira LC, Araujo E, Direct Composite Resin Restorations: A Review of Some Clinical Procedures To Achieve Predictable Results In Posterior Teeth, J Esthet Restor Dent, 2004; 16 (1): 19-31.
-
Lowe RA, Recreating Nature Using Today’s Composite Materials, Restorative Quarterly – A Supplement to the Compendium, Volume 3, Number 1, June 2000, pp. 3-10.
-
Lowe RA, Morphologic and Esthetic Precision In The Placement Of Class II Direct Composites, Contemporary Esthetics And Restorative Practice, Volume 8, Number 5, May 2004, pp.28-30.

ABOUT THE AUTHOR
Dr. Robert A. Lowe received his DDS degree, magna cum laude, Loyola University in 1982, has maintained a full time practice for almost 40 years, and is a world recognized teacher and clinician. He taught for 10 years at Loyola University School of Dentistry and has received Fellowships in the AGD, ICD, ADI, and ACD. In 2004, Dr. Lowe received the Gordon Christensen Outstanding Lecturer Award and in 2005 received Diplomate status on the American Board of Aesthetic Dentistry. In January of 2021, Dr. Lowe joined the faculty at MUSC James B. Edwards College of Dental Medicine in the department of Oral Rehabilitation, Charleston, SC. In addition to continuing to practice part time in Charlotte, NC and teach at MUSC, Dr. Lowe continues to provide continuing education seminars, author scientific articles, and consult with dental manufacturing companies in product development and clinical testing.
Share This Article! Choose Your Platform
Products Mentioned in this article


Related Articles
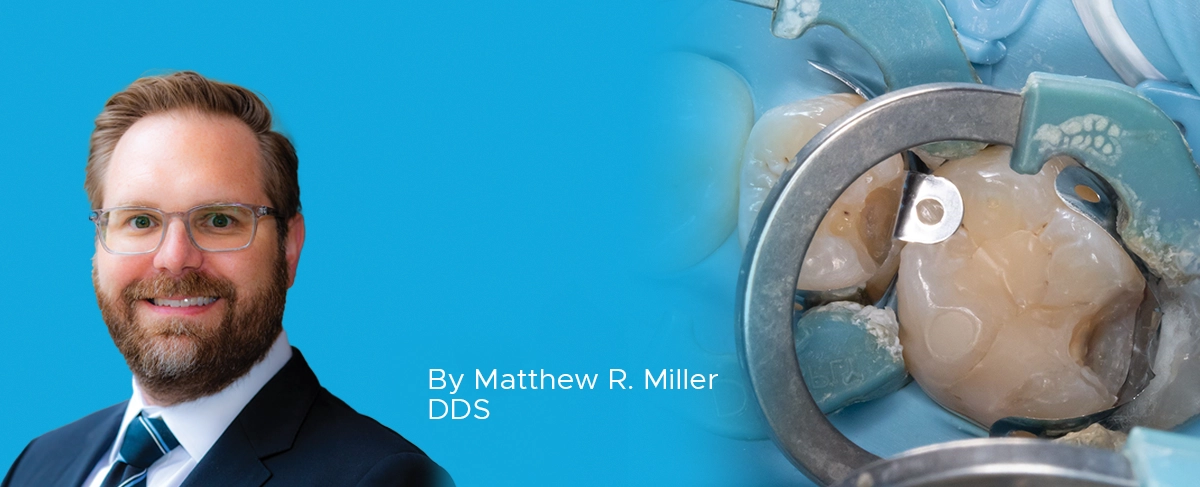
Ask the Expert: An Interview with Matthew R. Miller, DDS on Sectional Matrix Systems
By Matthew R. Miller, DDS
There are many sectional matrix systems on the market today. Are some better than others? What should I be looking for when choosing a sectional matrix system?

Simple, Beautiful, and Predictable Class V Restorations
By Marc Geissberger, DDS, MA, BS, CPT
In general, people are retaining their teeth much longer than decades past. With this increase of tooth retention, the need to maintain and protect teeth has never been greater. Non-carious Class V lesions have become commonplace.
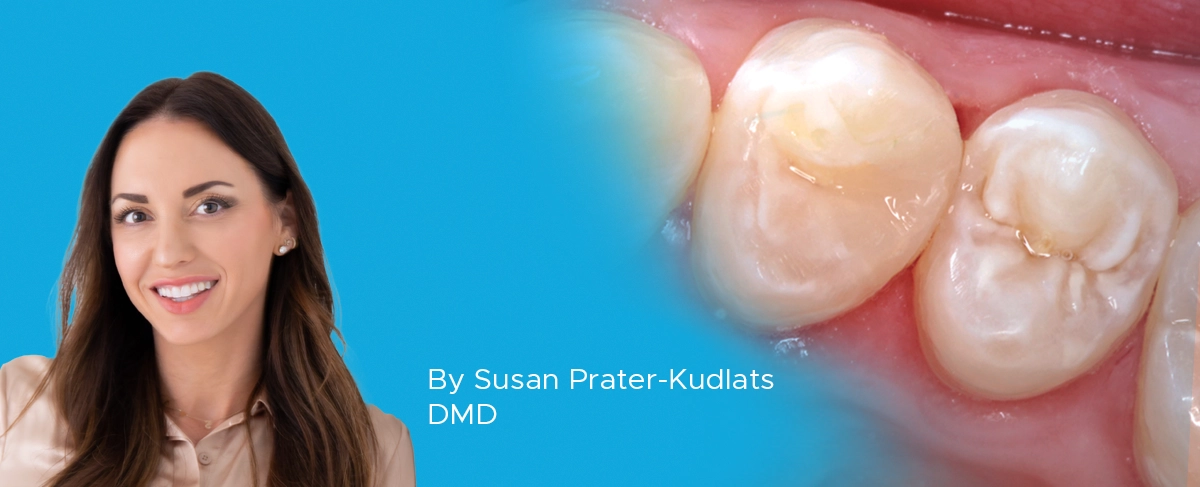
Achieving Clinical Success Utilizing the DualForce™ Sectional Matrix System
By Susan Prater-Kudlats, DMD
Although Class II restorations are routine amongst restorative dentists, they still present challenges when it comes to proper contour isolation, and marginal seal. Failure to achieve adequate contour can lead to food packing, gingival inflammation, and bone loss over time. The inability to ensure isolation can result in post-operative sensitivity; the marginal seal is essential to prevent recurrent decay.
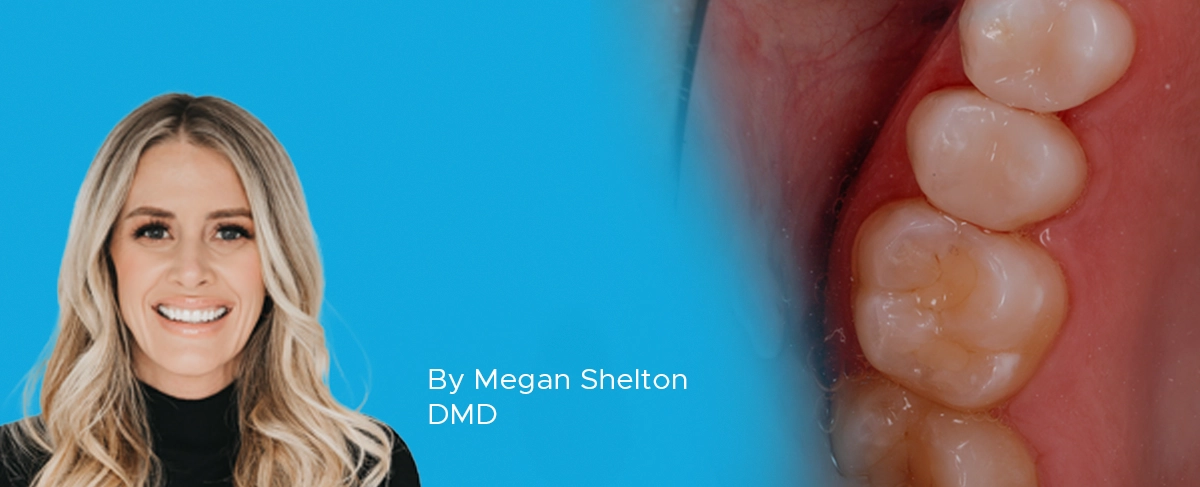
The Back-to-Back Class II Composite: A Predictable Workflow for One of the Most Common Clinical Procedures
By Megan Shelton, DMD
While it may be one of the most common procedures in most restorative dental offices, the efficient placement of multiple Class II composites in a single quadrant can be technically demanding. Creating strong and natural proximal contours and contacts with the restoration of even a single Class II composite restoration can pose a challenge using traditional matrix systems.
Take 5: 5 Restorative Clinicians’ Take on DualForce™ Sectional Matrix System
5 Restorative Clinicians' Take On DualForce Sectional Matrix System.
Using Affinity Crystal and Evanesce Flow in an Injection Molding Technique
By Susan Prater-Kudlats, DMD
The injection molding technique is gaining popularity for dental clinicians due to its wide array of procedural applications. This technique involves injecting a low viscosity resin composite through a transparent silicone index made from a diagnostic wax-up, aiming to replicate the mock-up.