
Creating Natural Restorations for Pediatric Trauma Teeth
By Tiffani Dunn, DMD, AAACD
Developing a systematic approach and mastering the techniques for anterior composite restorations can be a gamechanger for the real-world clinician. There are many different and correct approaches to have a predictable outcome. This article aims to share valuable techniques learned from exceptional clinicians by providing a step-by-step recipe to help you craft a personalized approach.
Brody, our youngest patient, is a bright and energetic ten-year-old who recently suffered a traumatic dental injury. While playing at Kona’s local pier in Hawaii, Brody tripped and fractured both his #8 and #9 teeth. (FIG. 1) Brody was referred to the endodontist for treatment of his #8, while #9 was restored with composite by his pediatric dentist. Brody’s mother, who I had replaced a composite veneer previously, expressed her desire for a more cosmetic approach to restore Brody’s endodontically treated #8. She wanted not only to address the functional needs of the tooth but also to enhance its esthetics for a more natural and pleasing result.

Ten-year-old patient, Brody, suffered a traumatic dental injury, fracturing both his #8 and #9 teeth.
STEP 1: PRE-RESTORATION PLANNING AND WAX-UP
Before initiating the restorative process, a full arch impression was taken using Affinity™ Heavy Body impression material (Clinician’s Choice®) and then poured up in white stone for a wax-up. It is crucial to understand the patient’s, and in this case, the parents’ expectations when designing the wax-up, as this sets the foundation for the final restoration. Once the wax-up was completed, a lingual matrix was fabricated using Template® Ultra Quick Matrix Material (Clinician’s Choice) which accurately replicates the lingual morphology including the incisal edges, gingival and incisal embrasures, and lingual anatomy.
STEP 2: PHOTOGRAPHY FOR SHADE SELECTION
Accurate shade selection is vital for achieving natural-looking restorations, and photography plays a crucial role in this process. To avoid dehydration of the teeth and ensure accurate shade matching, it is recommended to take three different photographs within the first few minutes of the procedure 1. A useful resource for mastering dental photography is the Collidescope course by imP.R.E.S. (https://imprescourses.com/).
Small, circular, flattened sphere(s) of the composite resin shades to be used were cured without adhesive onto the facial aspect of the tooth to be restored. Once shade selection was acceptable to the naked eye, three photographs were taken.
The first photograph should be a standard image of the tooth with the cured composite resin shades in place. The second photograph is taken using a polarized lens to eliminate glare, allowing you to capture true tooth color and both surface and deeper characterizations. (FIG. 2) The third image should be in monochrome (black and white) to aid in selecting the correct value of the resin, as this allows the clinician to see contrasts and identify the optimal shade for the restoration.

Three small, flattened spheres of composite resin shades were cured without adhesive for shade selection. This photo was taken using a polarized lens to eliminate glare, capturing true tooth color and both surface and deeper characterizations.
STEP 3: ISOLATION AND TOOTH PREPARATION
Proper isolation is key to achieving long-lasting, esthetic restorations. In this case, rubber dam isolation was established using True™ Dental Dam (Clinician’s Choice). (FIG. 3) The fracture line was prepared using a two-angled bevel technique, incorporating a starburst effect across the facial surface. This approach ensures more surface area for increased bond strength and retention, and an esthetic finish.
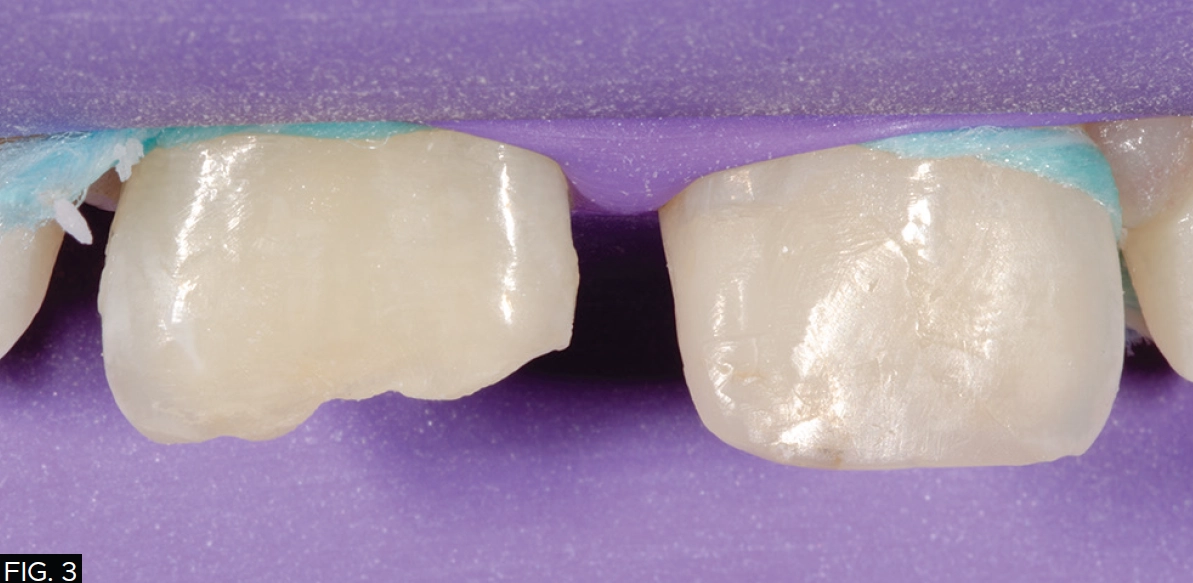
Using True Dental Dam (Clinician’s Choice), proper isolation is achieved.
Next, air abrasion with 50-micron aluminum oxide particles was used, followed by 15 seconds of phosphoric acid etching, rinsing, and drying. (FIG. 4) MPa Universal™ Light-Cure Adhesive (Clinician’s Choice) was applied, thinned with air to evaporate the solvent, and light-cured for 20 seconds.
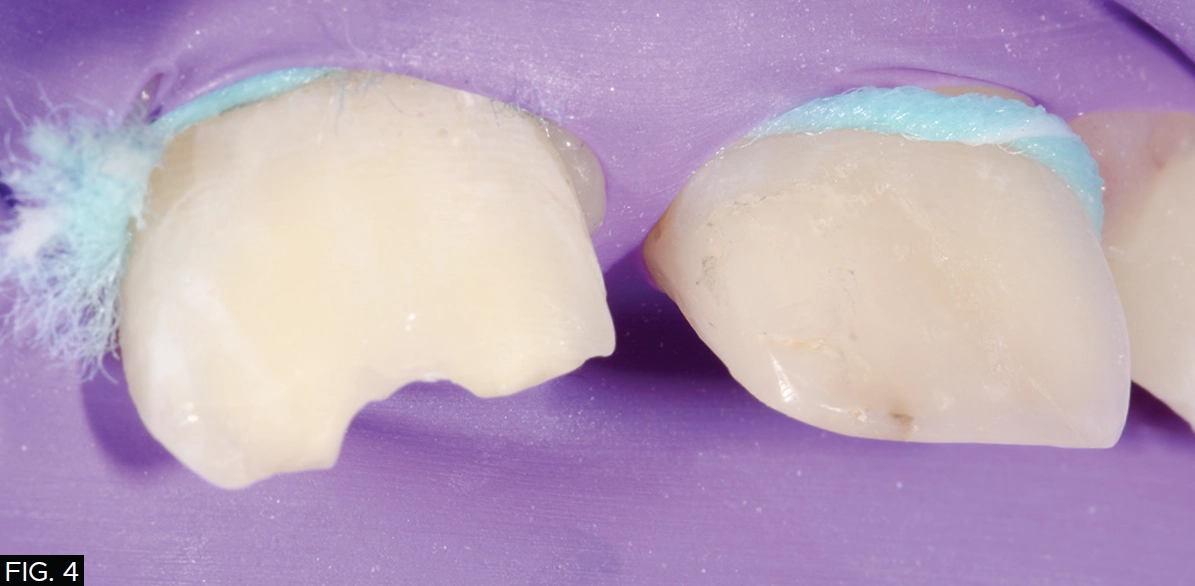
Air abrasion with 50-micron aluminum oxide particles was used, followed by 15 seconds of phosphoric acid etching, rinsing, and drying.
STEP 4: RESTORATIVE TECHNIQUE
The lingual matrix made from the wax-up model in Step 1 will allow a foundation for the layering technique. Using an explorer, the matrix was scored to define where the thin lingual layer of composite should be placed and to prevent overfilling with the composite resin. (FIG. 5) The CompoJect™ composite gun (Clinician’s Choice) was chosen for easy loading and unloading of composite compules.
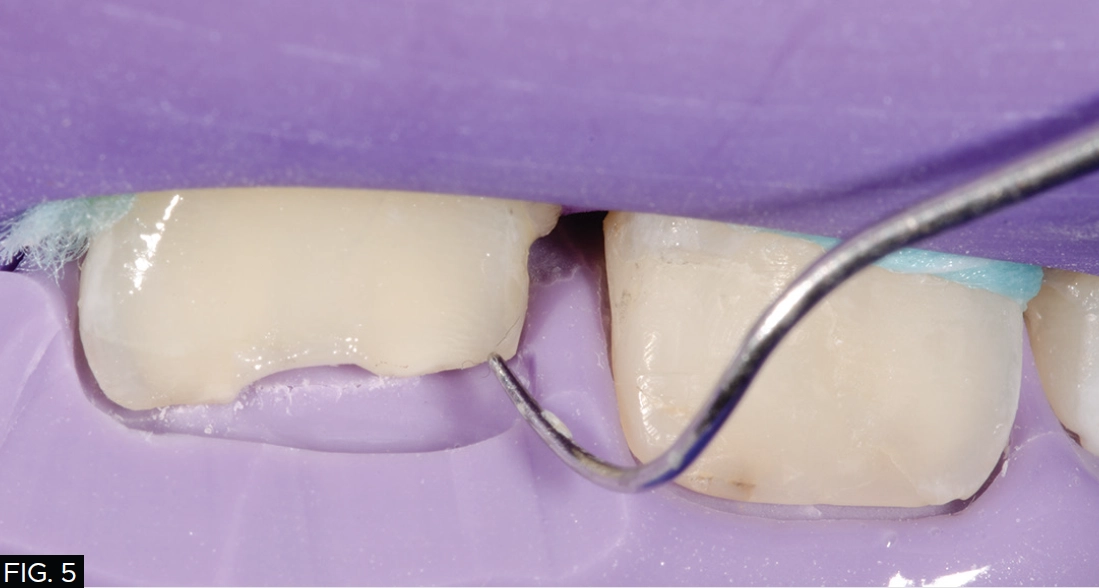
Using an explorer, the Template matrix was scored to define where the thin lingual layer of composite should be placed.
A thin layer of Evanesce® FX Clear nano-hybrid composite (Clinician’s Choice) was chosen for the lingual shelf due to its achromatic property which creates a natural translucent incisal halo effect. The resin was placed into the matrix, and a thin lingual shelf was formed using an Esthetic Contouring Instrument (Clinician’s Choice). The IPC instrument (Cosmedent®, Inc.) was then used to ensure a seamless transition from composite to the tooth, with excess composite cleaned away before curing. The lingual matrix was then gently removed and the composite resin cured again. (FIG. 6)
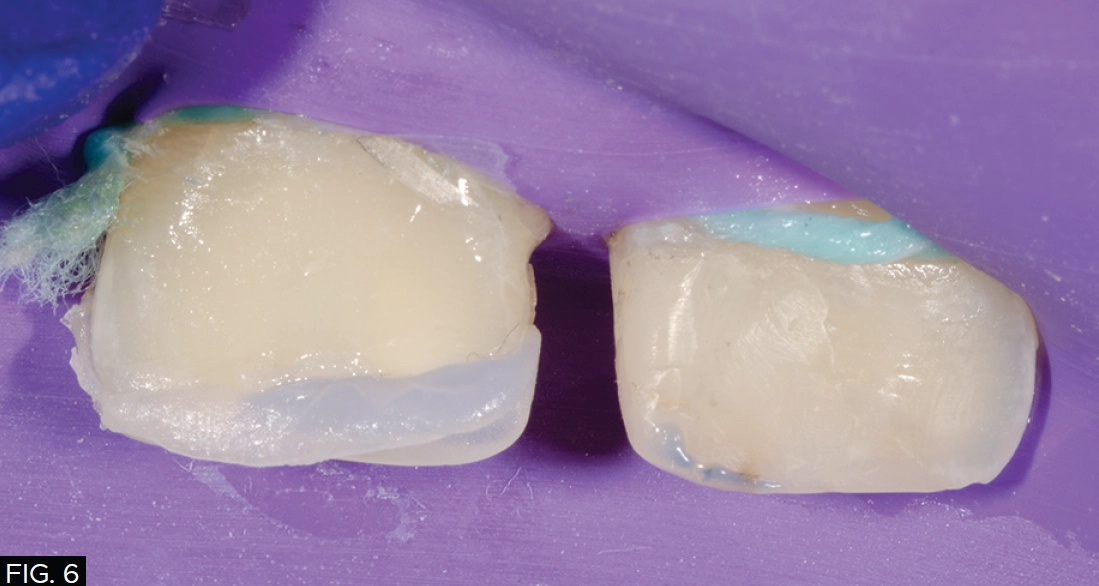
A thin lingual shelf was formed, and any excess composite has been cleaned away before curing. The lingual matrix is then gently removed, and the composite resin is cured again.
A layer of Evanesce A2 Dentin was then placed over the leading edge of the bevel and thinned toward the beginning of the starburst bevel but not over it. (FIG. 7) This layer was sculpted using the OptraSculpt® and OptraSculpt® Pad (Ivoclar) instrument for optimal shaping. Evanesce dentin shades are more chromatic and less transparent and will mask the beveled tooth structure for a seamless transition. The dentin layer was cured for 20 seconds. For the final layer of composite, Evanesce A2 Enamel was selected and applied as a thin layer over the entire surface and tack cured. Liquid Strip (Ivoclar), a glycerin gel, was applied over the restoration to inhibit the oxygen-inhibited layer from forming thus ensuring a smooth finish and reducing the need for further polishing. The glycerin was then rinsed off and the restoration is now ready for finishing and polishing.
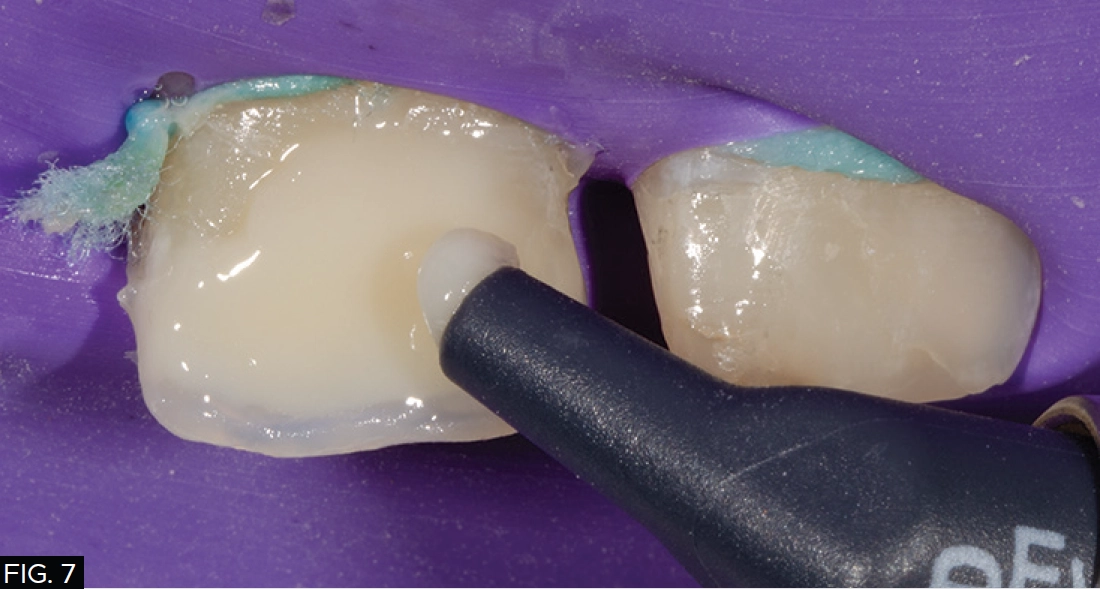
A layer of Evanesce A2D (Clinician’s Choice) was placed and thinned, then sculpted for optimal shaping.
STEP 5: SHAPING
Shaping a composite restoration requires a systematic approach to ensure anatomical accuracy and esthetic appeal. As emphasized by Dr. Bob Margeas and Dr. Marcos Vargas, the process begins by defining the incisofacial and incisolingual line angles, which serve as critical reference points for the contour of the restoration 2. A coarse Contours™ Finishing & Polishing Disc (Clinician’s Choice) was used to carefully establish these angles ensuring proper transitions between the incisal edge and the facial/lingual surface.
Next, attention should be paid to refining the facial line angles, ensuring they flow naturally and maintain the appropriate convexity or concavity based on the tooth’s anatomy. A mechanical pencil is used to mark the mesial and distal line angles, and the adjacent tooth is used as a reference. (FIG. 8) The line angles can be moved to make the restoration appear wider or narrower as required by adjusting the facial surface with a coarse Contours Finishing & Polishing Disc. Throughout the shaping process, it’s essential to preserve the three distinct planes of the tooth: the incisal third, the body (middle) third, and the gingival third. By maintaining these planes, you ensure the composite mimics the natural form and function of the tooth, avoiding over-contouring or under-contouring in any area. Focusing on these details results in a restoration that is both esthetically pleasing and functionally sound.
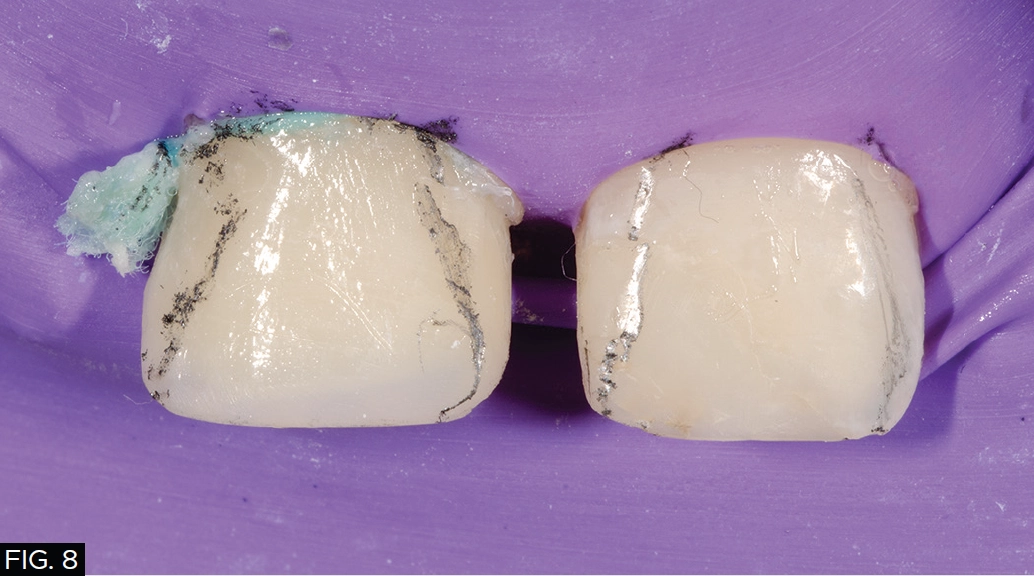
A mechanical pencil is used to mark the mesial and distal line angles, using the adjacent tooth as reference.
STEP 6: POLISHING
The shaping stages are now complete, and the restoration is ready for polishing. A.S.A.P.® All Surface Access Polishers, a 2-step diamond polishing system (Clinician’s Choice), includes two polishers that have sequentially decreasing grit particle size and were used to provide high luster and gloss. The purple pre-polisher was used first followed by the peach final high shine polisher. The final step of polishing was performed using the Final Shine Cotton Polishing Wheel (Clinician’s Choice) with Enamalize™ (Cosmedent, Inc.), an aluminum oxide polishing paste, for ultimate shine. (FIG. 9)

The final step in the polishing stages is performed using the Final Shine Cotton Wheel (Clinician’s Choice) and an aluminum oxide polishing paste for the ultimate shine.
CONCLUSION
Restoring pediatric trauma teeth with natural-looking composite resin requires a thoughtful, personalized approach that balances both functional and esthetic outcomes. By following a systematic process from pre-restoration planning and photography for shade selection to meticulous shaping and polishing, clinicians can achieve results that meet the expectations of both the patient and their caregivers. For this young patient, we have restored his smile and confidence with a durable and esthetically pleasing solution. (FIG. 10)
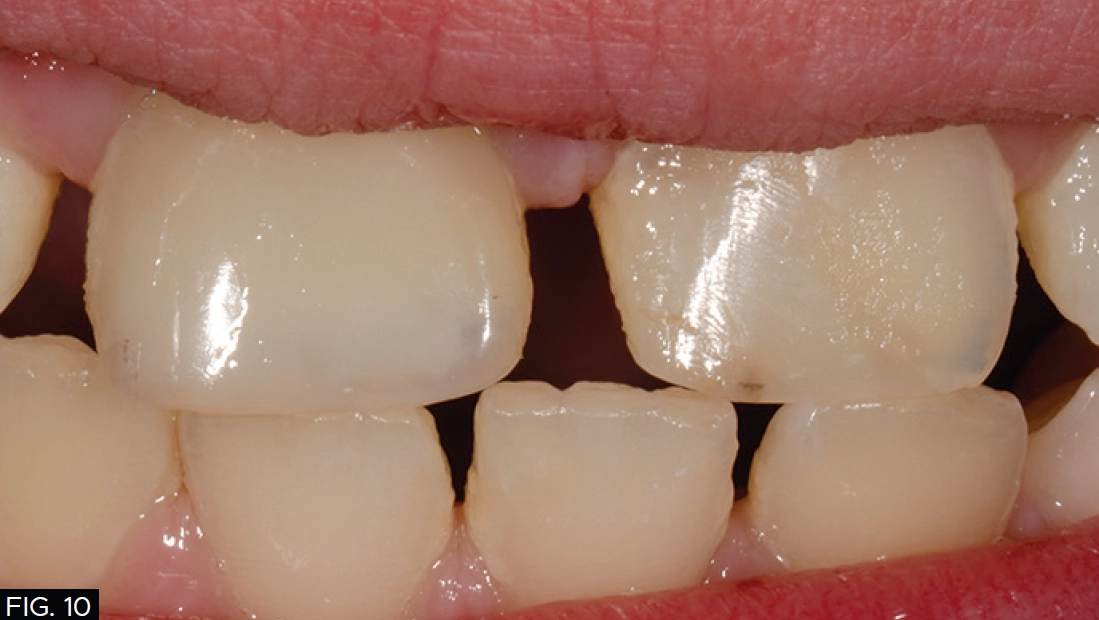
The final restored tooth #8 after following a systematic process.
REFERENCES
1. Notarantonio AE, McClintock D. The Effect of Isolation and Dehydration on Shade Matching. Compendium of Continuing Education in Dentistry (Jamesburg, N.J. : 1995). 2022 May;43(5):E9-eE12. PMID: 35523317.
2. Vargas MA, Margeas R. A systematic approach to contouring and polishing anterior resin composite restorations: A checklist manifesto. J Esthet Restor Dent. 2021 Jan;33(1):20-26. doi: 10.1111/jerd.12698. Epub 2020 Dec 25. PMID: 33368992.

ABOUT THE AUTHOR
Dr. Dunn graduated from the Medical College of Georgia in 2009 and lives in Kona, HI. She is a Kois Graduate, AACD accredited, and a Dental Advisor Ambassador. She has been published in the Journal of Cosmetic Dentistry, is involved with Magne Education, and is a regular participant in the Seattle Study Club. Dr. Dunn has been honored as Honolulu’s Best Dentist and Top Dentist consecutively since 2014.
Share This Article! Choose Your Platform
Products Mentioned in this article


Related Articles
An Ultra-conservative Path Leads to Unparalleled Patient Satisfaction
By Ellen Katz, DDS
There is a feeling of immense satisfaction when you complete an esthetic case, and the patient cannot stop smiling because you have delivered exactly what they had envisioned. It can be challenging for a patient to communicate what it is that they do not like about their smile, leaving the possibility that the clinician does not completely understand what procedure to perform. It takes active listening, restating, rephrasing, and follow-up questioning to clarify what vague description of dislike for their smile may be.

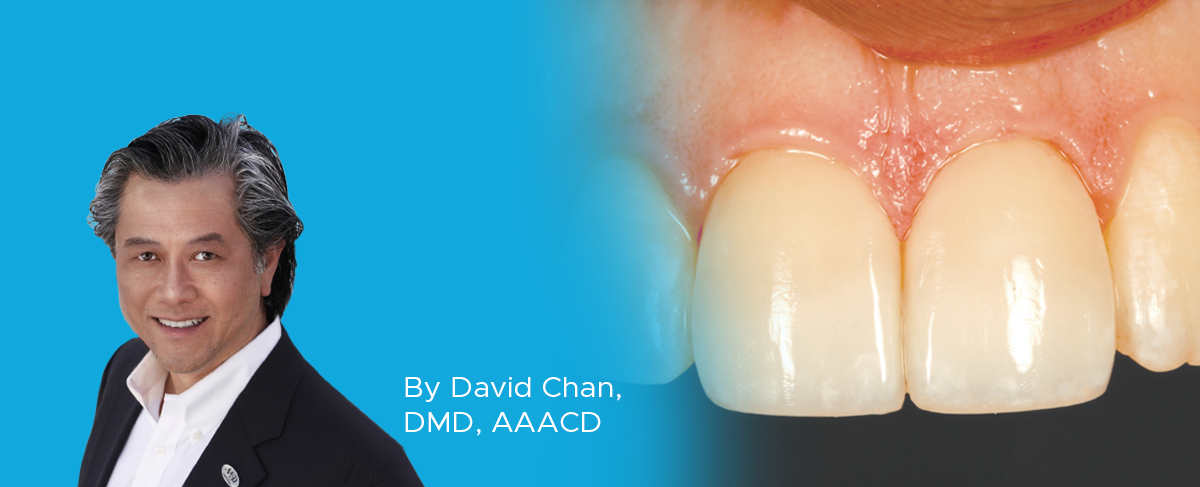
Creating Beautiful Anterior Composite Restorations
By David Chan, DMD, AAACD
I believe there are two important concepts that should be embraced when considering direct restorative materials for anterior restorations: 1. Composite restorations can be indistinguishable from natural dentition and 2. Composite materials aren’t an inferior option to porcelain.
Simple Anterior Composite Restorations
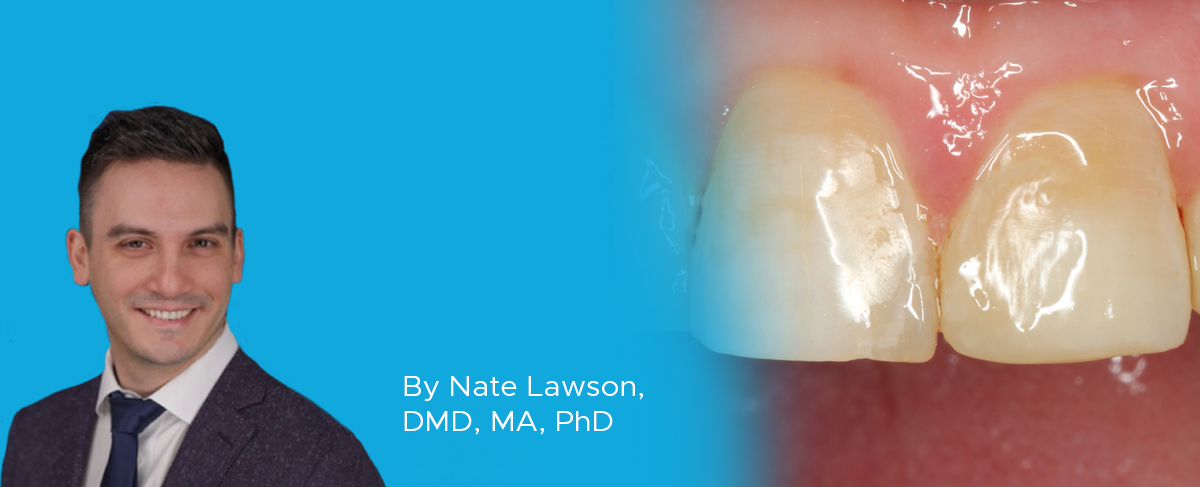
By Nate Lawson, DMD, MA, PhD
A patient presented to the University of Alabama, School of Dentistry with fractured composites on the mesial incisal edges of his left central and lateral incisors that had been placed 20 years previously.
Success and Predictable Results with Anterior Composites Every Single Time
By David Chan, DMD, AAACD
The ability to rehabilitate or enhance a smile using direct composite restorations in the esthetic zone can be considered the ultimate challenge for the cosmetic dentist.