
Success and Predictable Results with Anterior Composites Every Single Time
INTRODUCTION
The ability to rehabilitate or enhance a smile using direct composite restorations in the esthetic zone can be considered the ultimate challenge for the cosmetic dentist. Proper placement and management protocols of anterior composite restorations commands the clinician possess an exceptionally high level of understanding in both the science as well as the art of dentistry to make the restoration become undetectable. In addition, the use of anterior composite restorations is often the most conservative treatment of choice for the patient due to the minimal requirement of tooth structure reduction or modification. Clinicians today are given a myriad of features such as hues, opacities/translucencies, polishability and favorable physical properties in contemporary composites which provides the clinician with all the tools needed to truly emulate the beauty of natural tooth structure.
CASE PRESENTATION
A 21-year-old college student returning home for school break was referred to my office by his dentist. As a result of a skateboard accident from a few months ago, he traumatized both maxillary central incisors. The patient presented with approximately 30% of the incisal portions of both his maxillary central incisors missing which was replaced by two composite restorations that did not match the shade or shape of the remaining native teeth. (FIG. 1 and 2)
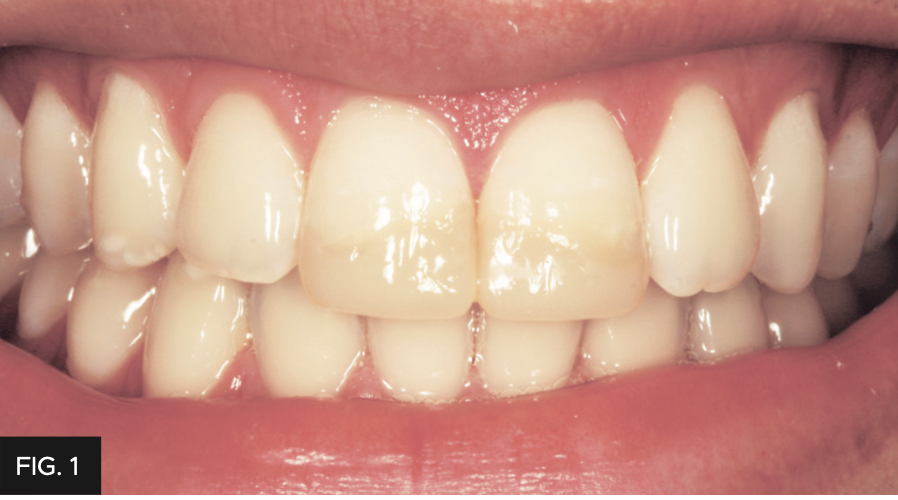
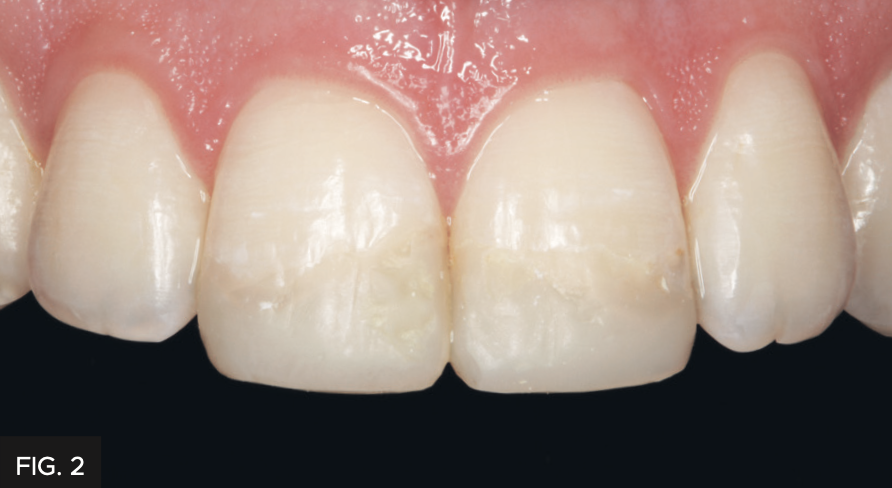
The importance of esthetics is paramount in this case and cannot be understated, due to the patient’s high lip dynamics whereby the success of any definitive restoration must include the ability to make it undetectable within the smile.
The patient’s chief complaint was to have whiter teeth and have the existing composite restorations in teeth #8, 9 replaced with restorations that match the rest of his dentition.)
TREATMENT
Due to the young age of the patient and the likelihood that the restorations would need to be replaced a few times in the patient’s lifetime, composite restorations were chosen due to a very predictable shade match and the conservative nature of such treatment.
The patient was going to be home for approximately 4 weeks before returning to college and thereby allowing sufficient time for planning the treatment to the desire of the patient. The patient also desired that the rest of his teeth be a little whiter in the final treatment and therefore allowed time for teeth whitening with Opalescence GO (Ultradent).
A set of study models were generated to be used for a diagnostic wax-up of both maxillary central incisors allowing for a predictable and precise placement of the incisal edges for the definitive restoration. In this case a palatal putty matrix was made of the diagnostic waxup precisely capturing the “incisal facial line angles” of teeth #8, 9 which were used later to establish the incisal edge thickness and lingual boundaries of the restorations. Another way to fabricate a lingual matrix is with Template (Clinician’s Choice) which offers a faster setting time, increased accuracy and can be directly applied from the impression gun.
BIOFILM REMOVAL AND SHADE SELECTION
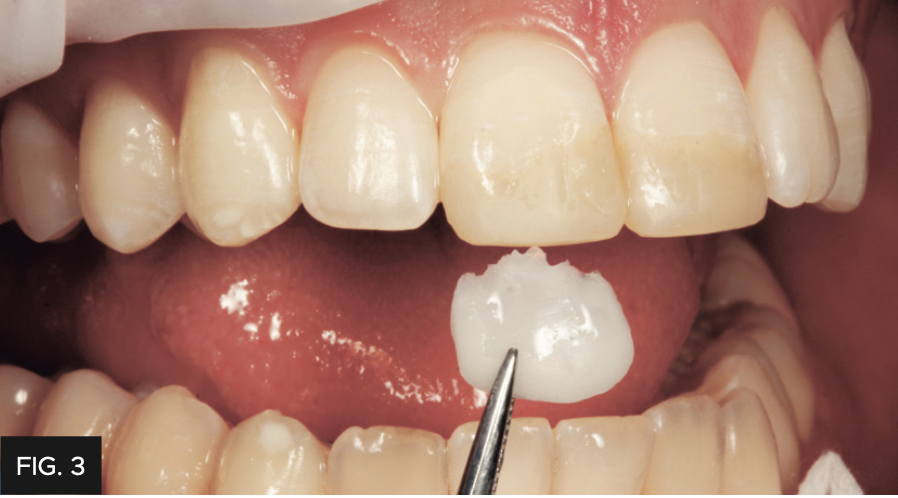
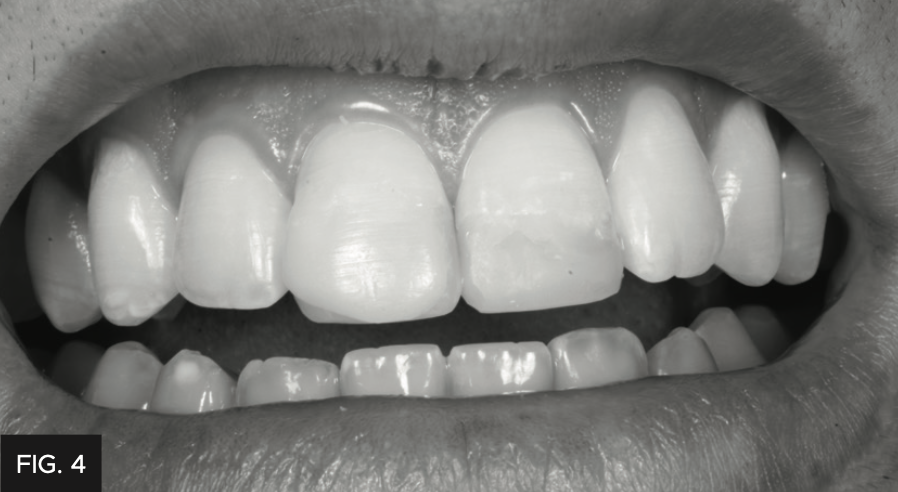
The patient returned for treatment 2 weeks after having his teeth whitened and was anesthetized. An OptraGate (Ivoclar) retraction device was placed followed by having both #8, 9 pumiced with a prophy cup and treated with rotating abrasive discs in order to remove any biofilm or aprismatic enamel from the teeth being treated. It was critical to maintain hydration of the natural teeth to ensure the accurate evaluation of the proper shade of composite to use in this case. A custom composite mockup was done over the hydrated teeth in order to determine the correct “composite shade recipe” along with black and white photos to determine the value. (FIG. 3 and 4)
The shade recipe was determined to be:
-
-
Evanesce Enamel White- 70% opacity (a non-vita translucent shade)
-
Evanesce Silk shade A1UX- 85% Universal opacity
-
Evanesce B1 Enamel- 80% opacity
-
These Evanesce composites were chosen for their ability to hide the fracture line along with their excellent handling, optical and esthetic properties. The Evanesce nano-hybrid restorative blends into natural tooth structure with ease and the two viscosity options allow me to restore virtually any dental situation that requires a direct composite solution.
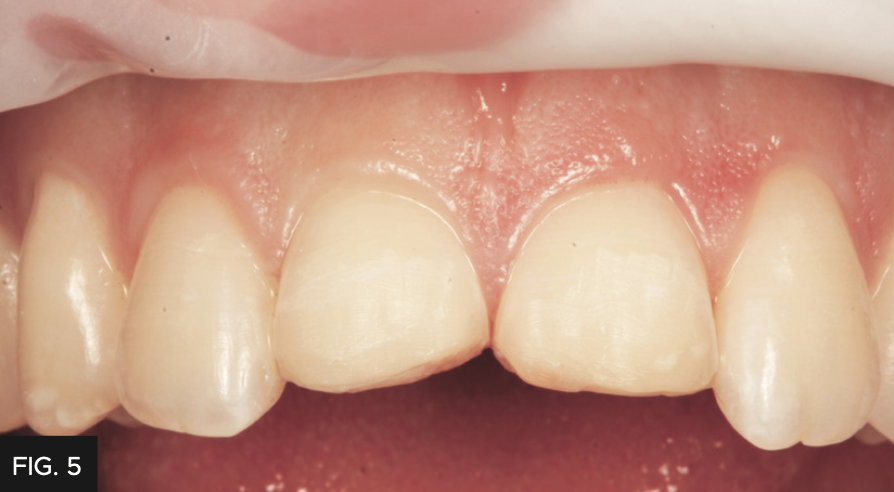
The existing composite restorations on teeth #8, 9 were completely removed. (FIG. 5)
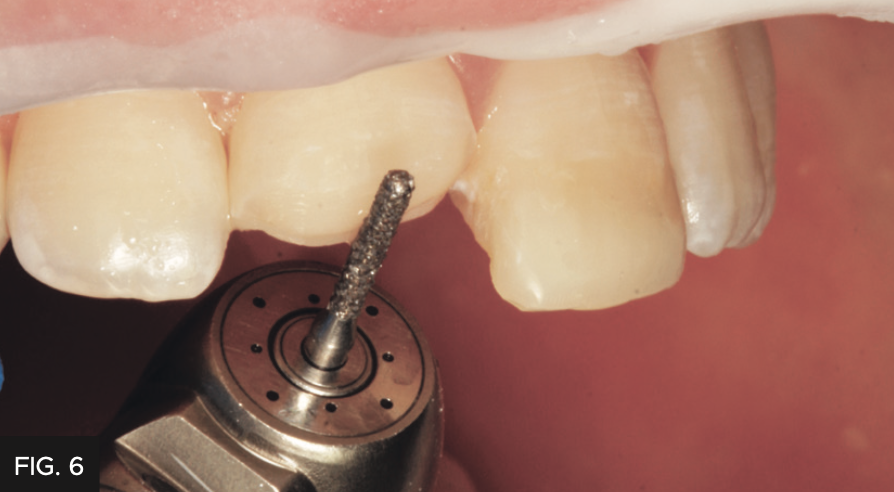
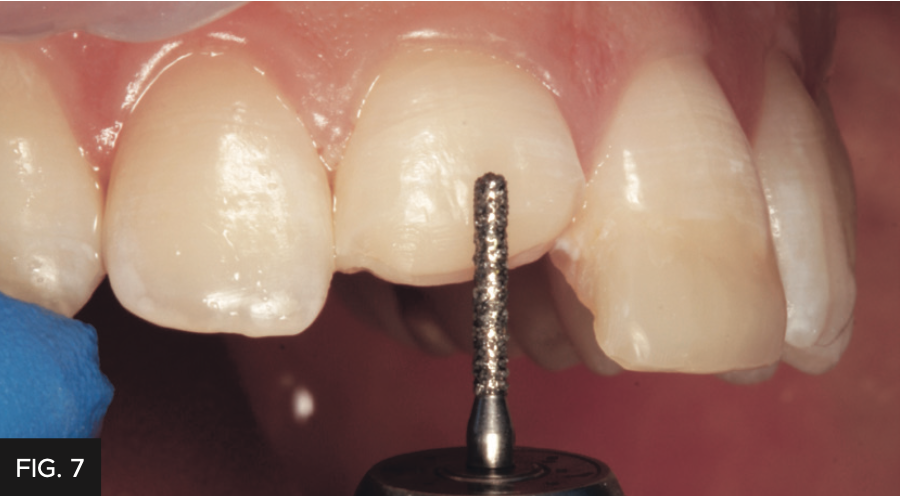
A 45 degree bevel (2-2.5 mm wide) was placed at the fracture and an infinity starburst bevel (5-6 mm wide) was placed. Often clinicians underestimate the length of bevel needed to fully hide a composite margin. (FIG. 6 and 7)
The teeth were then etched with Ultra-Etch (Ultradent), a 35% phosphoric acid for 15 seconds followed by application of a light cured bonding adhesive, MPa Max (Clinician’s Choice).
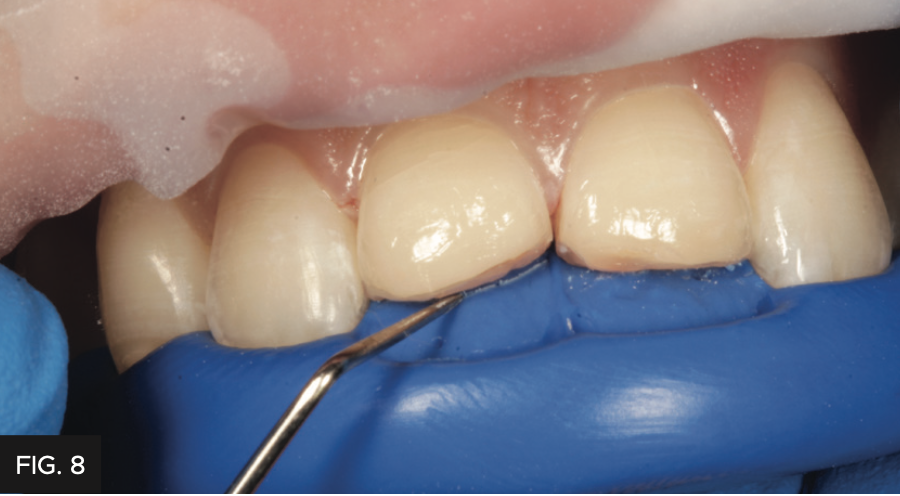
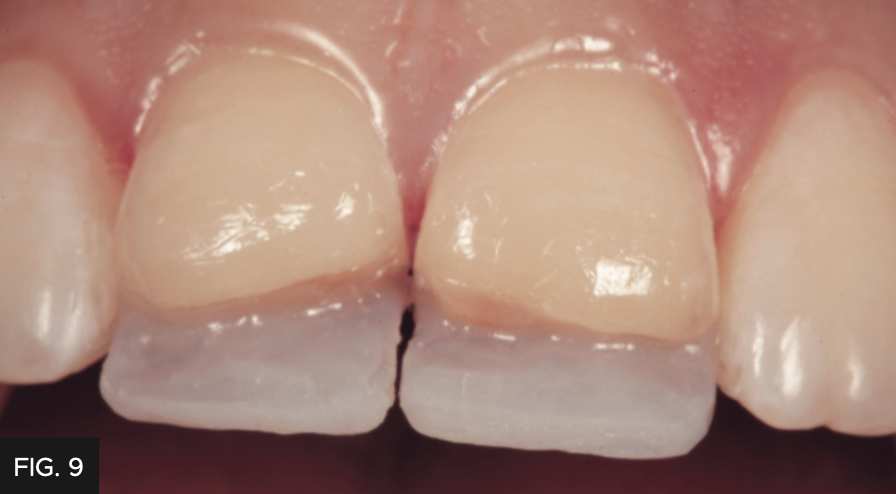
The lingual putty or Template matrix of the diagnostic wax-up was then placed over the prepared teeth and an explorer was used to gently score the matrix to aid in the placement location of the initial composite lingual shelf using Evanesce FX Enamel White composite. (FIG. 8) It’s important to limit the thickness of this initial lingual shelf to 0.5mm. If this layer is too thick you may not be able to place sufficient thicknesses of the subsequent dentin and enamel layers. This FX Enamel White layer was placed on both maxillary central incisors and was polymerized simultaneously. (FIG. 9)
Subsequently, a layer of Evanesce Silk shade A1UX composite was placed over #8, 9 to cover 1-2 mm over the thick 45 degree bevel up to the incisal edge making sure to avoid filling in the proximal areas. It is critical that this A1UX which serves as the internal dentin is placed 0.5 mm from the final facial contour of the restoration allowing room for 0.5 mm of enamel as the last layer. As mentioned earlier, Evanesce offers two viscosity options in the Universal (85%) opacity. Evanesce Silk exhibits a slightly lower viscosity compared to the signature Evanesce formula. Silk has excellent handling and can be manipulated easily without slumping and can be effectively used as a dentin replacement layer, as in this case or as a single layer for one shade restorations. Personal handling preference should dictate which formula is chosen. It is paramount that the composite material space left for the final enamel layer be no greater than 0.5 mm otherwise there will be a risk of the final restoration taking on a grey appearance by the value being lowered.
A small amount of white composite tint (Creative Color, Cosmedent) was placed along the incisal edges to simulate hypocalcification and light polymerized.
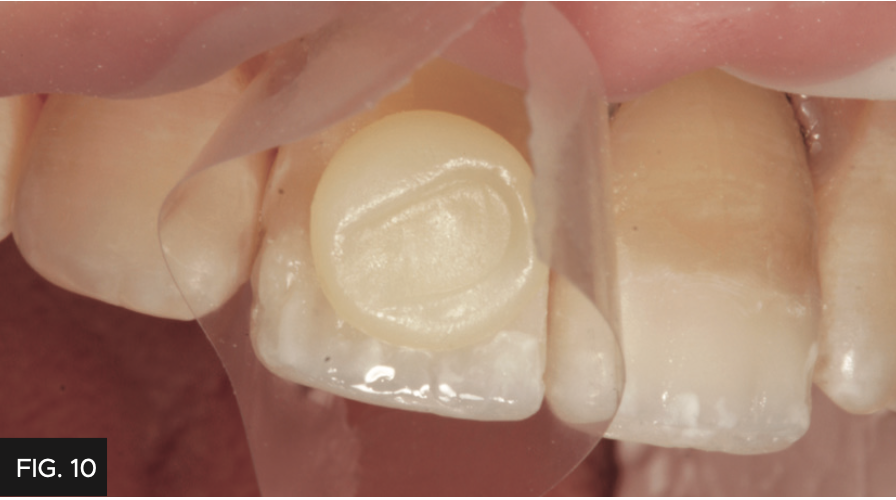
Mylar strips were then placed in the proximal contacts of both central incisors and utilizing the pull through technique to build the final enamel layer using Evanesce B1 Enamel. (FIG. 10) Although not depicted in these clinical images, the pull through technique is performed by placing composite on the facial interproximal space. I gently cover the facial composite with the Mylar strip then pull the Mylar toward the lingual surface which pulls the uncured composite interproximally to effectively close the interproximal space, followed by light polymerization. An Esthetic Contouring Gold Grip instrument (Clinician’s Choice) was then used to shape the final enamel layer and to develop the primary anatomy of the tooth. A #3 artists brush moistened with modeling resin (ResinBlend LV, Clinician’s Choice) was then used to smooth and finesse the final enamel layer before light polymerization.
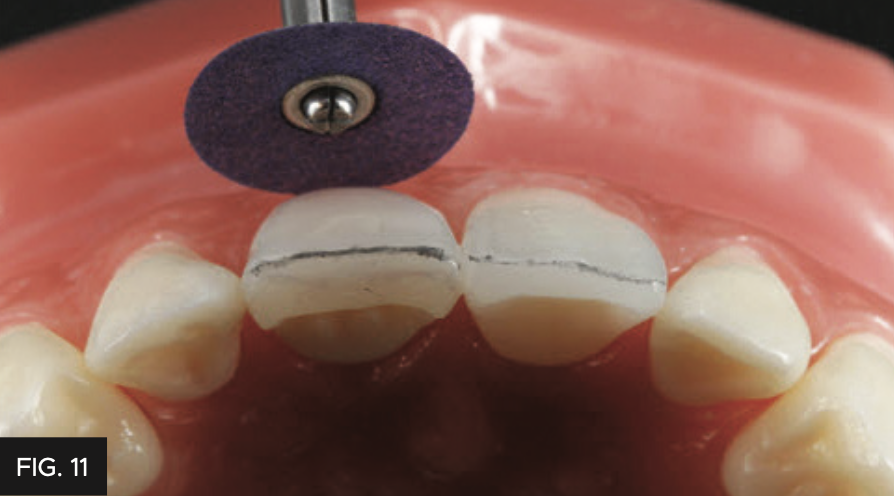
FINISHING PROTOCOL (Demonstrated on a typodont)
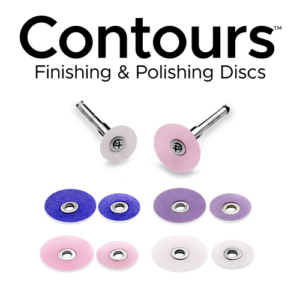
A simple and predictable workflow to finish composite after the application of the final composite layer is by using only abrasive discs to develop or refine the primary anatomy and proximal line angles. In this case, the coarse and medium Contour Finishing & Polishing Discs (Clinician’s Choice) were used. (FIG. 11)
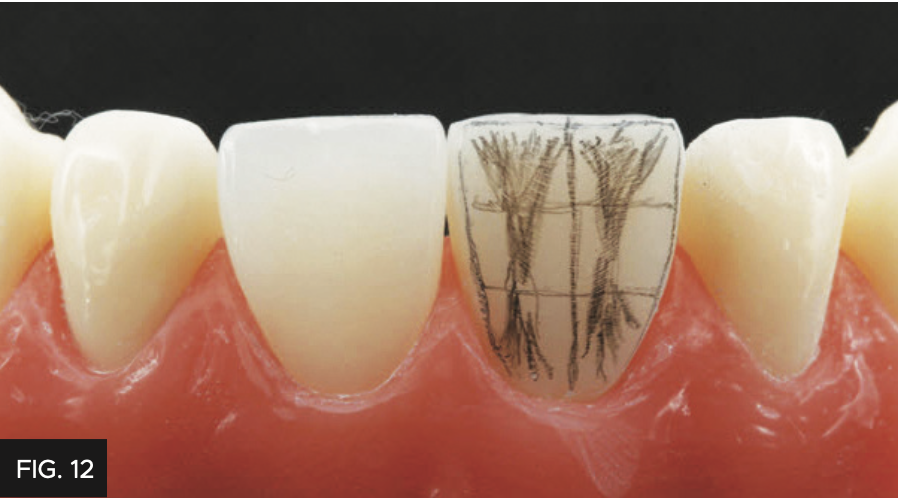
The depressions were drawn with a pencil to create the secondary anatomy as a guide. (FIG. 12)
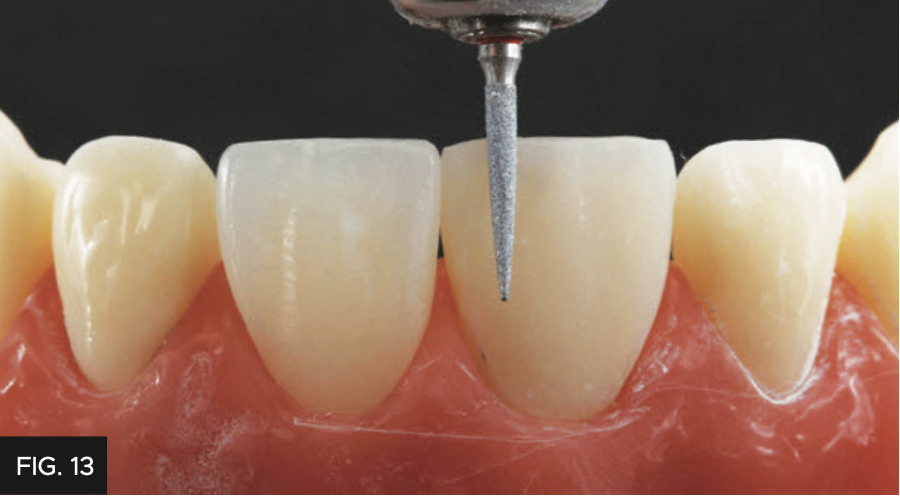
Once the primary tooth anatomy has been achieved, the secondary tooth anatomy was created using a fine grit flame shape diamond bur to place depressions on the incisal 1/3 of teeth #8, 9 using the pencil markings as a guide. (FIG. 13)
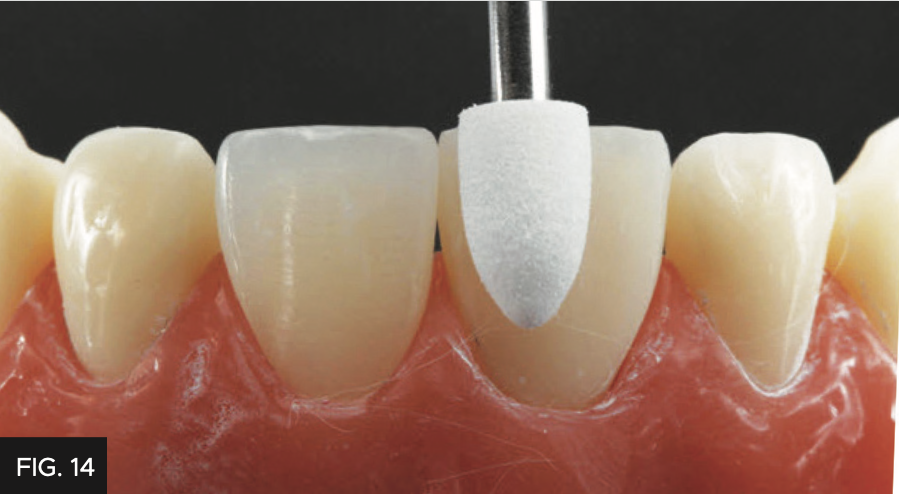
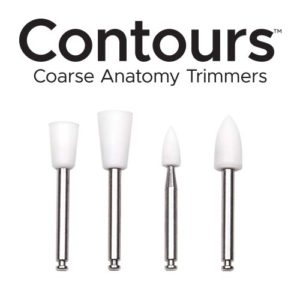
These depressions created with the diamond bur was made more subtle and naturally flowing using various shapes of the Contours Coarse Anatomy Trimmers (Clinician’s Choice) containing 90-micron aluminum oxide particles. (FIG. 14)
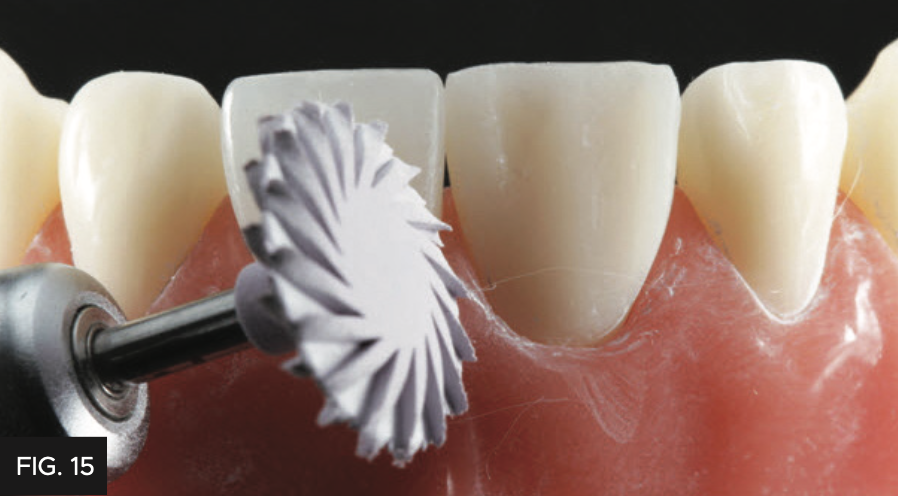
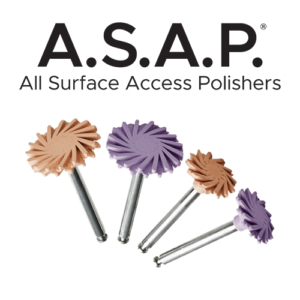
A set of diamond-impregnated A.S.A.P. Pre-polisher and Final High Shine Polisher (Clinician’s Choice) were used to further smooth the surface and to create a shiny polished appearance. A.S.A.P. Polishers are a fast and effective way to polish any composite restoration in about 30-60 seconds. The unique 2-layer spiral design is flexible allowing access to any restorative surface and without the risk of removing surface texture nor anatomy. (FIG. 15 and 16)

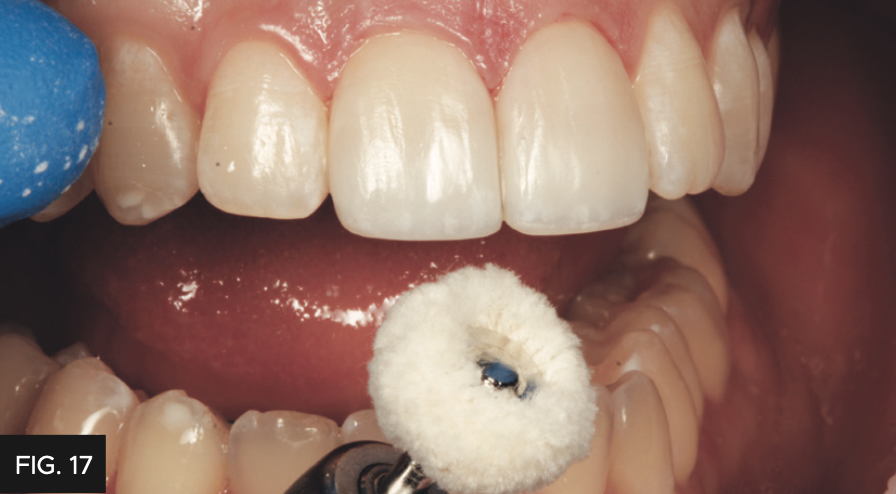
If a higher gloss is desired, I use an aluminum oxide paste, Enamelize (Cosmedent) applied with a Final Shine Cotton Polishing Wheel (Clinician’s Choice) at 25,000 RPM to give the final restoration a very lustrous finish that blends seamlessly with the rest of the patient’s dentition. (FIG. 17)

CONCLUSION
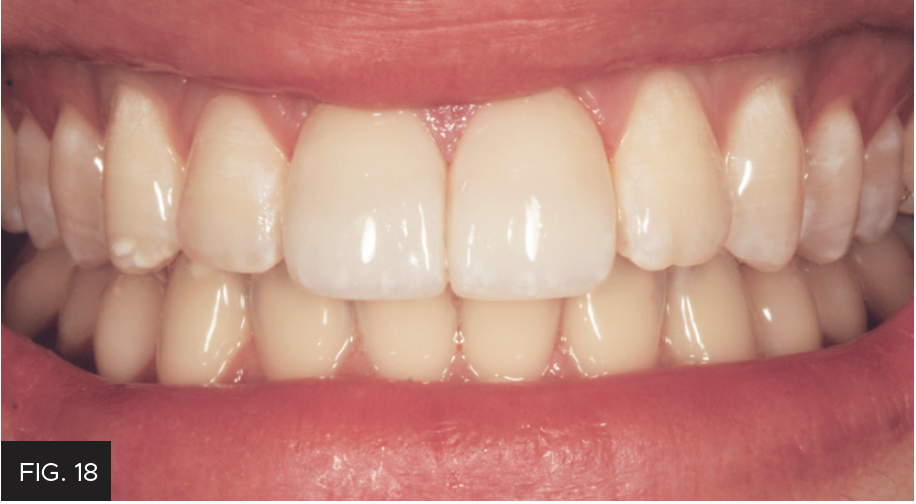
By adhering to concepts of using composites to control the shade/opacity and the workflow of how to shape/finish as seen in this case, the clinician can use the tools discussed to create anterior composite restorations that mimic the beauty of natural tooth structure predictably every single time! (FIG. 18 and 19)

ABOUT THE AUTHOR
David Chan earned his DMD degree in 1989 from Oregon Health Sciences University. He maintains a full-time practice focused on cosmetic and comprehensive dentistry located in Ridgefield, Washington. David currently serves as the President of the American Academy of Cosmetic Dentistry, as director at the Center for Dental Artistry and a Clinical Instructor at the Kois Center in Seattle, Washington. He is an Accredited member of the AACD and has been published widely in peer reviewed dental articles, including several articles in the prestigious “Journal of Cosmetic Dentistry.” In addition, David travels nationally/internationally giving lectures to dentists on comprehensive esthetic dental care and serves as a key opinion leader for many dental products companies.
Share This Article! Choose Your Platform
Products Mentioned in this article

Related Articles

Creating Natural Restorations for Pediatric Trauma Teeth
By Tiffani Dunn, DMD, AAACD
Developing a systematic approach and mastering the techniques for anterior composite restorations can be a gamechanger for the real-world clinician. There are many different and correct approaches to have a predictable outcome.
An Ultra-conservative Path Leads to Unparalleled Patient Satisfaction
By Ellen Katz, DDS
There is a feeling of immense satisfaction when you complete an esthetic case, and the patient cannot stop smiling because you have delivered exactly what they had envisioned. It can be challenging for a patient to communicate what it is that they do not like about their smile, leaving the possibility that the clinician does not completely understand what procedure to perform. It takes active listening, restating, rephrasing, and follow-up questioning to clarify what vague description of dislike for their smile may be.
Creating Beautiful Anterior Composite Restorations
By David Chan, DMD, AAACD
I believe there are two important concepts that should be embraced when considering direct restorative materials for anterior restorations: 1. Composite restorations can be indistinguishable from natural dentition and 2. Composite materials aren’t an inferior option to porcelain.
Take 5: 5 Restorative Clinicians’ Take On Evanesce Nano-Enhanced Universal Restorative
5 Restorative Clinicians' Take On Evanesce Nano-Enhanced Universal Restorative.
A Conservative Approach to Restoring the Worn Anterior Dentition
By Newton Fahl, DDS, MS
Long-term restorative treatment of the worn dentition can be a complex endeavour and possibly extend beyond the scope and experience of the general dentist. Additionally, restoration of this compromised dentition may require other health disciplines’ involvement to address any psycho-social factors that may limit the long-term success of the restorative treatment.
Celebrating 10 Years of Clinical Excellence with David Chan, DMD, AAACD
Dr. David Chan graduated from the Oregon Health Science University in 1989 and has dedicated his professional life to creating composite restorations as much as an artist as a clinician.