
An Ultra-conservative Path Leads to Unparalleled Patient Satisfaction
By Ellen Katz, DD
There is a feeling of immense satisfaction when you complete an esthetic case, and the patient cannot stop smiling because you have delivered exactly what they had envisioned. It can be challenging for a patient to communicate what it is that they do not like about their smile, leaving the possibility that the clinician does not completely understand what procedure to perform. It takes active listening, restating, rephrasing, and follow-up questioning to clarify what a vague description of dislike for their smile may be. A fast, shade-appropriate intraoral composite mock-up on a limited number of teeth can give the patient a glimpse of what is possible and confirm an understanding between patient and clinician. The following case shows how this technique helped a patient identify exactly what she did not like about her smile and convinced her that a conservative treatment plan would provide the esthetic result she sought.
An 18-year-old nursing student presented for a second opinion to see if she could further her current options for improving her smile. She stated that she did not like her smile but was unsure what precisely it was that she did not like. To aid her in the discussion, her sister accompanied her for the consultation. The first treatment plan discussed was to place porcelain veneers on several teeth. She responded that she was not eager to “cover” all her front teeth and sought a more conservative option.
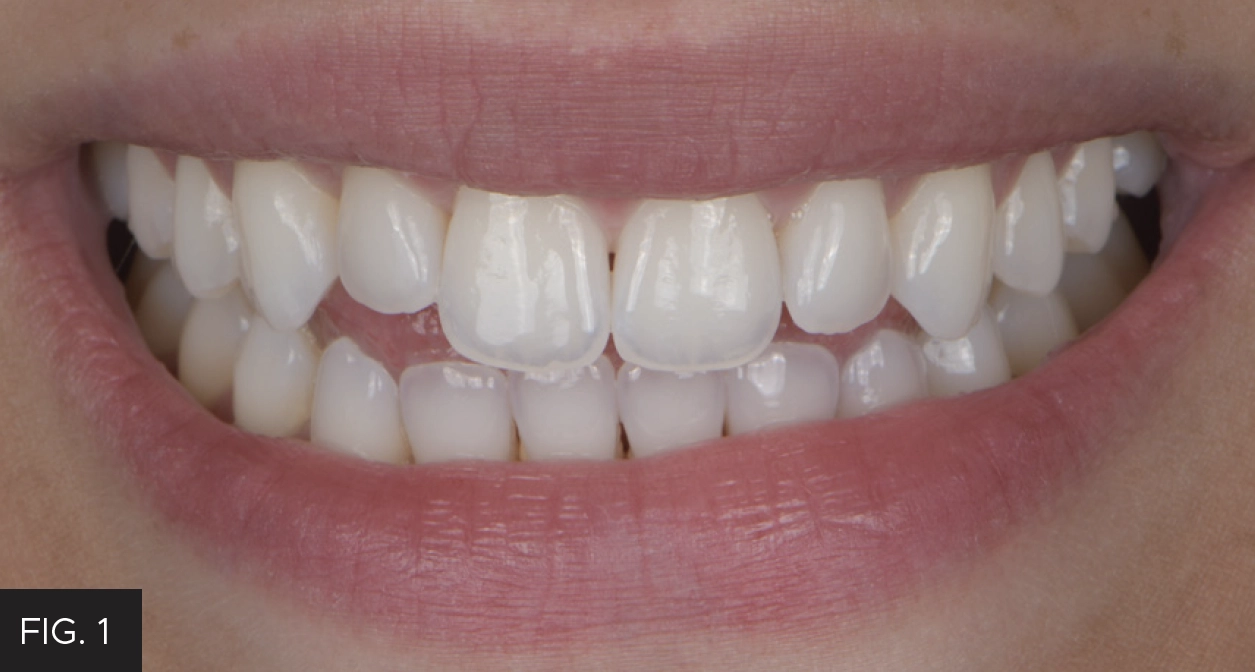
An 18-year-old patient presented seeking options to improve her smile. Using an intraoral mock-up, it was determined that lengthening the significantly shorter teeth (#7 and #10) using composite would dramatically enhance her smile without compromising her ideal, existing tooth structure.
This young patient had beautiful enamel structure on all her teeth. At her consultation, we discussed orthodontics to alleviate minor crowding on her lower teeth and to extrude her upper lateral incisors. The patient declined this route of treatment, wanting something more instantaneous. Teeth #7 and #10 were significantly shorter than the adjacent teeth. (FIG. 1) While she did not initially communicate this as the reason that she was unhappy with her smile, it became apparent that it was. At this point, she was asked for permission to mock-up her smile using composite, making this a completely reversible procedure. Teeth #7 and #10 were dried, and without using an adhesive a flowable composite was added (Evanesce™ Flow, Clinician’s Choice®) until the preferred length and shape was created for these teeth; followed by light-curing. While her sister looked on, the patient held the hand mirror to preview her new smile. She and her sister loved the look of the chairside mock-up, and the patient said, “How did you know what I really wanted”?
Before committing to treatment, the patient took the composite mock-ups home so she could show her parents. The composites had come off without damage and she could place them back on her teeth perfectly. When the patient called to schedule her treatment appointment, tooth whiteneing was discussed as an option before the bonding procedure. Tooth whitening is routinely advised ahead of any esthetic enhancements, but in this case, the patient declined.
Pre-treatment scans and photos were obtained. The use of Exocad software (Exocad) allowed for a digital wax-up with the desired shape and length of teeth #7 and #10. A 3D printed wax-up model was created and a lingual matrix was made from a fast-setting PVS matrix material (Template®, Clinician’s Choice) from the wax-up. (FIG. 2) The lingual matrix is essential for anterior cases involving the placement of multiple opacities of composite, which are necessary to replicate the translucency and vitality of the adjacent tooth structure. Even in simpler anterior cases, the lingual matrix establishes the optimal lingual contour and incisal edge location, saving finishing time.
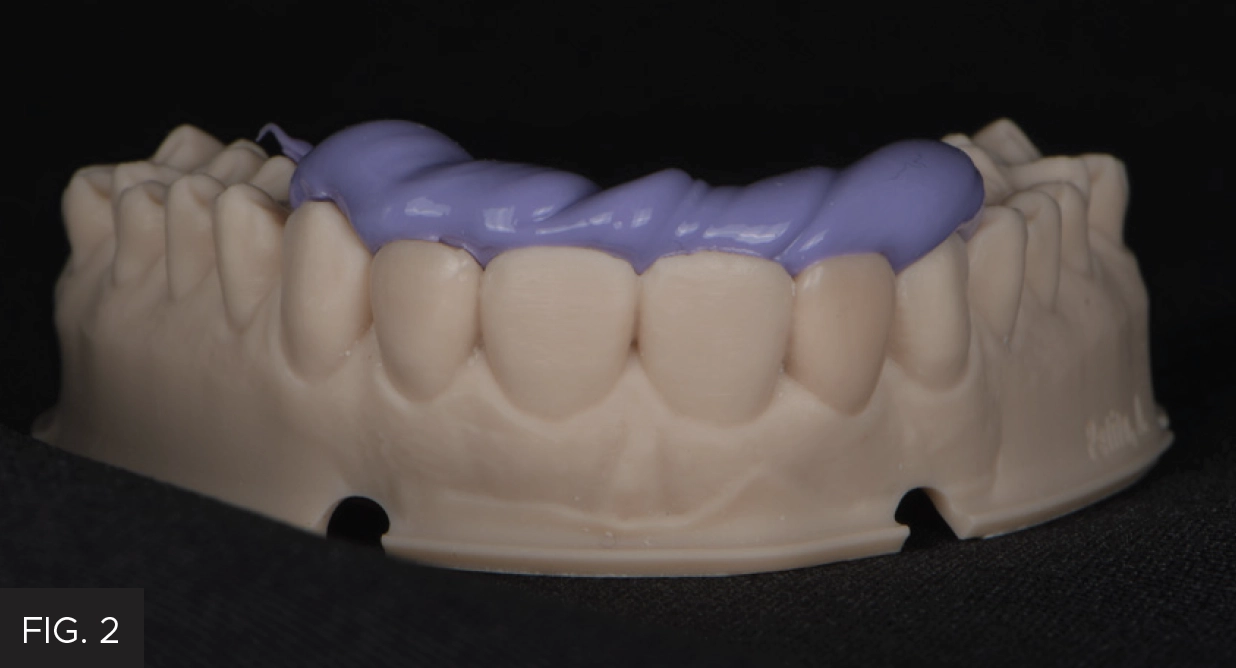
A printed model was obtained from a digital wax-up. Template Ultra Quick Matrix Material (Clinician’s Choice) was placed on the lingual of the six anterior teeth to form the lingual matrix.
On the day of treatment, the optimal shade selection was determined within minutes of the patient being seated. This must be done quickly, while the patient’s teeth are still hydrated. A small increment of Evanesce™ Nano-Enhanced Universal Restorative (Clinician’s Choice) was placed on the proper locations of the tooth and light-cured. The result was then evaluated using the natural light coming through the operatory windows and black and white photographs were taken to confirm the value and surface texture. Evanesce composite was selected for this procedure due to its offering multiple opacities, its handling characteristics when using a layering technique, and because of the optical properties that enable it to disappear into the surrounding tooth structure. Given the patient’s translucency and the halo effect present in the incisal third, a more translucent Evanesce FX shade, Enamel Clear (ENC) was incorporated for the lingual shelf. To create the lobe development, Evanesce B1D and B1E were combined followed by A1E for the final facial enamel layer. White Opaque and Violet tint (Cosmedent®, Inc.) were then utilized to further differentiate the areas of translucency along the incisal edge.
An OptraGate® lip and cheek retractor (Ivoclar) supplied isolation and visibility, while a bite block was used to keep the patient comfortable throughout the procedure. The use of an anesthetic was unnecessary since tooth preparation was limited to superficial bevels using a KS1 (Brasseler USA®) diamond bur. The proper beveling of the enamel is essential for the composite to blend nicely into the tooth without any visible transition lines.
Teeth #7 and #10 were isolated by placing PTFE tape on the adjacent teeth. At this point, Ultra-Etch™ phosphoric acid solution (Ultradent™ Products, Inc) was placed on the facial and lingual aspects of the lateral incisors for 15 seconds and then thoroughly rinsed off. All-Bond Universal® adhesive (Bisco) was applied to the etched surfaces and airt-hinned before light-curing for 40 seconds.
Establishing the lingual shelf was a critical first step. Not only did this represent the final lingual contours, the definitive incisal edge location, and translucency, but the lingual shelf also served as a backstop onto which all subsequent layers were placed. The Template lingual matrix was placed onto the prepared teeth (FIG. 3), and a line was scribed onto the surface corresponding to the inferior edge of teeth #7 and #10.
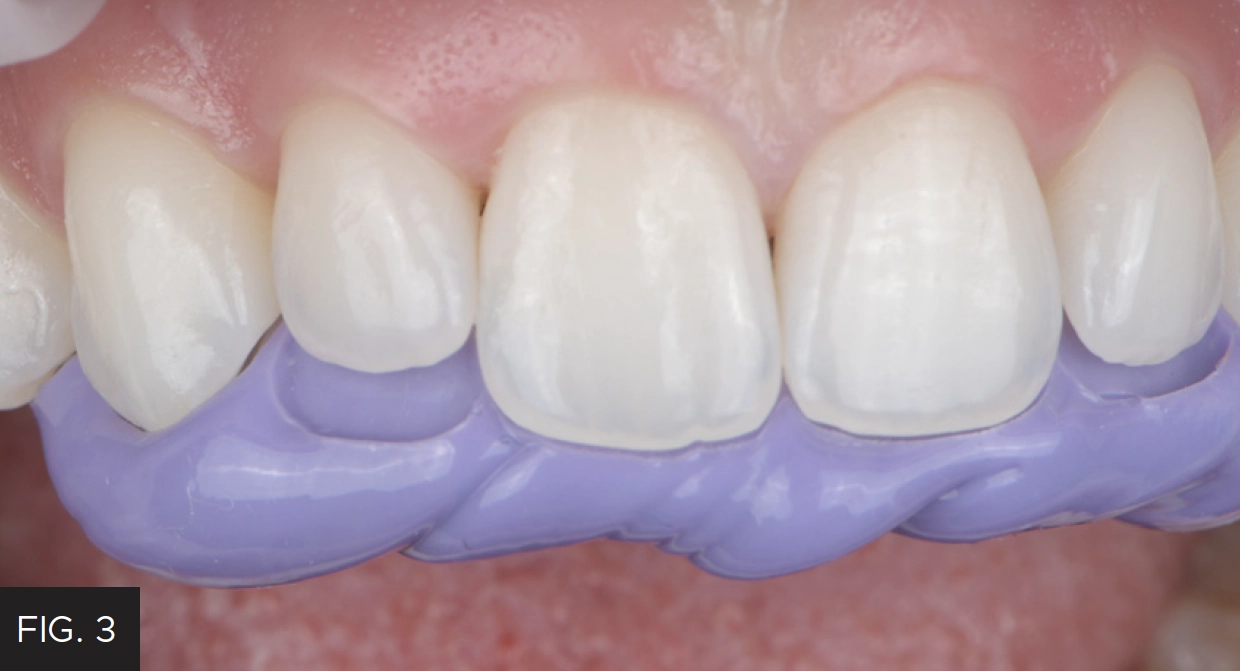
The lingual matrix was placed on the unprepared teeth and assessed for accuracy of fit. The use of a lingual matrix establishes the ideal lingual contours and incisal edge location in the final restorations, in addition to acting as a rampart for the placement of the dentin layer. This results in significantly less finishing time.
A very thin uniform layer of Evanesce Enamel Clear (ENC) was adapted onto the lingual matrix up to the scribed line using an OptraSculpt® composite placement instrument (Ivoclar). Brush & Sculpt™ wetting agent (Cosmedent, Inc.) was used to help create the smooth thin layer using a #3 composite brush. The lingual matrix was placed onto the teeth, and the Evanesce Enamel Clear (ENC) shade of composite was carefully attached to the prepared teeth and light-cured for 40 seconds. (FIG. 4)
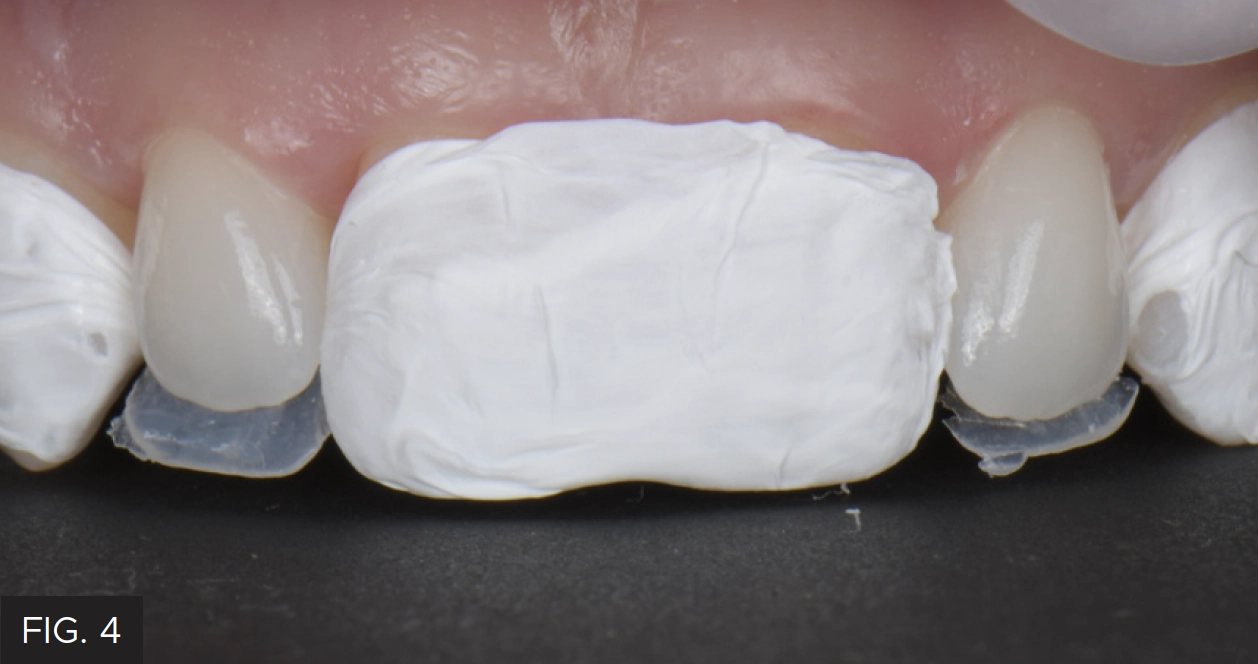
Lingual shelves were created using a very thin layer of Evanesce Enamel Clear (ENC) (Clinician’s Choice) placed onto the lingual matrix. The matrix with the uncured composite is placed intraorally and the Evanesce ENC was attached to the preparations prior to light-curing.
Using a glass slab, small lobes of the composite were rolled and shaped using Evanesce shades B1E and B1D. These were brought and blended into the lingual shelf using an IPC composite instrument (Cosmedent, Inc.). The remaining composite was covered on the slab to protect it from overhead light and to keep it from polymerizing. Evanesce B1E was placed for the proximal layer, while the B1D lobes were placed more facially. A #10 endodontic K-file was used to finesse the facial anatomy to mirror the adjacent teeth (FIG. 5) before light-curing for 40 seconds. The translucency on the incisal edge was further developed by sparingly applying Cosmedent’s Creative Color Violet Tint using a #1 composite brush. The “halo” effect of the incisal edge was emphasized using a small application of Creative Color White Opaque Tint (Cosmedent, Inc.).

By creating an uneven, striated composite surface using a #10 endodontic K-file during lobe development, light can be naturally reflected and refracted within the final restoration.
The final enamel layer of Evanesce A1E was placed on the facial surface of each tooth, shaped, and adapted using the OptraSculpt (Ivoclar). This composite instrument, followed by a wetting agent lightly applied to a #3 composite brush, worked well to shape and smooth the final layer while avoiding bubbles and streaks. Once satisfied with the facial anatomy, this layer was light-cured for 40 seconds.
At this stage, the overall esthetics and occlusion were assessed, and the excess composite was removed using a fine diamond bur at a low RPM and using a light touch. Adjustments to the proximal line angles and fine-tuning of the facial planes were done using coarse and medium FlexiDiscs® (Cosmedent, Inc.), followed by blue and pink FlexiPoints® (Cosmedent, Inc.). Polishing of the final restorations was quickly achieved using 2-step A.S.A.P.® All Surface Access Polishers (Clinician’s Choice). Finally, an even higher luster was created using Enamelize™ (Cosmedent, Inc) polishing paste on a FlexiBuff® (Cosmedent, Inc.).
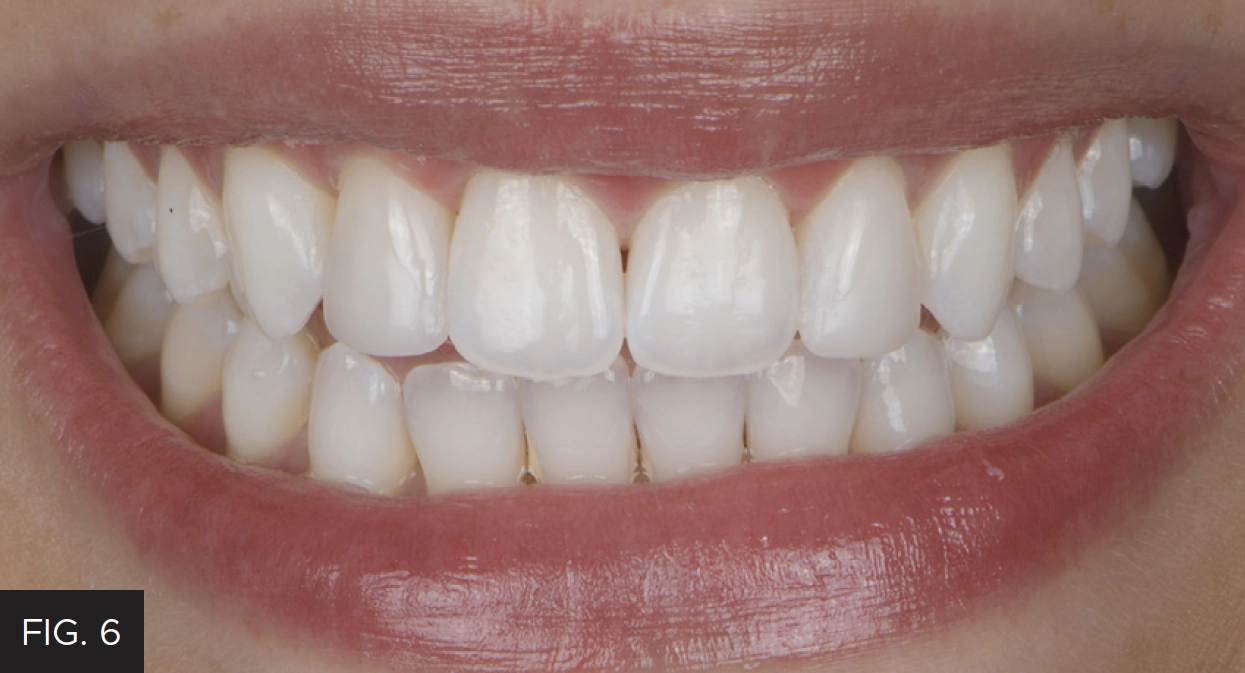
The patient was thrilled with her new smile. This case illustrates how anterior esthetics that meet and exceed the patient’s expectations can be achieved with ultra-conservative composite dentistry.
The patient was delighted with the esthetic outcome (FIG. 6) and grateful for the more conservative treatment plan. As Clinicians, we sometimes get so caught up in creating “perfect” esthetics that we neglect to listen to what the patient really desires. It is possible, and often preferred, to take a more conservative approach to minimize tooth reduction, the number of teeth involved, the procedure, time, and cost. Navigating patient preferences can be a nuanced task, but careful questioning, active listening, using creative software, and even an intraoral composite mockup can all be valuable exercises to confirm that the patient and clinician are on the same page, and often results in a much simpler and more conservative path to the desired esthetic result.

ABOUT THE AUTHOR
Dr. Ellen Katz attended NYU College of Dentistry. Following graduation, she completed a one-year residency at Jamaica
Hospital. Dr. Katz currently serves as an Adjunct Clinical Assistant Professor and Co-clinical Director at the Full Mouth Rehabilitation Program at NYU and is an Adjunct Faculty Member in the Department of Prosthodontics at NSU College of Dental Medicine. Dr. Katz is a Mentor at the Kois Center. She is a published author in the peer-reviewed Compendium Magazine and continues to share her wealth of knowledge with practicing dentists and dental students across the country. She is a Co-founder of a luxury female owned dental studio, MAISON BE, in New York City with Dr. Bridget Glazarov.
Share This Article! Choose Your Platform
Products Mentioned in this article
Related Articles

Creating Natural Restorations for Pediatric Trauma Teeth
By Tiffani Dunn, DMD, AAACD
Developing a systematic approach and mastering the techniques for anterior composite restorations can be a gamechanger for the real-world clinician. There are many different and correct approaches to have a predictable outcome.
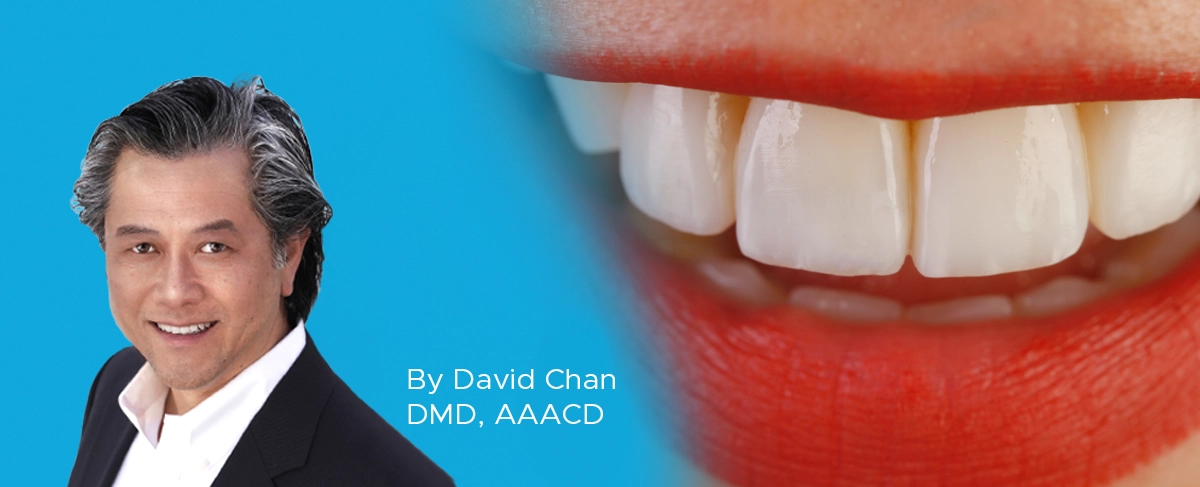
Creating Beautiful Anterior Composite Restorations
By David Chan, DMD, AAACD
I believe there are two important concepts that should be embraced when considering direct restorative materials for anterior restorations: 1. Composite restorations can be indistinguishable from natural dentition and 2. Composite materials aren’t an inferior option to porcelain.
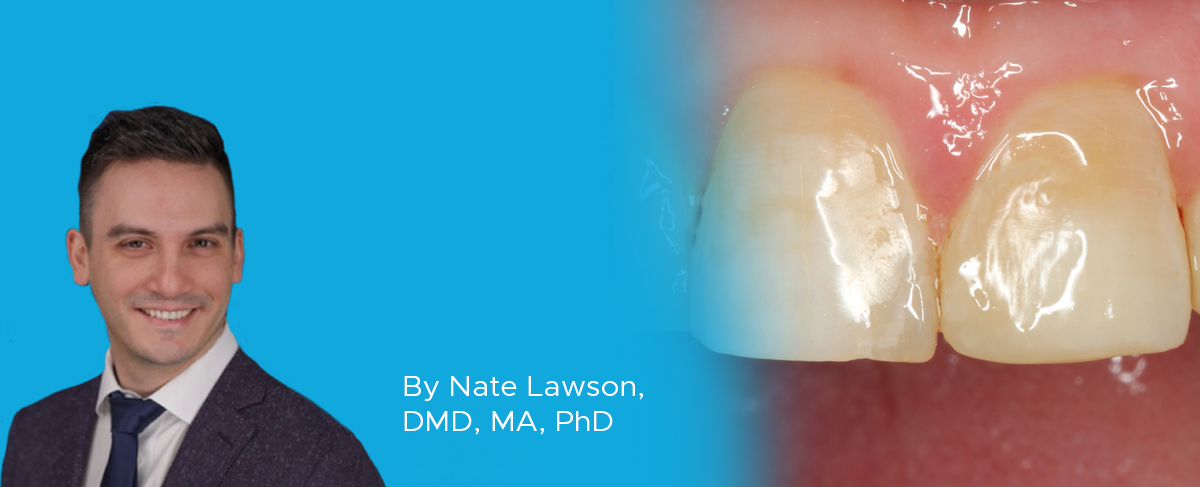
Simple Anterior Composite Restorations
By Nate Lawson, DMD, MA, PhD
A patient presented to the University of Alabama, School of Dentistry with fractured composites on the mesial incisal edges of his left central and lateral incisors that had been placed 20 years previously.