
JUST TAKE A MINUTE: A Step-By-Step Guide to Clinical Efficiency
The sheer volume of information on dental materials and techniques at our fingertips is staggering, but having the right information is vital to providing the best care possible.
Dental product marketing generally promotes ease, speed and cost savings as an advantage to change but we need to filter that information so that the techniques and products that we choose reflects our patients’ best interests.
Chair time is the most valuable commodity in the dental office, thus taking time to review treatment protocols makes a lot of sense. However, balance between clinical efficiency and continuing to provide dentistry of the highest quality is critical to any change you consider. Most of us get locked into a technique that we simply accept as “works best in my hands”. If we take a minute to consider the challenges that we experience in our day-to-day dentistry, many can be solved with just a small change in the technique or product we use.
The anterior composite restoration continues to improve in both its esthetic potential and efficiency of placement. Each step of this procedure should be considered, as current research and techniques show capacity for significant improvement; in adhesion, getting the most out of your composite, and the development of a more effective finishing and polishing technique. Just take a minute to break down your anterior composite technique into its component parts. Evaluate each step to determine if there are some changes that can be made to improve both your efficiency and clinical result.
Start by considering if your choice of phosphoric acid is the optimal strength and viscosity. Runnier H3PO4 gels tend to be more difficult to control during placement, leading to potential sensitivity. As well, many of us turned to self-etch adhesives due to post-operative sensitivity linked to the total-etch adhesive technique and “how wet is wet” dilemma. While there was far less sensitivity, I experienced some esthetic challenges. Occasionally, white lines appeared at the margin after polishing, and the formation of marginal staining was sometimes noted due to the inadequate pH of the self-etch adhesive. In hindsight, the bond strengths of the 4th and 5th generation or total-etch adhesives are considered the highest and most enduring, compared to the later generations. The simple addition of a glutaraldehyde-based desensitizer helps to solve the question of “how wet is wet”, as well as the post-operative sensitivity that is sometimes linked to the total-etch technique. Recent research into MMPs and their bond degrading activity makes it necessary to reconsider the choice of adhesive in its ability to inhibit their effect. The adhesive technique of choice should be easy to apply, universally compatible with all substrates and provide high, predictable bond strengths that are resistant to MMP degradation. Just take a minute and ask yourself if your adhesive choice satisfies these requirements.
Anterior preparations have generally required bevelling to hide the margin and blend the restoration into the surrounding tooth. Despite this, it was always disappointing to go through a strict anterior composite regimen and still see the margin after polishing. Some composite systems today can provide the range of shades and opacities/translucencies that enable the dentist to more easily blend the restoration into the tooth with less layers. I remember the frustration of having composite stick to my instrument, resulting in pull-back or lifting off of the tooth when trying to thin out the margin of the restoration or adapting it into a preparation. Some of today’s composites allow for easy placement of an infinitely thin margin without any pull-back. Coated instruments, available in many tip forms and thicknesses, allow improved placement, adapting, and sculpting of the composite. Would a change in your composite material and instrumentation improve your technique efficiency and composite restoration?
Finishing and polishing is one aspect of the technique whose importance is often overlooked. Many of us use discs for gross reduction, refining and final polishing. It is now possible to dispense with the finer grit discs and polishers of various shapes. Newer two-step, single shaped polishers produce an ultra high luster in less than a minute without degrading surface anatomy or diminishing the characterization of the restoration. Surface texture can be easily created by reducing the speed of a fine diamond and maintained with the right diamond polish. Take a minute to consider if your polishing regimen provides the efficiency as well as the flexibility to recreate form, texture, and luster of your anterior composites.
In order to desire an alteration in technique, it must be perceived that a change will better serve our patients. By just taking a minute to re-assess each step in your composite technique, perhaps you will discover that what you perceive as a challenge can be solved with just a little alteration to your technique. If not, you can remain confident that your approach is the best for you.
STEP #1 MOCK UP & MATRIX
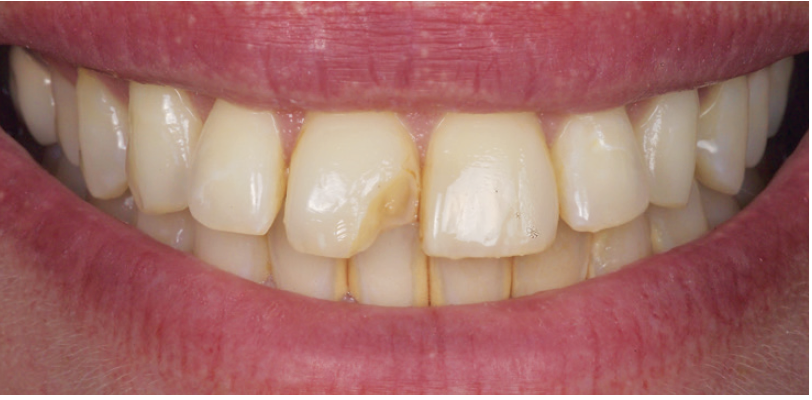
The traditional method of restoring existing Class IV composites, or replacing anterior tooth structure due to trauma, is to place and contour the composite by hand instrumentation.
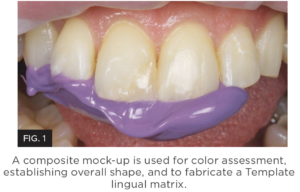
If the length and lingual contour of the existing restoration is ideal, making a record of this pre-operatively and using it as a template can greatly simplify the layering of dentin and enamel composite opacities and dramatically reduce the finishing time. In the case of trauma, simply mocking up the ideal lingual and incisal aspect using old or unwanted composite prior to making this lingual matrix will have the same effect. (Figure 1.)
Template® Ultra Quick Matrix Material from Clinician’s Choice® is a silicone material designed to make highly detailed provisionals; however, its fast working and set times (30s and 30s), in addition to its accuracy, make it a perfect choice for this lingual matrix technique. Utilizing the Template lingual matrix technique dramatically reduces procedure time, provides the ideal lingual/embrasure contours, and leaves a pre-polished lingual surface.
STEP #2 DESENSITIZATION
Prevention of post-operative sensitivity is determined by the quality of the dentin/adhesive seal. Class I and II restorations are most prone to sensitivity due to the sheer size of the preparation as well as the number of adhesive walls involved. Ensuring your adhesive is properly applied and controlled so that all adhesive walls are sufficiently sealed is crucial. A properly applied adhesive obturates the dentin tubules which eliminates intra-tubular fluid pressure changes, preventing post-operative sensitivity. Utilizing a Glutaraldehyde-based desensitizer takes the guesswork out of dentin bonding by helping to obturate the dentin tubules before adhesive placement.
G5™ from Clinician’s Choice contains 5% Glutaraldehyde, HEMA, and water – the combination of which helps coagulate intra-tubular fluid proteins, resulting in a partial/initial dentin seal. Once G5 is applied, followed with MPa™ Max adhesive, together they create consistently high bond strengths and an ideal dentin seal to ensure the likelihood of post-operative pain is virtually eliminated. The use of G5 is not restricted to posterior restorations; it can be very effective in anterior restorations when dentin is exposed, as well as for desensitizing crown preps.
STEP #3 ETCHING
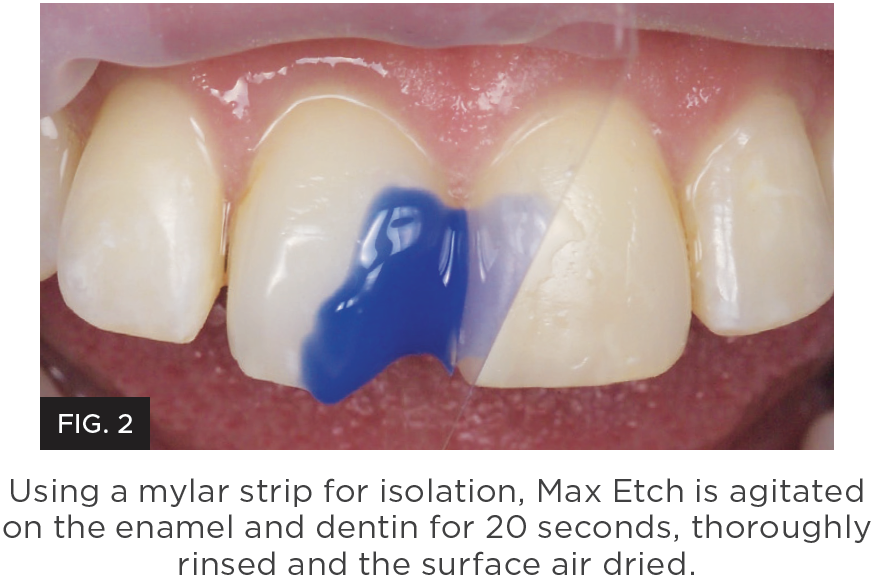
The bond to enamel is the most important bond and determines the longevity of your restoration as well as the integrity of the composite/enamel margin. The dentin bond is also key and determines the incidence of post-operative sensitivity your patients could experience. Your goal should be to achieve the highest bond strength as possible to both substrates. The total-etch technique provides the highest bond strength to enamel while demineralizing the dentin and removing the smear layer.
Max Etch from Clinician’s Choice, a 35% viscous phosphoric acid included in the MPa™ Max Starter Kit, is easy to place, stays where you place it, and rinses easily; providing the best possible enamel conditioning. (Figure 2.)
BONDING
The bond to enamel is the most important bond and determines the longevity of your restoration as well the adhesive you choose must effectively and consistently seal the dentin tubules without being technique sensitive to apply.
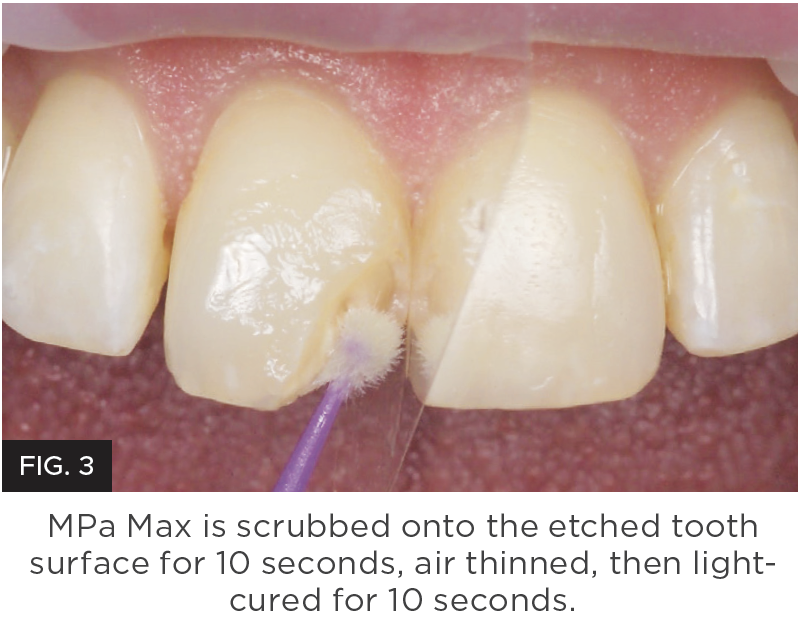
MPa™ Max adhesive from Clinician’s Choice is designed to provide bond strength to both enamel and dentin of 45 MPa, one of the highest bond strengths available in dentistry. In addition, MPa Max is specifically designed for ease of application and to ensure a dentin seal is achieved with little technique sensitivity. MPa Max adhesive is slightly thicker than other adhesives, allowing for one coat application. This higher film thickness adhesive coats the adhesive walls, yet won’t over thin when air drying. In fact, MPa Max can be air thinned so just microns stay on the restorative walls to prevent post-operative sensitivity – especially when used in combination with G5 All-Purpose Desensitizer (also included in the MPa Max Starter Kit). With the addition of 0.2% Chlorhexidine, MPa Max is one of only a few adhesives that inhibit MMP breakdown of the adhesive bond. (Figure 3.)
STEP #4 COMPOSITE & PLACEMENT
HIDING & MARGINS
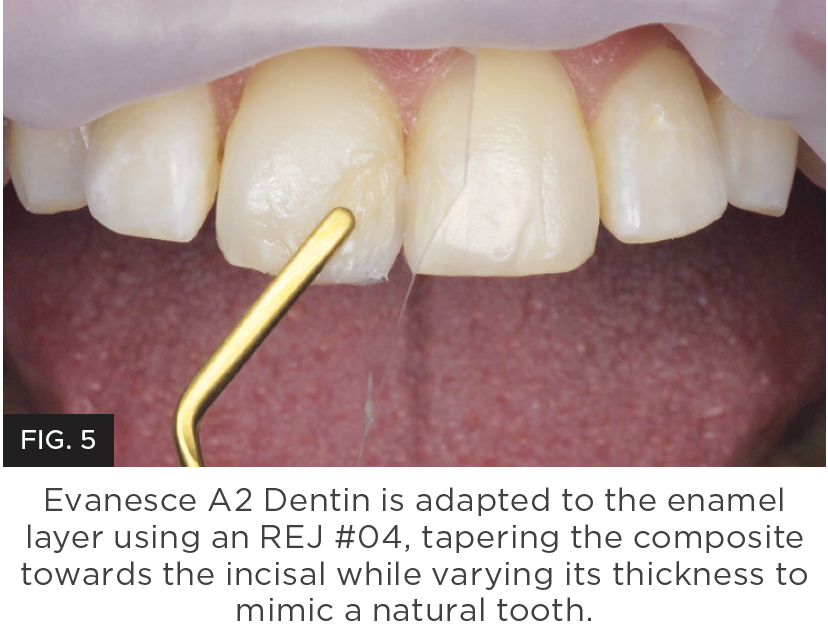
Technique and material selection are crucial to ensure invisible margins are created with anterior composite restorations such as Class III, IV and diastema closure techniques. Not all composites are created equal and few provide simplicity, strength and beautiful restorations. Challenges with handling and the inability to pre-shape anatomy without slumping or stickiness is common. This makes it necessary to use multiple opacity layers, tints, and opaquers which adds complication and inconsistent results. In addition, difficulty in shade matching or long polishing time requirements are frustrations that you don’t need to experience. (Figure 4 and 5.)
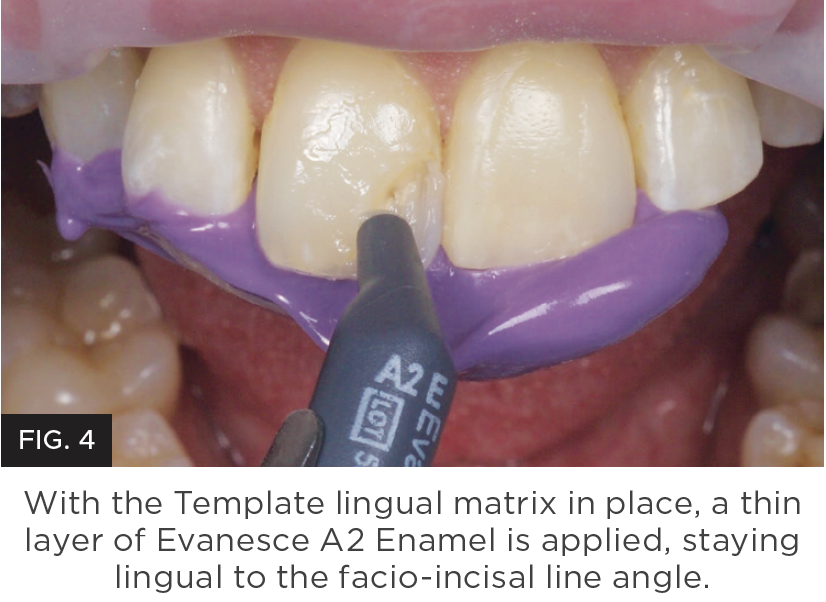
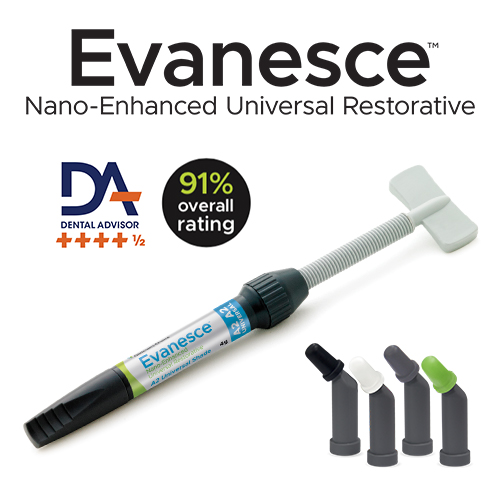
Evanesce™ from Clinician’s Choice, is a nano-hybrid composite material designed to give you simple, strong, and beautiful results for both anterior and posterior composite restorations.
SIMPLE
Evanesce users find that fewer opacity layers are required in most cases, compared to other composite materials. The unique rheological modifiers allow you to manipulate and shape Evanesce to create the most detailed anatomy without slumping. Designed with nano pigments and fillers to assist in blending with natural dentition, Evanesce restorations literally disappear. Ideal for both layered and single shade restorations, Evanesce comes in three opacities and 30 VITA shades, plus three Enamel non-VITA shades for characterization. For single shade cases, a second viscosity, Evanesce UX is available in 7 universal shades and features a slightly lower viscosity.
STRONG
82% filled by weight and with high compressive strength (340 MPa) and low wear (0.07 microns/200,000 cycles), Evanesce gives you confidence for both anterior and posterior restorations.
BEAUTIFUL
Evanesce matches the VITA Classic shade guide perfectly to provide efficient and consistent shade matching and has a unique ability to blend in with adjacent porcelain restorations. In less than one minute, you can polish Evanesce to a beautiful shine.
STEP #5 INSTRUMENTATION
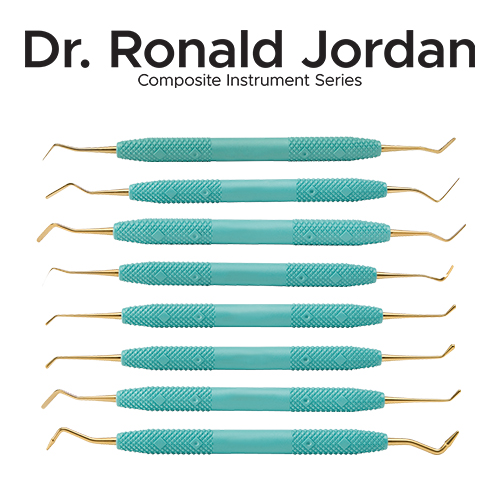
The choice of instrumentation for placing an anterior composite restoration can be beneficial in greatly reducing your placement and contouring time. Using instruments designed for ease of composite placement, shaping, thinning, and refining will allow you to better approximate the final anatomy of your restoration prior to light-curing. Stainless steel composite instruments are prone to scratching, resulting in frustrating pull-back of the composite during manipulation.
The Dr. Ronald Jordan (REJ) from Clinician’s Choice line-up of composite instruments provide an assortment of non-stick blades, thanks to their titanium nitrate precision designed tips. The REJ instrument blades are available in varying lengths, widths, and flexibilities so that you can place, shape, contour, and refine your composite prior to light-curing.
STEP #6 FINISHING
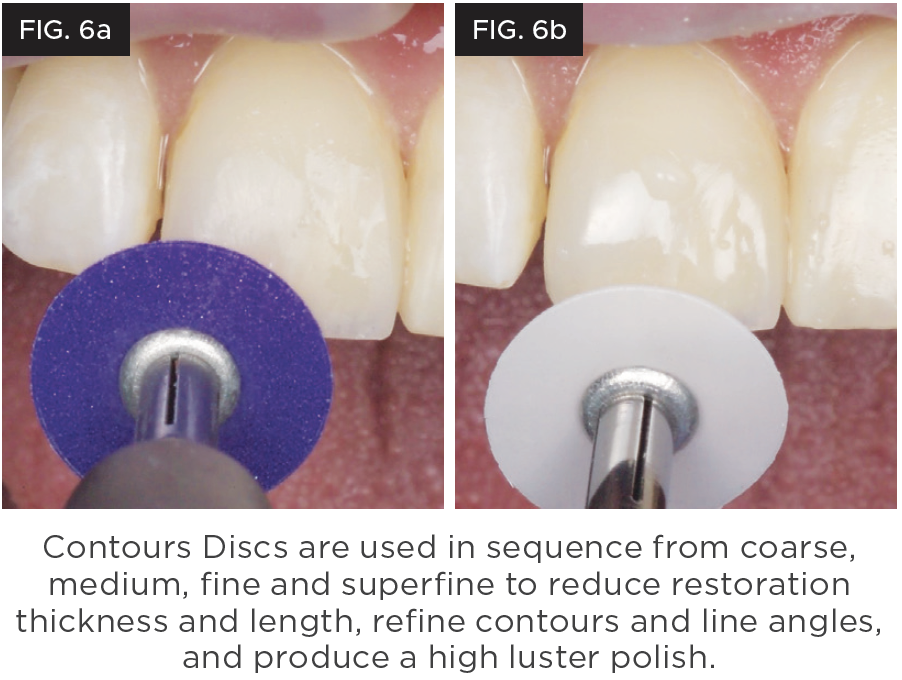
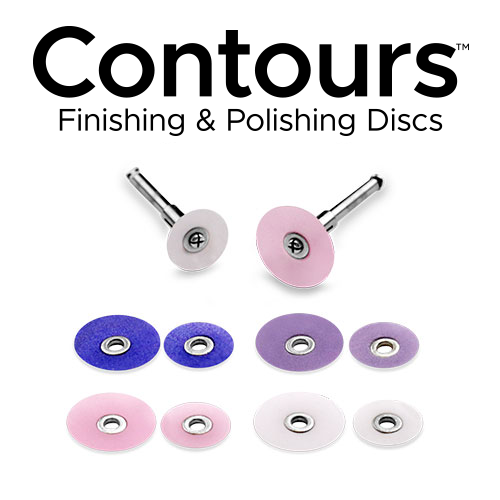
Final shaping, refining, and polishing of the anterior composite restoration is vital to its esthetics and longevity, yet the time allotted to this is often insufficient. While rotary instrumentation may be used for removal of excess composite and some refinement, the use of an aluminum oxide disc system can provide better control for the efficient gross reduction and refinement of the composite restoration as well as bring out the natural luster of the composite itself. Having the optimal flex and a choice of sizes will aid in gaining access to all aspects of the restoration without gouging the composite margin.
The Contours™ Finishing and Polishing Discs from Clinician’s Choice provide an easy to follow color/grit sequence along with ideal flexibility to allow efficient reduction, refinement and ultimately, a high luster polish. Contours Discs are available in the two most popular sizes of 3/8” and 1/2” diameters and effortlessly and securely pop onto a round mandrel. When used in sequence, the anterior composite restoration can be contoured, refined, and polished to a high luster in just a few minutes. (Figure 6a and 6b.)
STEP #7 POLISHING
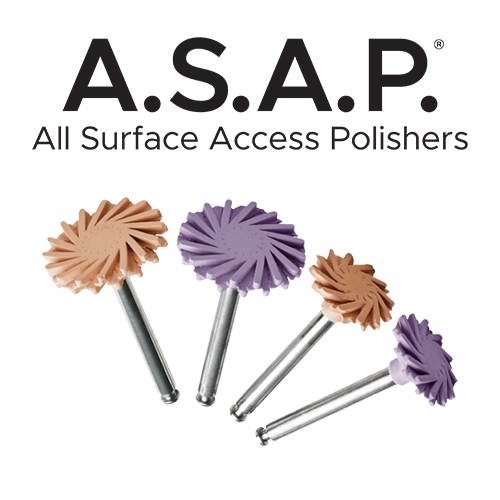
Once the finishing of your anterior restoration has been established, there is often very little time to achieve the ultimate polish. Polishing systems requiring multiple steps, shapes, and even polishing paste can be time consuming and frustrating.
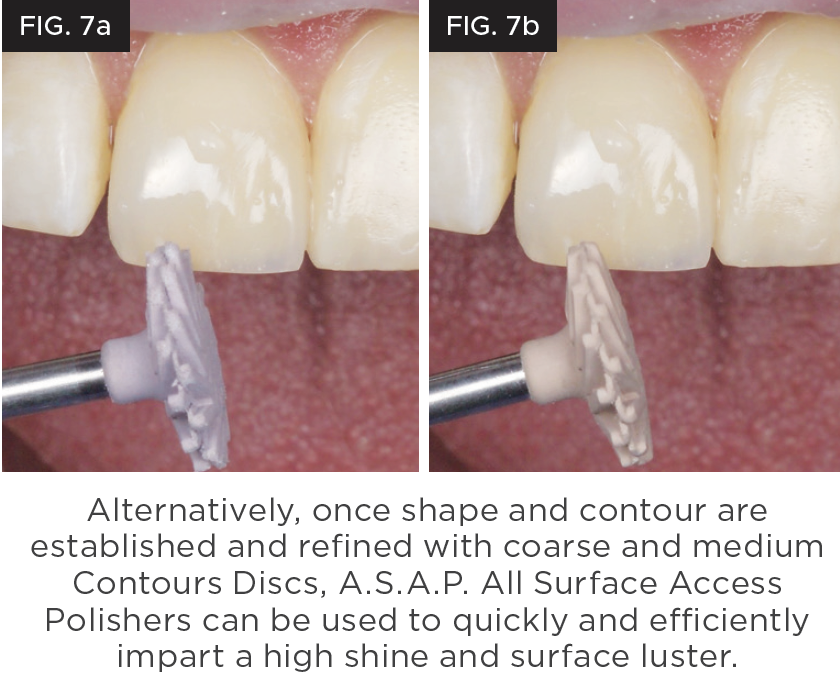
Simplifying your polishing regimen to ensure that you have sufficient time to bring out the natural luster of the composite is achievable with the use of A.S.A.P.® All Surface Access Polishers from Clinician’s Choice. This two-step diamond polishing system utilizes one spiral shaped Pre-polisher and one Final High Shine Polisher to create the highest luster in under a minute. The flexible, spiral-shaped polisher adapts to every surface of the restoration, eliminating the need to stock multiple shapes of polishers. Versatile A.S.A.P. Polishers are available in two sizes and are designed to be used on composites; however, they are also ideal for most ceramics, zirconia, lithium disilicate, and provisional materials. (Figure 7a and 7b.)

ABOUT THE AUTHOR
Dr. Snyder received his doctorate in dental surgery at the University of California, Los Angeles (UCLA) School of Dentistry and has trained at the F.A.C.E. institute. He is an Accredited Fellow of the American Academy of Cosmetic Dentistry and is a member of Catapult Education. Dr. Snyder was on the faculty at UCLA, where he created and co-directed the first 2-year graduate program in aesthetic and cosmetic restorative dentistry. In addition to lecturing internationally, he has written numerous articles in publications around the world.

ABOUT THE AUTHOR
Dr. Douglas Harvey is a consultant in Clinical Affairs with Clinician’s Choice Dental Products. He has a Bachelor’s Degree in Biology and a Doctor of Dental Surgery, both from the University of Western Ontario. He served as a dental officer at the Canadian National Defence headquarters before enjoying a career in solo general practice until 2015. Dr. Harvey has been a long-standing member of the International Dental Study Club, and has served in organized dentistry at the local and provincial levels in Canada.
Products Mentioned in this article

Related Articles
Take 5: 5 Restorative Clinicians’ Take On Evanesce Nano-Enhanced Universal Restorative
5 Restorative Clinicians' Take On Evanesce Nano-Enhanced Universal Restorative.
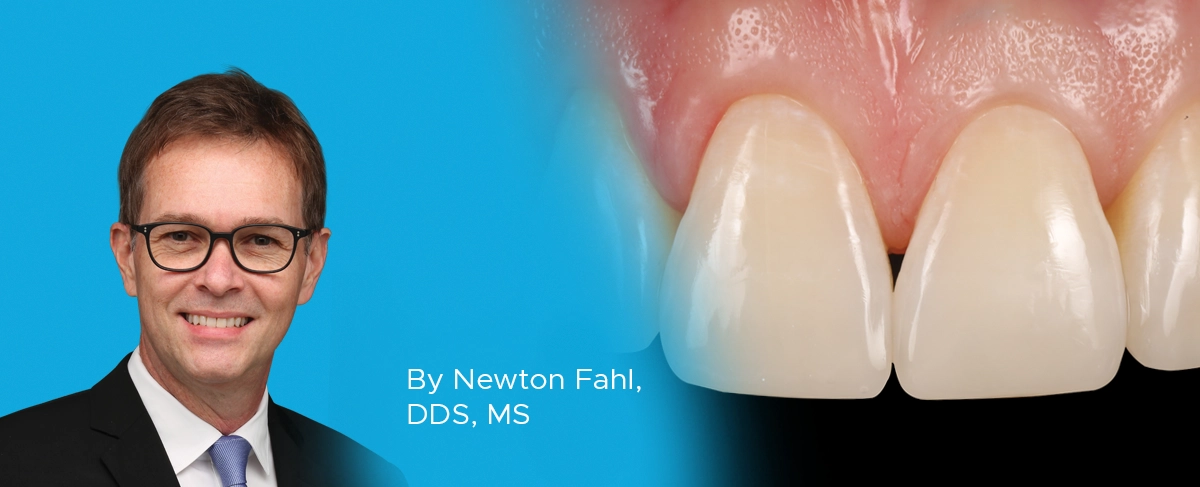
A Conservative Approach to Restoring the Worn Anterior Dentition
By Newton Fahl, DDS, MS
Long-term restorative treatment of the worn dentition can be a complex endeavour and possibly extend beyond the scope and experience of the general dentist. Additionally, restoration of this compromised dentition may require other health disciplines’ involvement to address any psycho-social factors that may limit the long-term success of the restorative treatment.
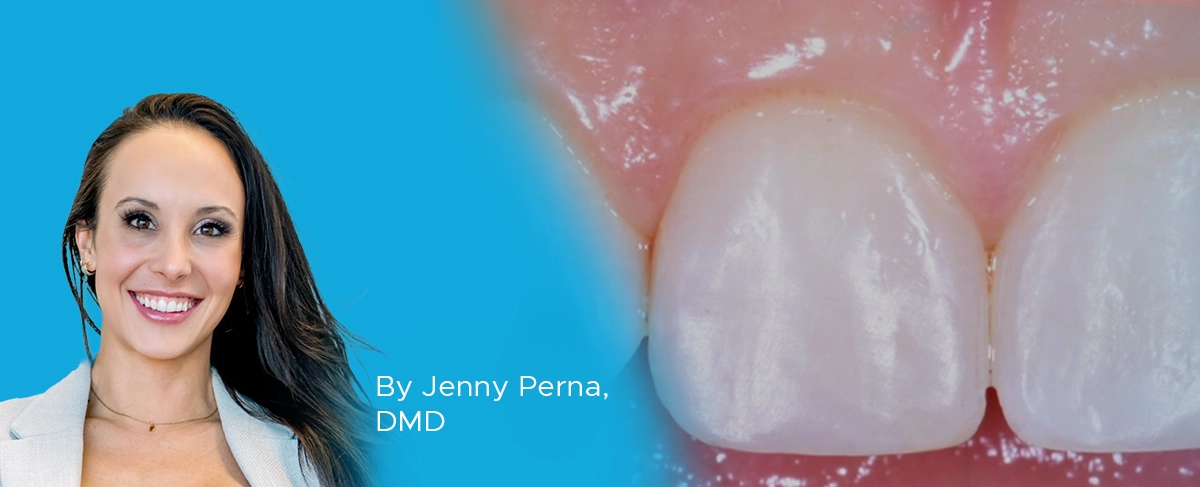
Step by Step Protocol for Consistently Creating Invisible Class IV Restorations
By Jenny Perna, DMD
In the world of cosmetic dentistry lives the ever challenging Class IV restoration. The success of this restoration lies in the ability to restore function and esthetics while utilizing the risk profile analysis for seamlessly blended, long lasting restorations.
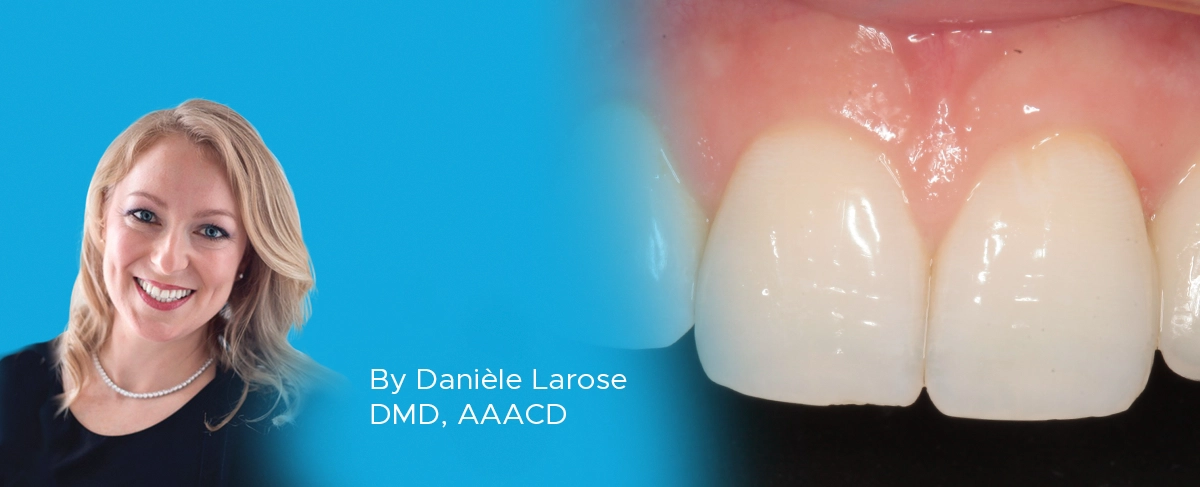
The Missing Tooth: How the General Dentist and a Multidisciplinary Approach Can Achieve an Excellent Clinical Outcome
By Danièle Larose, DMD, AAACD
The successful replacement of a single anterior tooth involves a balance between esthetics, function, and anticipated longevity. In many cases, collaboration between the general dentist and one or more specialists is required to resolve the hard and soft tissue challenges that may arise in the process of achieving the desired outcome.