
Multilayer Composite Technique for Extraordinary Outcomes in Common Clinical Situations
Responsible esthetic dentistry embraces the notion of optimizing esthetic results with minimal tooth structure removal while acknowledging the inherent risk to the dentition as a result of any restorative intervention. It is this systemic approach that underlies my esthetic treatment planning and, more often than not, multilayered composite allows me to provide the highest quality esthetic dentistry with the least impact to tooth structure. A layering technique using a composite like Evanesce (Clinician’s Choice) that is available in varying shades and opacities allows for the flexibility necessary to mimic the natural characteristics of the adjacent tooth. Due to improved esthetic potential and enhanced physical properties, today’s composites have the additional advantage of providing control to the clinician over all aspects of the restorative case. It is possible to progress from mock-up to case presentation to treatment in a single visit, thereby maximizing profitability without compromising the restorative result.
The principles of responsible esthetics can be applied to common everyday clinical situations. Composite may be my preferred restorative material for an esthetic solution; however, it is contraindicated, in my opinion, in patients with a nail-biting habit or a frequent affinity for pigmented beverages, especially red wine or tea, due to the potential for staining.
The following case is an excellent example of how the application of the principles of responsible esthetics in a common clinical scenario can, in a single appointment, result in a highly esthetic outcome.
A young man presented with a long-standing Class IV composite restoration on tooth #9. According to the patient, the shade and shape of which were never ideal. (FIG. 1) He was seeking a more esthetic outcome and was open to the best restorative solution.
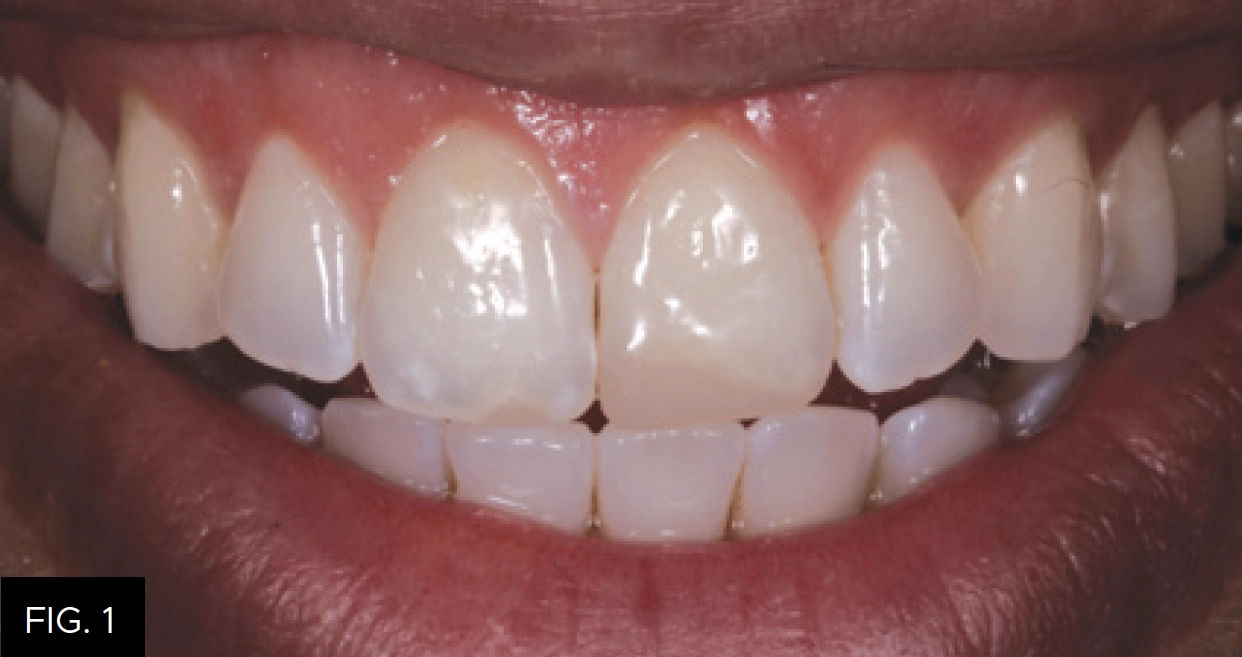
Pre-op: Patient presented with a non-ideal restoration on tooth #9.
Treatment options were presented as a composite replacement, porcelain veneer or no treatment at all. The patient elected to replace the composite restoration and the case quickly progressed to a chairside mock-up. A combination of finishing discs and composite were used to improve the shape and contours of the existing restoration. (FIG. 2)
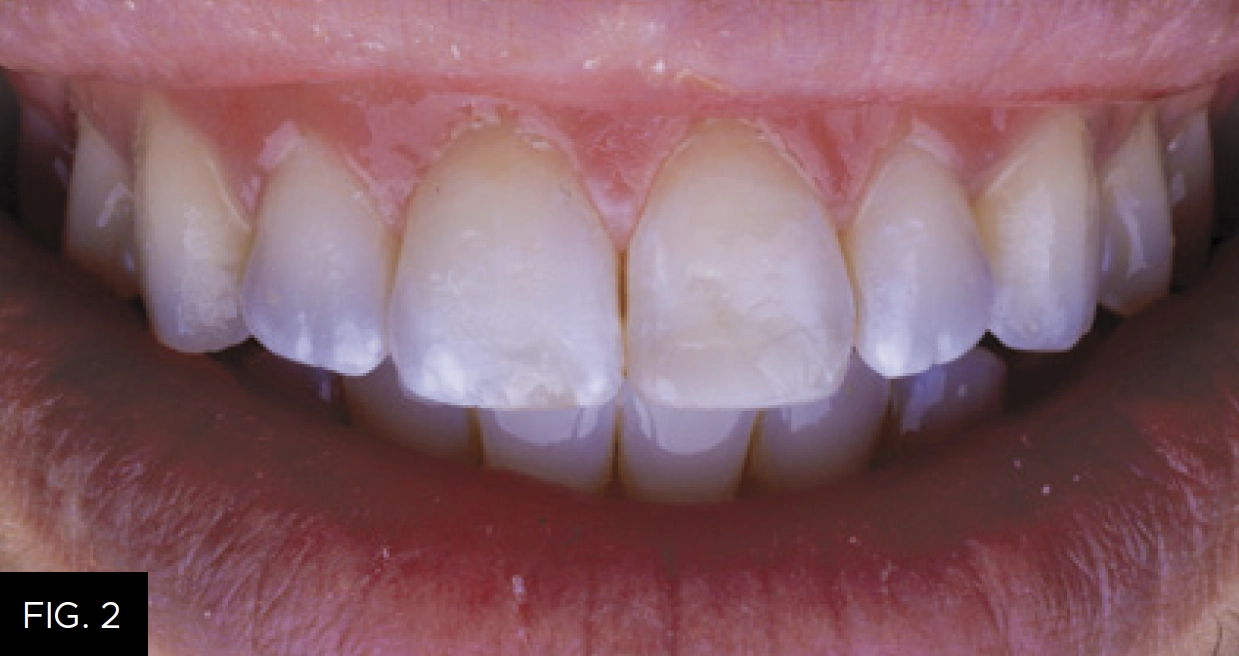
Mock-up: Shape and contours of the existing restoration were improved using discs and adding composite. This is not used for shade selection.
A mock-up was used to transfer the ideal incisal edge position and lingual contours to the lingual matrix, which becomes the initial guide for composite layering. With a little extra attention to shade, the mock-up may also provide the patient with a preview of the final restoration.
Pre-operative DSLR photography is ideal for case documentation and patient communication, as well as treatment planning. Monochromatic photography is useful in providing key information in verifying the value of a chosen shade. Polarized photography removes the unwanted reflections from the flash to allow an enhanced view. This is helpful in determining what tints and details may be required to replicate the surface characterization of the adjacent teeth.
Shade selection starts with small, flattened spheres of the possible dentin shades placed on the facial surface of the tooth and light-cured. Once the shade is chosen, a monochromatic photo is taken to confirm that the value is correct. Value is the degree of grayness within a tooth and is best evaluated through black and white photography.
A lingual matrix impression made with Template Matrix Material (Clinician’s Choice) was then made from the intraoral mock-up. The information derived from the mock-up can now be accurately transferred to the final restoration. The Template matrix was trimmed using a #12 scalpel such that no material extends beyond the inciso-facial line angle. This is a highly accurate, fast and efficient means of quickly establishing the ideal lingual contours and incisal length to the final restoration within minutes of completing the mock-up. (FIG. 3)
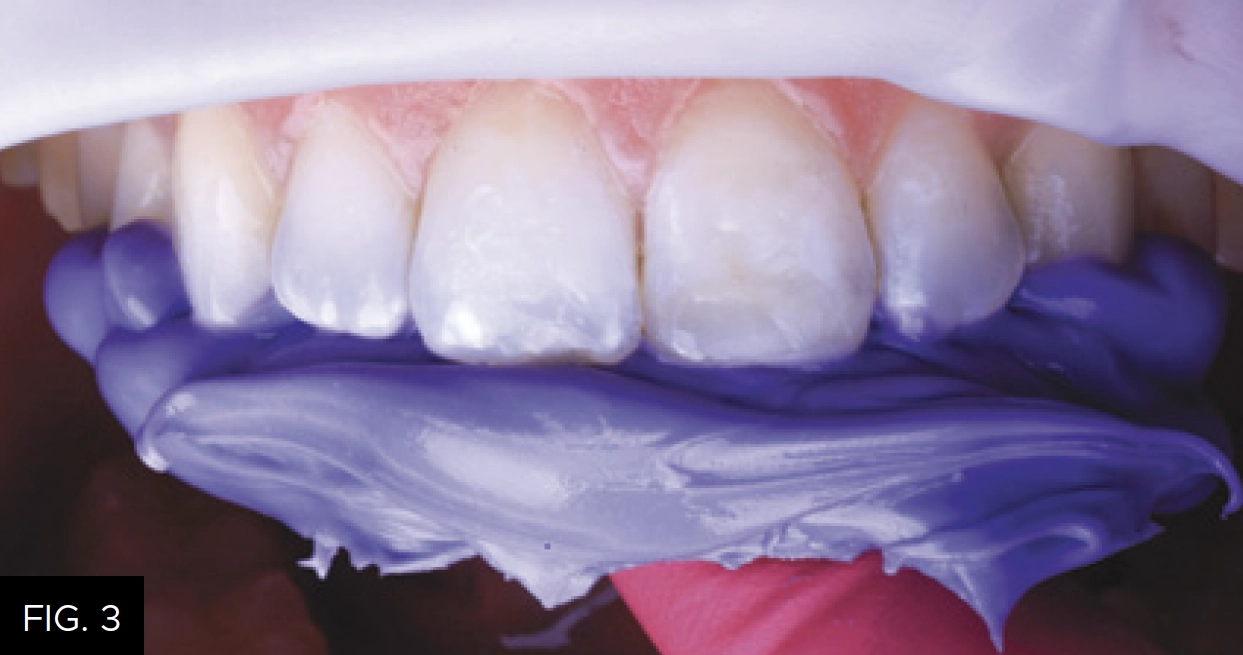
Lingual matrix: A lingual matrix impression was made with Template, capturing the ideal lingual contours and incisal edge position.
An OptraGate (Ivoclar) lip retractor was placed to give a clear working field. A KS1 diamond bur (Brasseler USA) was used to remove the existing composite and a coarse Contours disc (Clinician’s Choice) removed any sharp edges. A facial bevel was established with a KS1 diamond bur, beginning at a deep 45 degree angle to hide the fracture line and facilitate space for the dentin layer and lobes. This extends to a more shallow, irregular bevel over the facial surface to allow for the blending of the enamel layer and layering of the tints if needed.
The preparation was then air-abraded with PrepStart (Zest) and rinsed. High viscosity 35% phosphoric acid etch (Bisco) was applied to the entire facial enamel surface, then rinsed and dried. A single application of All-Bond Universal adhesive (Bisco) was scrubbed onto the preparation, air-thinned and light-cured. It is at this point that the prepared tooth is isolated from the adjacent teeth using PTFE tape. (FIG. 4)
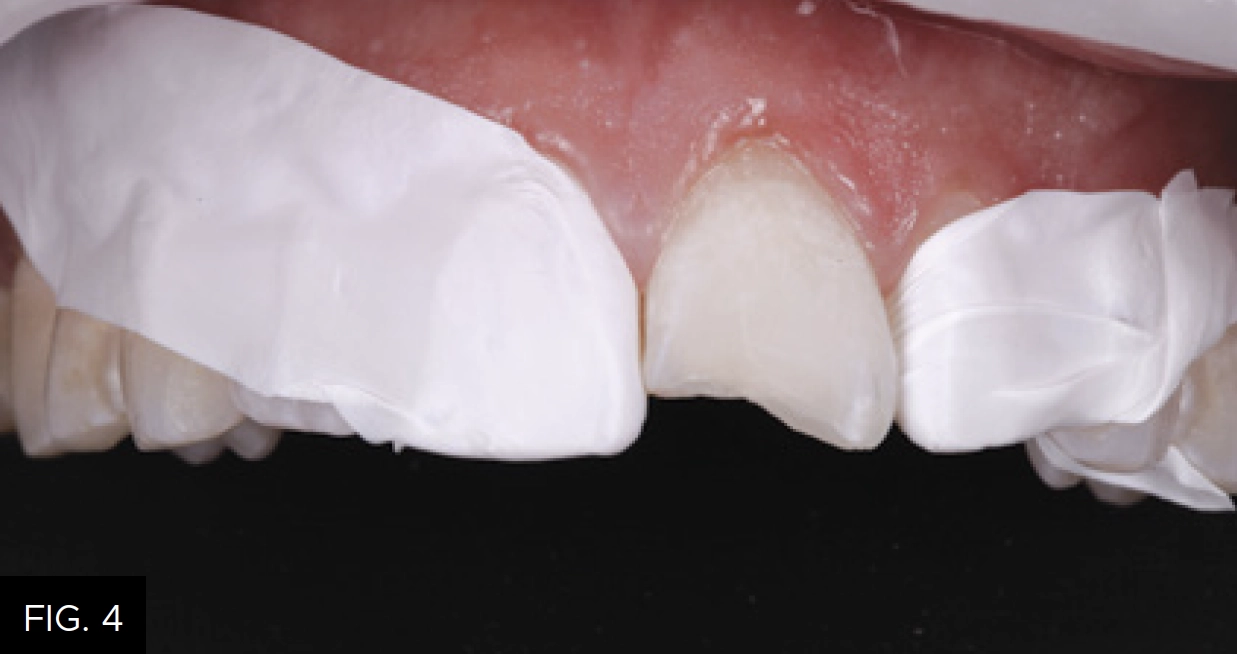
Isolation: Once the old restoration was removed, a facial bevel is placed and the tooth is air-abraided, etched and bonded. Teflon tape was then placed on the adjacent teeth.
The Teflon tape was placed on the adjacent teeth after the application of the adhesive as the chemicals may quickly breakdown the Teflon itself. The trimmed lingual matrix was placed onto the teeth and an explorer was used to scribe a line along the fracture. This line will help in limiting the extent of composite necessary for the lingual shelf. My preference for the lingual shelf is an achromatic composite as a more translucent lingual shelf allows for a translucent incisal edge and layering in of tints and creating halos, while acting as a foundation for subsequent composite layers. A very thin layer of Evanesce FX Enamel Clear (ENC/Clinician’s Choice) was adapted into the Template matrix up to the scribed line. (FIG. 5)
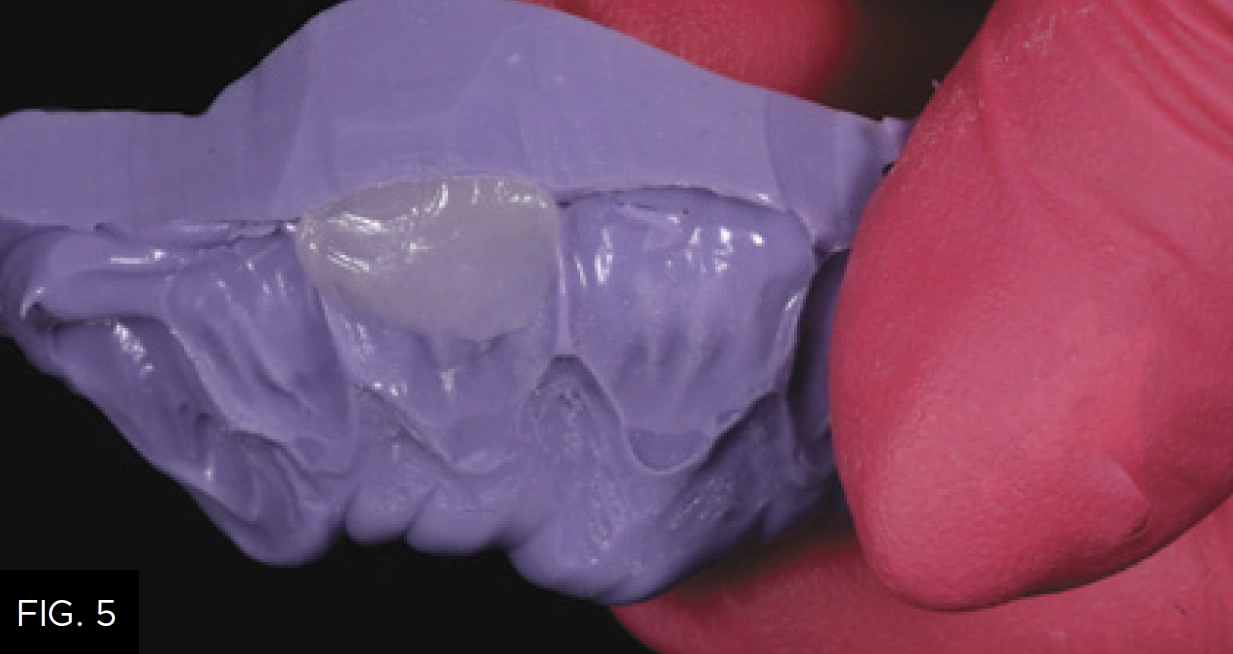
Lingual shelf: A very thin layer of ENC composite was placed and adapted into the lingual matrix and left uncured.
The matrix was then re-seated onto the teeth and the uncured ENC was attached to the preparation using a #3 composite brush lightly coated with ResinBlend LV (Clinician’s Choice). (FIG. 6) The lingual shelf was light cured for 20 seconds and the Template matrix was gently removed.
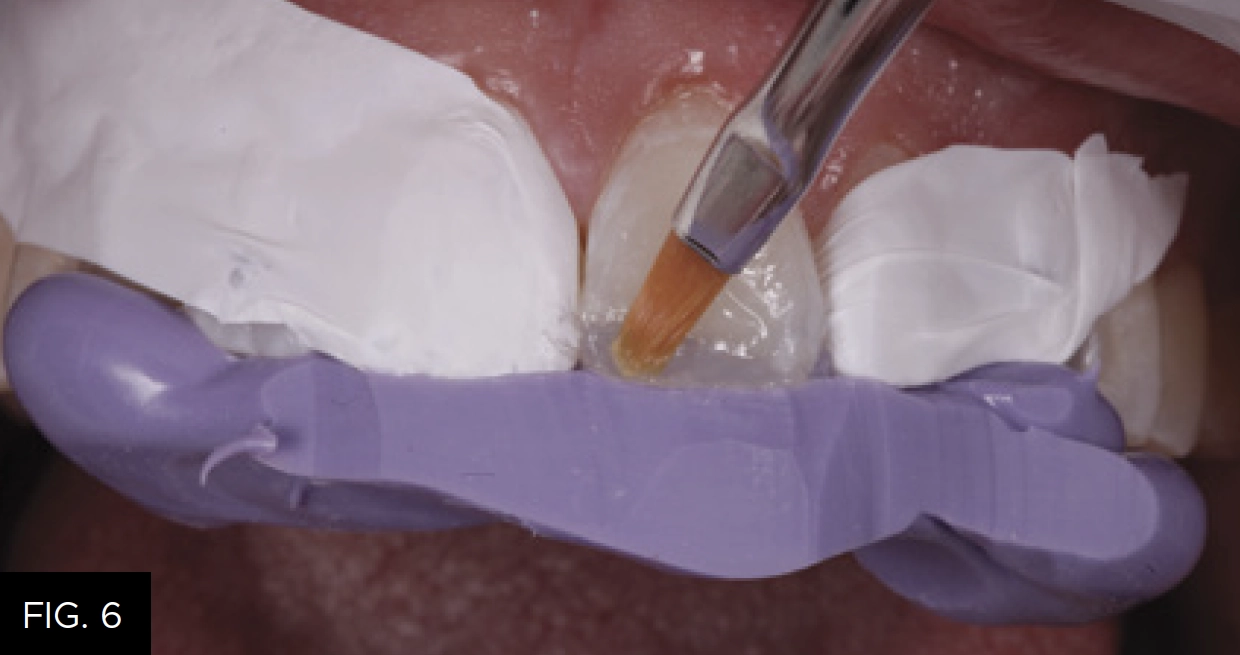
Attach to prep: Lingual matrix was returned to the mouth and the uncured ENC was attached to the lingual surface using a #3 composite brush lightly coated with ResinBlend LV. Light-cure for 20 seconds.
The dentin layer is a major contributor to the overall shade and value of the restoration and must be thick enough to serve this purpose. However, space must be left below the final height of contour in order for the chromatic or achromatic enamel layer to blend into the dentin and surrounding enamel. Evanesce A2 Dentin was placed gently onto the lingual shelf using a Compo Ject composite gun (Clinician’s Choice). The A2D was spread and blended using an OptraSculpt and pad (Ivoclar) lightly coated with ResinBlend LV. Although Evanesce is a non-sticky composite, ResinBlend LV improves the ability to manipulate any composite without introducing defects and does not create any risk for color change. With the A2D in place, a monochromatic photo was taken to verify the correct value of the dentin composite. (FIG. 7)
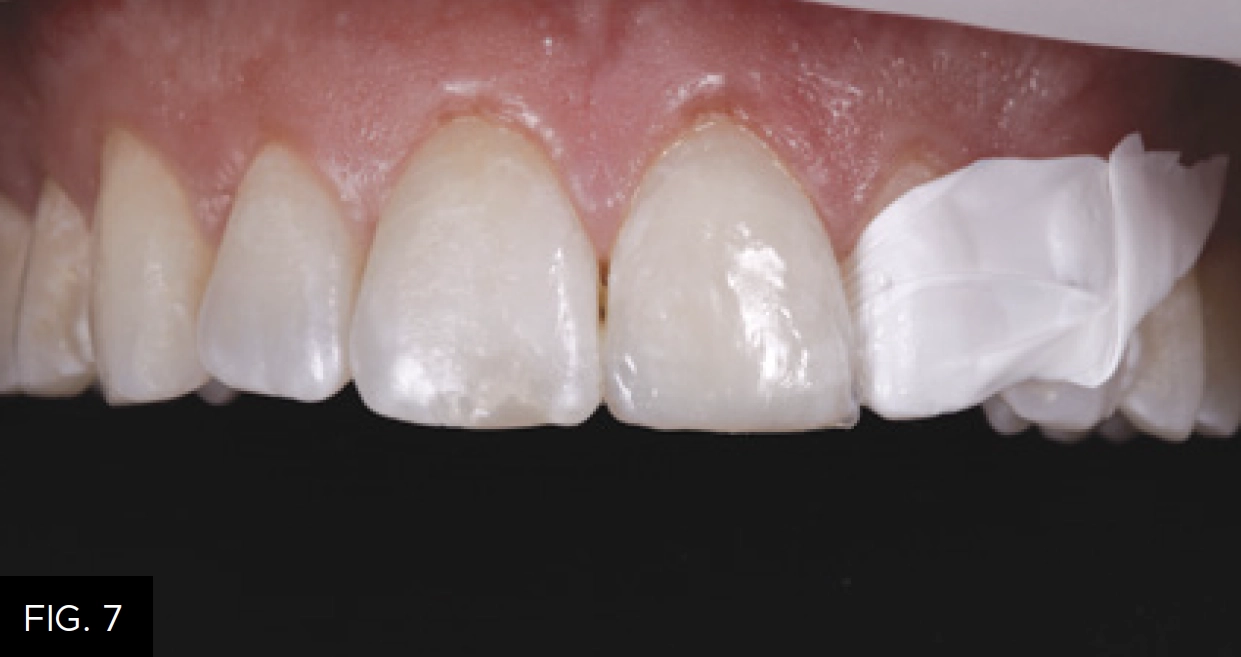
Dentin layer: Evanesce A2D was placed and adapted into the lingual shelf. The thickness of this layer should be approx. 0.25mm shy of the anticipated height of contour to allow for the enamel layer. A monochromic photo will confirm the correct value of the dentin layer.
After confirmation, a #3 composite brush with ResinBlend LV was used to further smooth out and refine the A2D at the margins. The dentin layer was then light-cured for 20 seconds. Despite being relatively thin, the enamel layer provides another opportunity to further characterize the restoration in order to mimic the adjacent dentition. An achromatic enamel composite layer allowed the layers below to show through more, having more of an influence over the final restoration. In this case, the adjacent teeth have decalcifications, which I simulated with White Opaquer (Cosmedent). I then placed achromatic Evanesce FX Enamel Incisal (ENI/Clinician’s Choice) over top of the cured opaquer to produce a more prominent effect. The incisal third required a less translucent Evanesce Enamel White (ENW/Clinician’s Choice) to mimic the milky finish of the adjacent teeth. The enamel layer was smoothed and refined using a #3 composite brush and ResinBlend LV prior to light-curing for 20 seconds.
Finishing of the restoration is always a systemic approach starting with the primary anatomy: incisal edge position, facial line angles, then facial planes. Using a pencil line, the incisal edges of the adjacent teeth and new restoration were marked and adjusted with a coarse Contours disc (Clinician’s Choice). Using a lingual matrix resulted in only a minor incisal edge adjustment. The side of the pencil tip was used to mark the line angles on the restoration and adjacent teeth. To make the restoration appear wider, I moved the line angles out by adjusting the facial surface with the disc. Using the disc on the embrasure side will move the line angles inward and give a more narrow appearance. (FIG. 8)
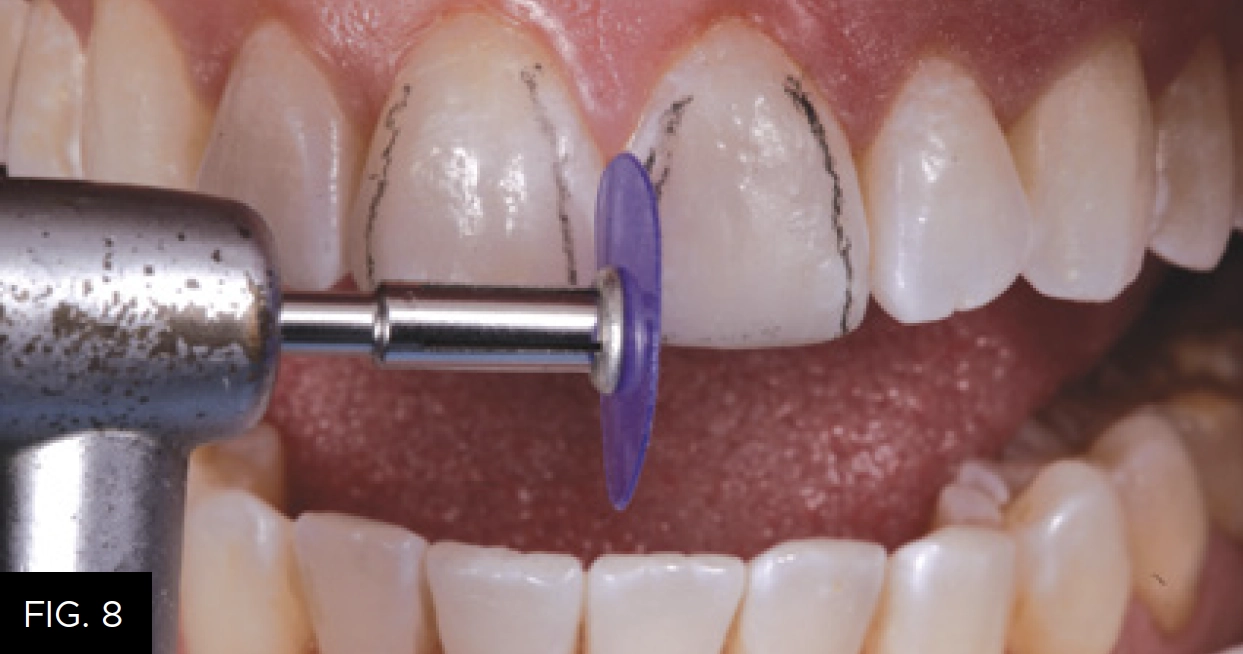
Finishing: Coarse and medium Contours discs are used to alter shape, length, and line angles to match adjacent teeth.
Finally, a mirror perpendicular to the incisal edge helped in discing the incisal, mid and gingival facial planes to match up with the adjacent teeth. Alcohol gauze removed any pencil lines as the primary anatomy was checked and re-checked.
Secondary and tertiary anatomy were established with diamond finishing burs. The KS0 (Brasseler USA) was used for shaping and lobe development followed by surface texturing using a KS1 diamond bur (Brasseler USA) at very low RPMs, or a DuraGreen stone (Shofu) could have been used. A blue FlexiCup (Cosmedent) softened the surface texture without removing it.
The goal of polishing is to mimic the reflective surface finish of the adjacent tooth. A.S.A.P. 2-step diamond polishers (Clinician’s Choice) produce a high shine luster in under a minute with only one shape. It may be necessary to use Enamelize polishing paste (Cosmedent) on a Groovy Diamond Polisher (Clinician’s Choice) to achieve an even higher luster. In this case, the polisher step was limited to the purple A.S.A.P. Pre-polisher and the peach Final High Shine polisher. (FIG. 9)
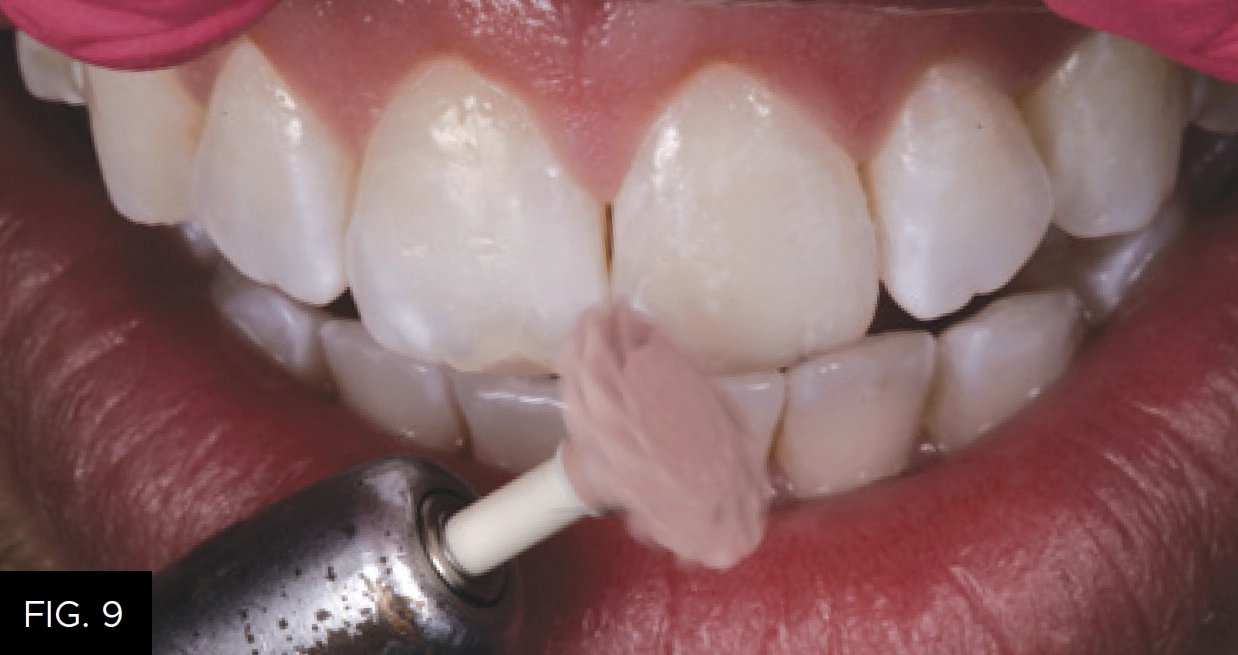
Polishing: Purple A.S.A.P. Pre-polisher and Peach A.S.A.P. Final High Shine polisher are used for 15 – 20 seconds each at 8 – 12,000 RPM to produce a high luster shine.
Responsible esthetics using composite can achieve the same esthetic outcomes when you understand composite colors and have a systemic approach to rebuilding teeth. This is a procedure that conserves tooth structure and gives the patient an immediate high quality, long-term esthetic outcome. (FIG. 10-11)
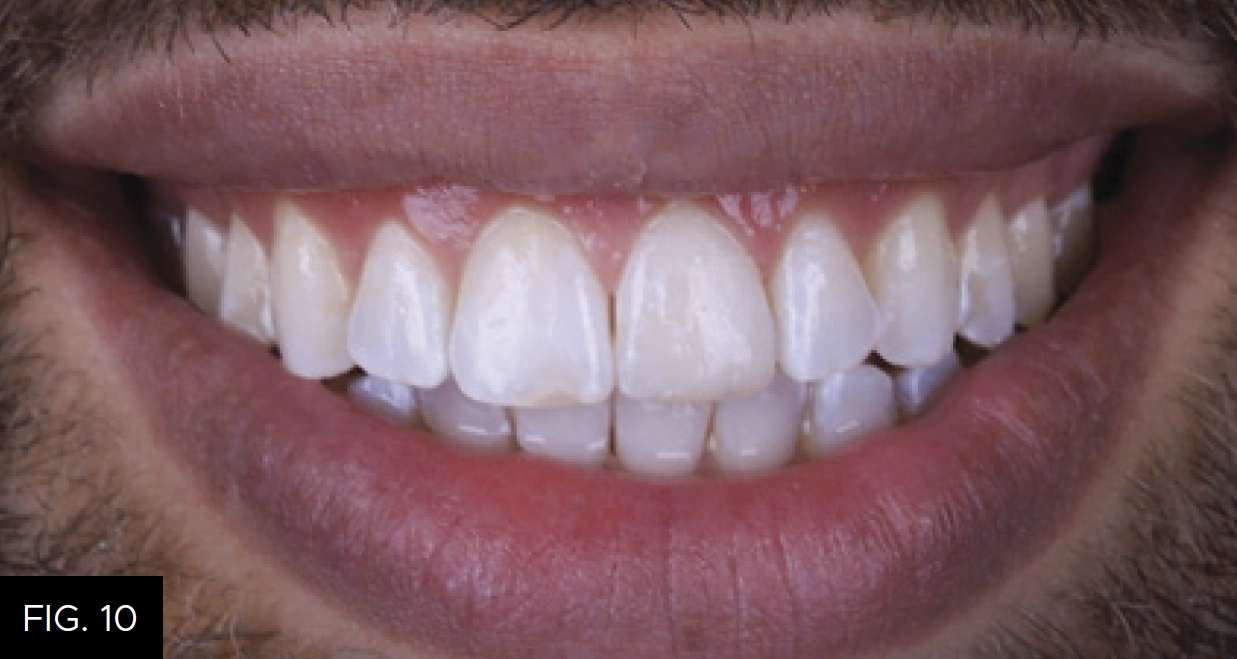
Post-op: Highly esthetic restorative solution using the principles of responsible esthetics.

Post-operative full-face portrait view.

ABOUT THE AUTHOR
Dr. Megan Shelton is a restorative and cosmetic dentist in Southern California. Dr. Shelton attended the University of Louisville School of Dentistry. She continued her education at the Kois Center and graduated in 2021, which allows her to predictably treat patients with complex problems. She is known as a leader in the industry for her implementation of digital dentistry, restorative materials, and continuing education into her private practice and is now helping other dentists to do the same.
Share This Article! Choose Your Platform
Products Mentioned in this article
Related Articles
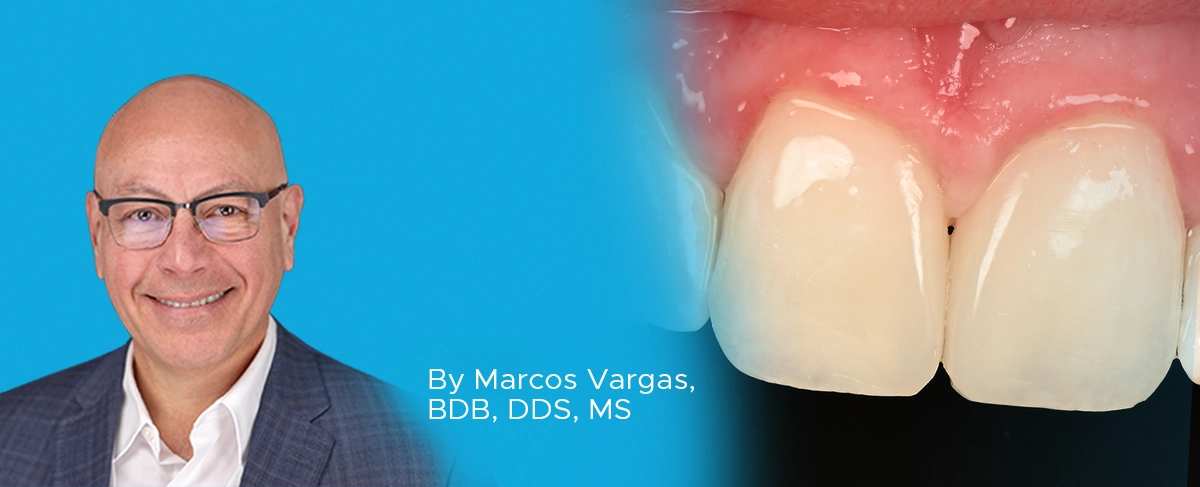
Ultimate Esthetics Using Non-VITA Shades for Diastema Closure
By Marcos Vargas, BDB, DDS, MS
Spaces between anterior teeth are a common occurrence, and for some, this can be an unattractive feature that they may be looking to correct, especially spaces in the midline.
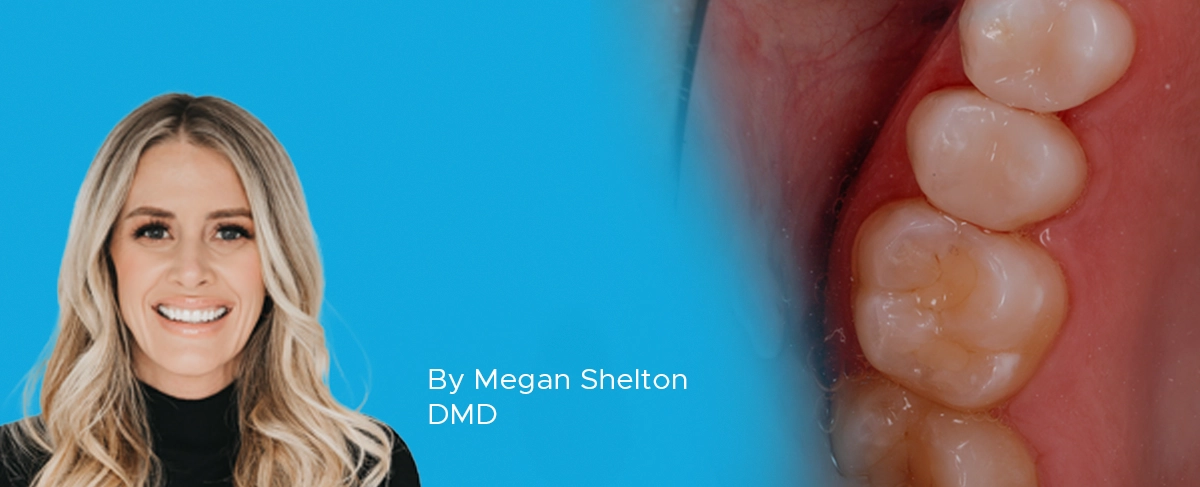
The Back-to-Back Class II Composite: A Predictable Workflow for One of the Most Common Clinical Procedures
By Megan Shelton, DMD
While it may be one of the most common procedures in most restorative dental offices, the efficient placement of multiple Class II composites in a single quadrant can be technically demanding. Creating strong and natural proximal contours and contacts with the restoration of even a single Class II composite restoration can pose a challenge using traditional matrix systems.
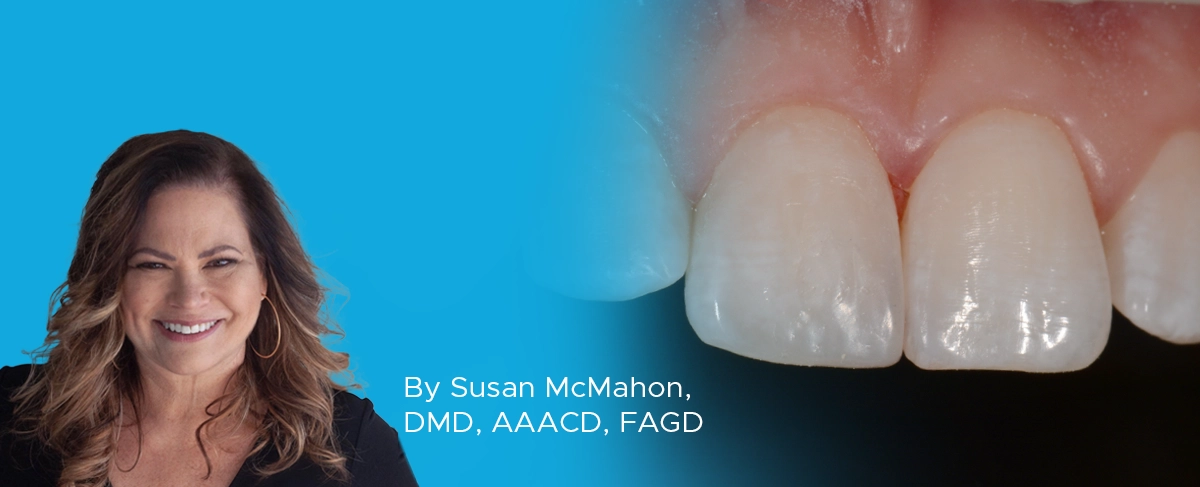
The Starburst Bevel: A Simple Solution for Enhanced Esthetics and Retention
By Susan McMahon, DDS, AAACD, FAGD
Developing a protocol for your Class IV technique is essential for attaining predictable and long-lasting esthetic restorations. Depending on the size of the Class IV and the presence of incisal translucency and surface characteristics of the adjacent teeth, for instance, your anterior composite protocol should also be both flexible and versatile.