
Simplifying the Process of Full Arch Implant Impressions Without Compromise to Accuracy
By Chad C. Duplantis, DDS, FAGD
INTRODUCTION
Implant impressions can create undue stress in the mind of a clinician. This is especially true for full arch implant impressions as these demand an incredible amount of accuracy and minimal room of error. Prior to taking these impressions, the clinician must answer a few questions: What type of impression material should I use? Should I take an open or closed tray impression? What trays are available to help me accomplish the best impression possible?
THE MATERIAL
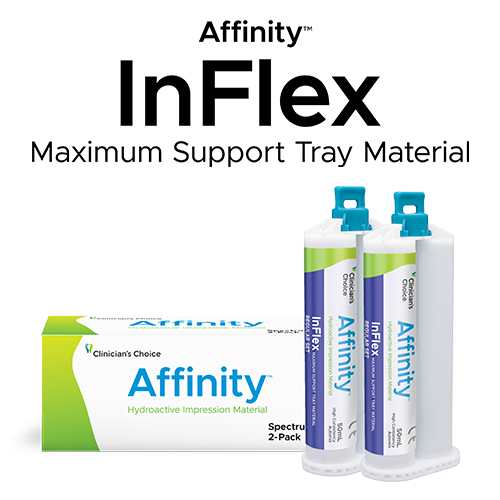
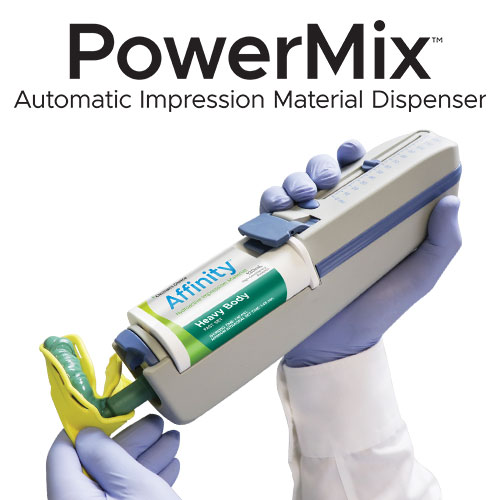
In the past, many clinicians would choose a polyether impression material. These materials provided great accuracy, yet they had a rather extensive set time. They also presented the patient with an unpleasant taste. Today, there are newer polyvinylsiloxane materials available that are more hydrophilic, set faster with no taste and provide a very accurate impression. The light body materials flow very nicely into the details of the tooth or implant, and the heavier bodied tray materials provide the support and detail needed as well. For a full arch implant impression, the tray material is perhaps the most important component of these impressions. Affinity™ InFlex (Clinician’s Choice®) is a very unique material that has several desirable properties: low viscosity to prevent tissue displacement, it’s also rigid enough to prevent pouring distortion due to its 80 durometer reading. This material has been extremely beneficial for both my dual arch and my full arch implant impressions. Additionally, it is available in 120mL cartridges (along with 50mL and 380mL). The benefit of the 120mL cartridges is that it can be used in the PowerMix dispenser. The PowerMix is a small handheld automixer that creates a consistent mix for faster tray filling and without placing strain on the assistants hands when delivered.
THE IMPRESSION TECHNIQUE
Open or closed tray impressions are truly a preference of the operator. Regardless of the preferred technique, the key is that all impression components are fully seated prior to taking the impression. In a review of the literature, no difference is found in accuracy of an open or closed tray technique. I prefer an open tray technique. The main advantage in my opinion is that I can visualize the impression copings upon insertion of the tray and verify that no problems have occurred in my impression. With this being said, I feel that an open tray technique provides me with more confidence.
THE TRAYS
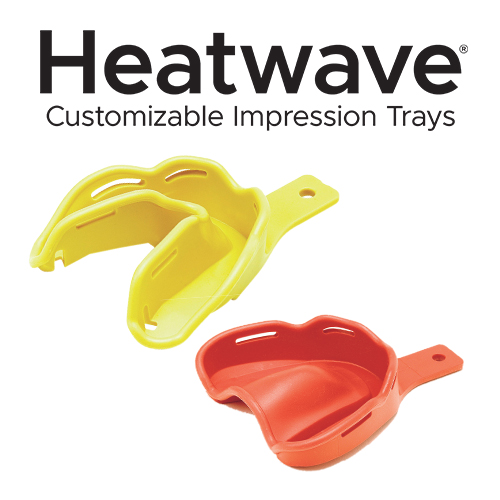
Several stock trays can be modified to accommodate an open tray impression. Custom trays can also be fabricated that would perform nicely as well but take a lot of time to fabricate. I believe that the Heatwave™ trays (Clinician’s Choice®) perform very nicely with their anatomical design which requires less impression material. By introduction of these trays to warm water, they can be customized to fit the patient and capture a quality impression. The tray is further modified by the use of an acorn or round acrylic bur in the area of the impression copings to retrieve the screw and coping.
THE WORKFLOW
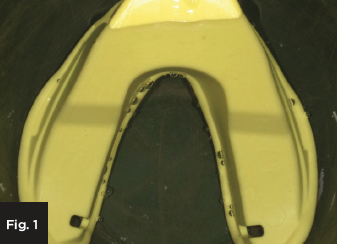
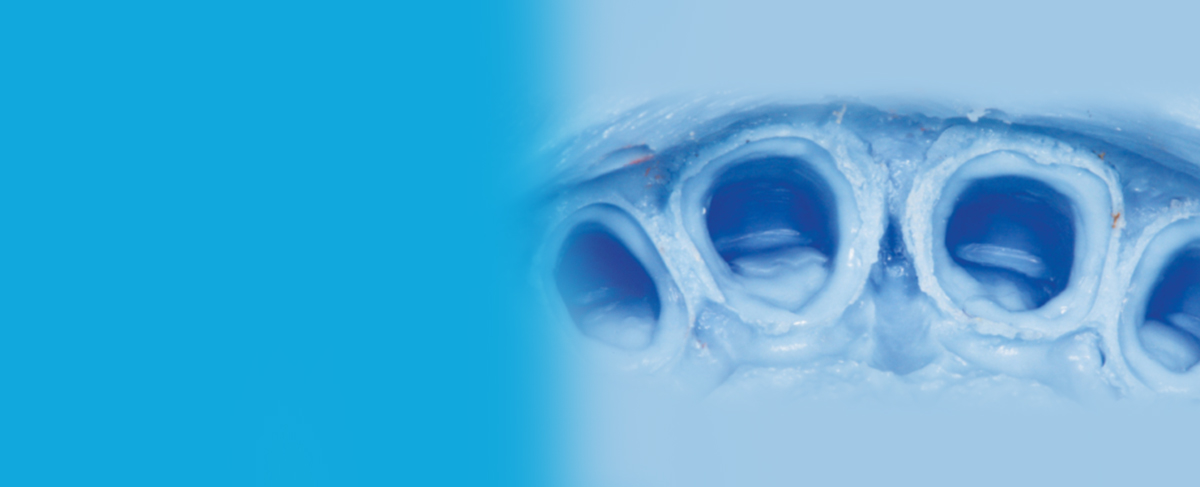
In this case, an open tray impression was taken. Once the appropriate Heatwave tray is selected using the calipers and chart provided, the tray is immersed in hot water (70°C/158°F) for 1 minute. (Fig.1)
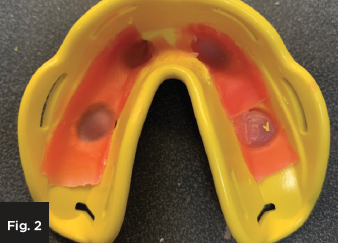
The tray is then molded to the desired shape and then allowed to cool. The impression copings have already been seated on the implants. The tray is relieved in the area of the copings and baseplate wax is placed to help contain the impression material in the tray. (Fig.2)
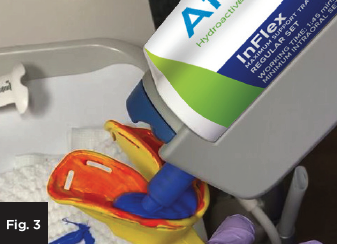
Adhesive is then applied to the tray. While the doctor is placing the light body (Affinity™ Light Body HF, Clinician’s Choice®) around the impression copings and on the ridge, InFlex is placed into the tray using the PowerMix by the assistant. (Fig.3)
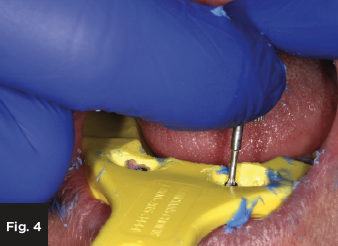
The tray is inserted, and the access screws puncture the baseplate upon seating. Following complete set of the material, the screws are loosened, and the tray is removed with the impression copings in the impression. (Fig. 4)
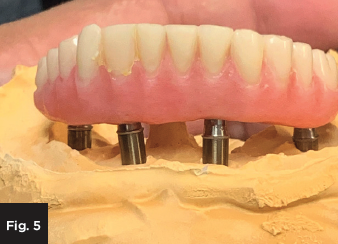
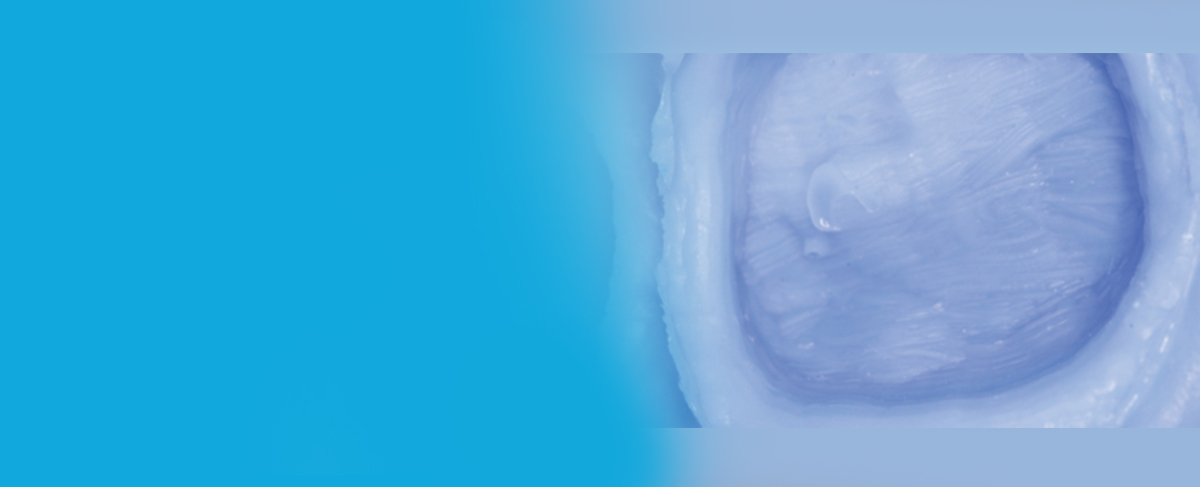
Utilizing analogs, the impression is poured. Following set of the stone, the model is then verified using the patient’s interim prosthesis. (Fig. 5)
CONCLUSION
There are many ways to take a final impression on a full arch implant retained prosthesis. This workflow has proven to be accurate and efficient in my practice. I feel that Affinity™InFlex provides the support that is needed to maintain accuracy. Additionally, the PowerMix provides an effective way to place the tray material into the tray with minimal effort.

ABOUT THE AUTHOR
Dr. Duplantis received his D.D.S. degree from the University of Texas Health Science Center at San Antonio Dental School in 1999. He then continued with Post Doctorate training at Baylor College of Dentistry, earning a Certificate in Advanced Education in General Dentistry in 2000. He is also a Fellow of the Academy of General Dentistry. Dr. Duplantis has been in private practice since 2000 in the North Fort Worth, TX area with an emphasis on restorative and aesthetic dentistry.
Related Articles
Predictable and Efficient Single Unit Crown Restorations
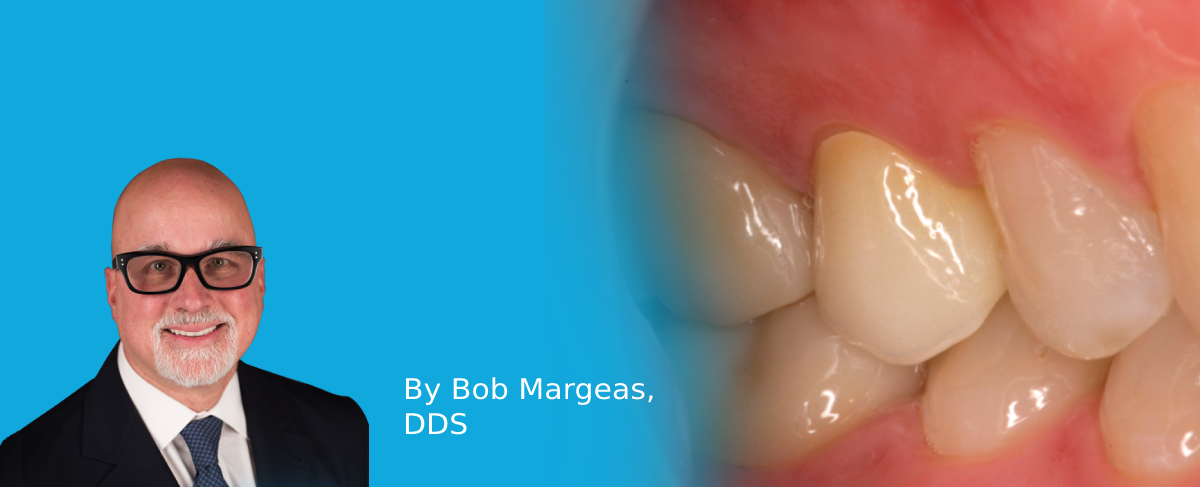
By Bob Margeas, DDS
A 55-year-old patient presented to my office with tooth pain upon biting from his second bicuspid. Upon further examination a crack was noted on the mesial marginal ridge.

Maximizing Impression-Taking Efficiency and Accuracy
By Fred Peck, DDS, FAACD
Obtaining a patient’s dental impression can present many challenges. One must keep the area free of saliva and blood, have good access to margins and often deal with a variety of viscosities of impression materials, that must be mixed and injected simultaneously to obtain an accurate impression.
Impression Accuracy Goes Beyond the Perfect Margin
Impression Accuracy Goes Beyond the Perfect Margin Courtesy of Dr. Robert Lowe Courtesy of Dr. Brad Carson Courtesy of Dr. Robert Ramsey [...]
Consistently Accurate Impressions Designed for You
Consistently Accurate Impressions Designed for You While the use of digital scanners and dental milling machines continue to rise, there is still the need for consistently accurate VPS impressions. The ability to precisely [...]