
It’s Time to Give Isolation a (Rubber) Dam
Achieving successful, long-term restorations is dependent on maintaining a clean, dry and isolated field during the bonding process. While many options exist for achieving a dry field, the rubber dam reigns supreme. In addition to superior isolation, the rubber dam allows the provider better visualization of the field as well as improved patient comfort as it serves as a barrier for excess water and material.
RUBBER DAMS ARE AVAILABLE IN A VARIETY OF GAUGES AND SIZES
- Medium and thick gauge dams are well suited for most restorative procedures providing a nice balance of gingival retraction and tear resistance.
- Larger dams (6″x6″) provide excellent visibility and retraction, however, smaller dams (5″x5″) may be more practical for children and patients with smaller mouths and/or limited openings.
LATEX AND NON-LATEX RUBBER DAMS
- Historically, latex dams have provided better stretch and elasticity and have been preferred over non-latex dams; however, improvements in materials with the introduction of Polyisoprene dental dams, have ensured that non-latex dams feature similar physical properties and may be used confidently.
- Great care should be made in identifying those patients with latex allergies, and non-latex dams should always be used.
RUBBER DAM CLAMPS ARE VAST AND VERSATILE
- To allow for proper fit and engagement on teeth, clamps can be winged or not-winged, serrated, cut, modified, bent and splinted.
- When in doubt, never hesitate to modify your clamp to ensure four-point contact on teeth for stability.
ONE SIZE DOES NOT FIT ALL
- Generally, the largest hole diameter is for the clamped tooth, then molars, premolars, canines and maxillary incisors, and finally mandibular incisors.
PRE-FAB OR CUSTOM TEMPLATES
- Pre-fab templates give a good estimate of the approximate location and spacing of teeth and are good for a majority of cases.
- Customized templates are better suited for patients with missing teeth or unique anatomy and spacing:
- May be fabricated either intra-orally or extra-orally (patient’s model needed for extra-oral).
- To make a custom template, place the rubber dam on the frame to the tension it will be placed intra-orally.
- Hold the dam against the patient’s teeth.
- Have your assistant mark the cusp tips or mid-occlusal plane of the teeth being isolated as you hold the dam in place.
ORDER OF PLACEMENT
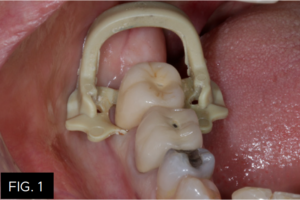

- Generally it is more practical to place the anchor clamp initially (FIG. 1) and place the rubber dam around the clamp. (FIG 2)
- However, in cases of limited opening or constriction due to anatomy, simultaneous placement of clamp with the rubber dam is recommended.
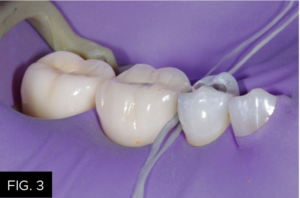
DAM INVERSION AND BACK-UP
- In order to achieve complete seal, the dam needs to be inverted apically around the teeth being isolated.
- Most medium/thick gauge rubber dams are rigid enough to be pulled down through contacts without assistance.
- Floss can assist complete seating and inversion by being navigated through the contact, folded over, navigated through the contact a second time, then pulled free. (FIG. 3)
- Other techniques including a thin plastic air syringe as well as packing of Teflon tape in the sulcus can further reduce any leakage that may occur.
- Finally, if tears occur, light-cured liquid dam material can be placed over the tear to block out the saliva and prevent contamination of the field.
Rubber dams ultimately increase efficiency of restorative procedures in addition to providing better visualization, moisture control, patient comfort and more reliable bonding. Which ultimately results in both happy dental professionals and patients. Work smarter, not harder!

ABOUT THE AUTHOR
Dr. Devin McClintock is a graduate of the State University of New York at Buffalo School of Dental Medicine (2016), where she graduated with honors and a minor concentration in esthetics. Since graduating, her dedication to continued education has not ceased. She has completed two years of General Practice Residency, and she is currently one of a few selected residents completing a two-year program with the American Academy of Cosmetic Dentistry. Additionally, she spends her free time attending courses at the Kois Center in Seattle, WA, as well as assists with the imPRES lecture series in Charleston, SC.
Products Mentioned in this article
Related Articles

A Stress-free Approach to Tooth Isolation
By Anthony Mennito, DMD
In my opinion, we are in a golden age of dentistry. The materials we have at our disposal are incredibly esthetic, increasingly durable, and can be placed with minimal to no removal of healthy tooth structure. So why are we so stressed out all the time?

Take 5: 5 Restorative Clinicians’ Take on True Dental Dam
5 Restorative Clinicians' Take On True Dental Dam.

Closer Look: True™ Dental Dams Stand Out From the Crowd
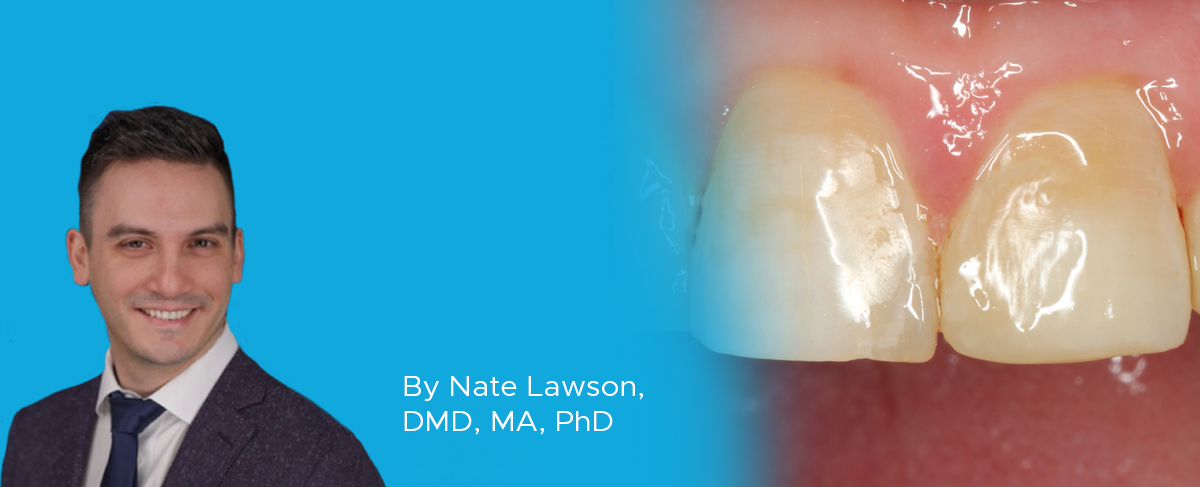
By Nate Lawson, DDS, MA, PhD
The Clinician’s Choice rubber dams stand out among others due to their versatility, tear resistance, flexibility, and color.
Simple Anterior Composite Restorations
By Nate Lawson, DMD, MA, PhD
A patient presented to the University of Alabama, School of Dentistry with fractured composites on the mesial incisal edges of his left central and lateral incisors that had been placed 20 years previously.