Choosing an Adhesive That Really “Sticks”
Adhesive dentistry has permeated into all aspects of direct and indirect restorative dentistry. This has marked a huge advance in dentistry from preservation of tooth structure with minimally invasive dentistry, to the ability to save a tooth with little remaining tooth structure.
Improvements have been made from one generation of dental adhesive to the next. The fourth generation of adhesives is often referred to as the “gold standard” due to its strong enamel and dentin bond strengths and versatility; however, its drawback was that it consisted of a multi-bottle kit with a thick instruction manual. Every generation after that has aimed at reducing the number of components as well as the time taken to place the adhesive. With the exception of the fifth generation adhesive, all other generations achieved an easier-to-use product, but often compromised the procedure with lower bond strengths, degradation of the bond over time, and less versatility.
It should be noted that the application of the dental adhesive comes after the acidic treatment of the smear layer. The smear layer is produced by the accumulation of tooth and bacterial debris caused by the preparation of the tooth. This layer can cover much of the dentin surface, collagen fibers, and dentinal tubules, all elements critical to a successful, long-lasting bond. Total-etch techniques using phosphoric acid removes the smear layer, exposing the dentin, collagen fibers, and dentinal tubules to receive the adhesive. Self-etch techniques vary greatly in their ability to remove any of the smear layer and their lack of effectiveness on uncut enamel required that you acid etch enamel before proceeding with the self-etch procedure.
Click on an image below to enlarge & view caption.
Dentistry and photography courtesy of Dr. Robert Margeas.
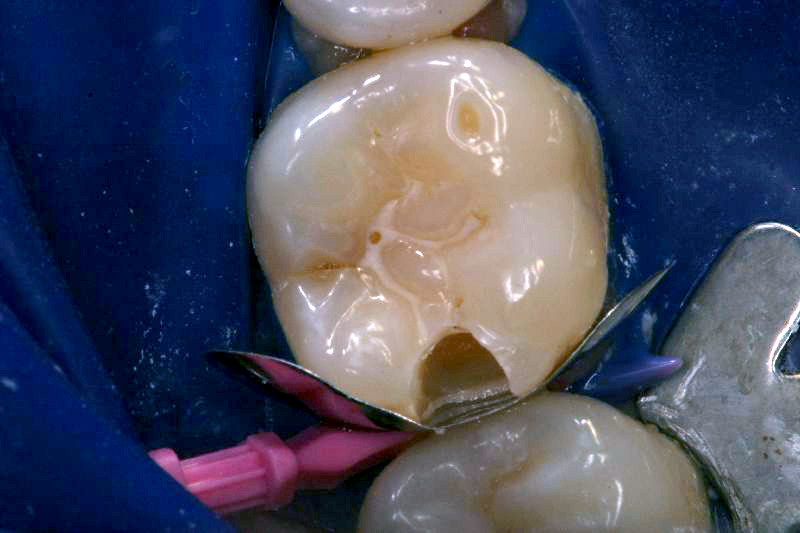
Figure 1: After caries removal and placement of the matrix band and wedge, thoroughly clean and dry the preparation.
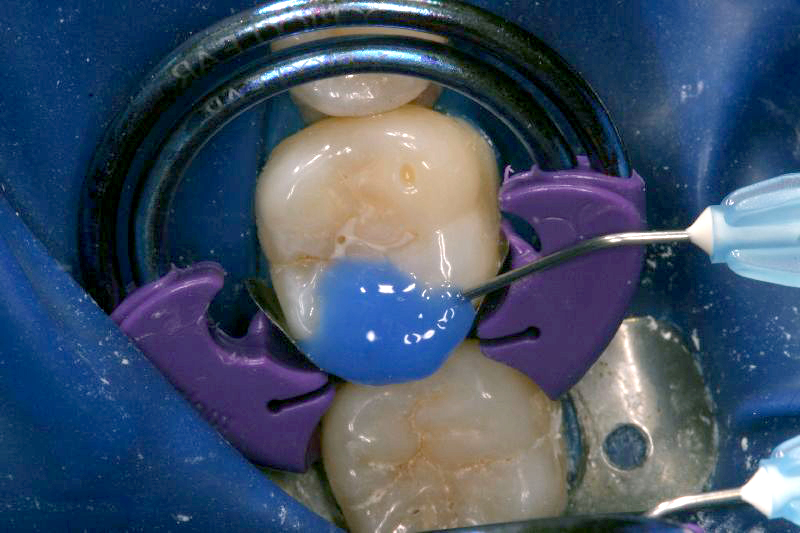
Figure 2: Liberally apply Max-Etch H3PO4 to the preparation and etch for 20 seconds.
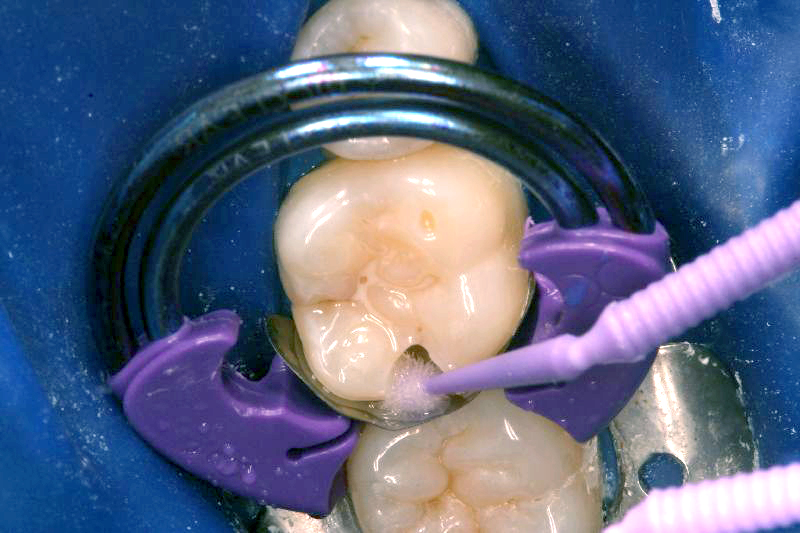
Figure 3: Rinse the Max-Etch for a minimum of 5 seconds then scrub G5 All-Purpose Desensitizer onto the preparation for 10 seconds, blotting any excess. Leave the surface visibly moist.
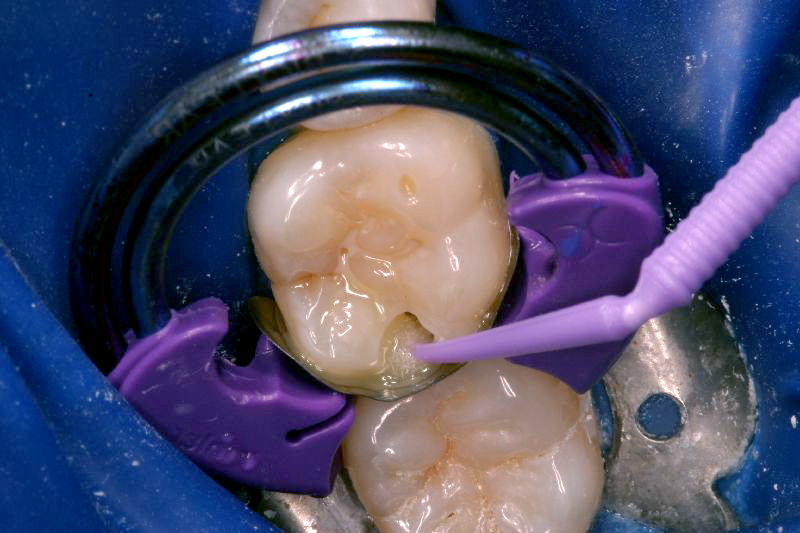
Figure 4: Apply MPa Max adhesive (ensuring each adhesive wall is coated) and gently scrub for 10 seconds. Thin and air dry using ¼ to ½ air pressure to evaporate the solvent, for 10 seconds. The preparation should appear shiny with no pooling.
Many dental offices use different adhesives for different procedures, even in various areas of the mouth. With our ability to bond everything from composite restorations to posts to crown and bridge restorations, the right dental adhesive is one that can do it all – without compromise: truly universal in its versatility of use (not to be confused with the term used for the versatility of application technique). To be truly universal, the adhesive used for all composites should be the same adhesive for cementing posts and ceramic crowns and bridges.
Several factors are to be considered when selecting the “one” dental adhesive. Personal experience or history with a particular generation could skew the decision away from one generation or another. Fourth generation total-etch adhesives were somewhat onerous in the number of steps required. Some technique sensitivity could result in post-op discomfort which was a major concern and caused many dentists to choose self-etch adhesives that produce very little post-op sensitivity. Even the fifth total-etch generation is somewhat technique sensitive due to the requirement for the dentin to be moist, but not wet or dry, in order to ensure optimal bonding conditions. The simple addition of a 10-second re-wetting agent takes care of that dilemma and the post-op sensitivity that was once associated with total-etch systems. This simple addition of a re-wetting agent allowed the use of fifth generation adhesives for optimal dentin and enamel bond strengths without the potential side effects. In fact, some re-wetting agents contain glutaraldehyde and hema. The glutaraldehyde acts as an antimicrobial and coagulates plasma proteins into a “plug”, restricting the movement of dentinal fluid which would otherwise contribute to post-op sensitivity. The hema component assists in the penetration of the resin into the dentin tubules for protection also against post-op sensitivity. This gives the fifth generation adhesives the benefit of no post-op sensitivity; however, self-etch generations could never match the bond strengths of most of the total-etch adhesives.
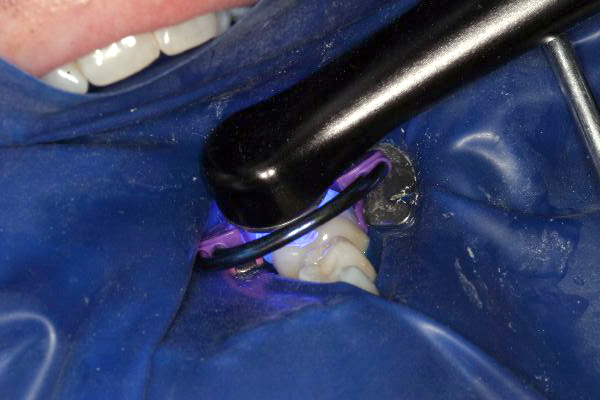
Figure 5: Light-cure for 10 seconds using a standard light with an output >600 mW/cm2 or 20 seconds if the output is <600 mW/cm2.
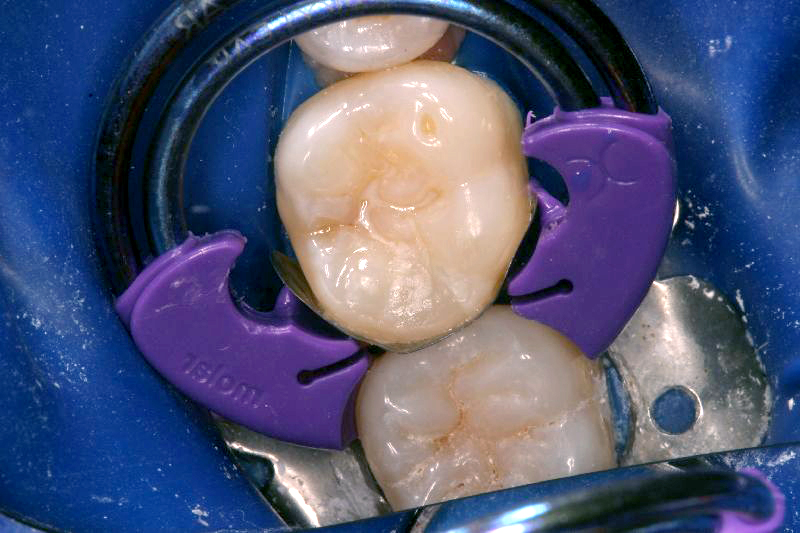
Figure 6: Proceed with placement and light-curing of the composite. A bulk-fill composite was used in this case.
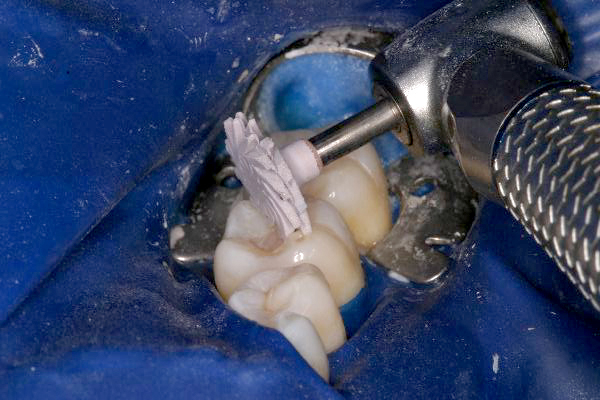
Figure 7: Use an A.S.A.P. Pre-Polisher to remove surface scratches.
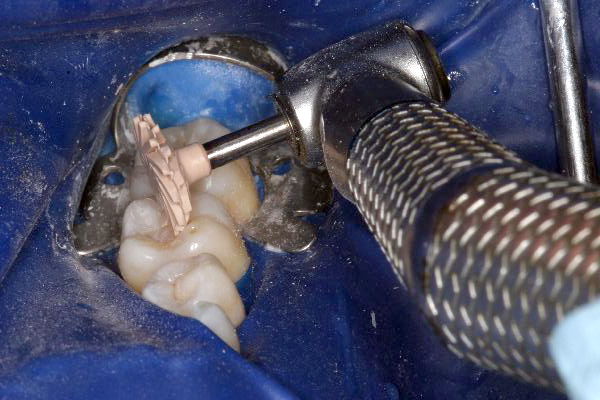
Figure 8: Apply light pressure using the A.S.A.P. Final High Shine Polisher to quickly bring an esthetic luster to the restoration. 20 seconds should do it!
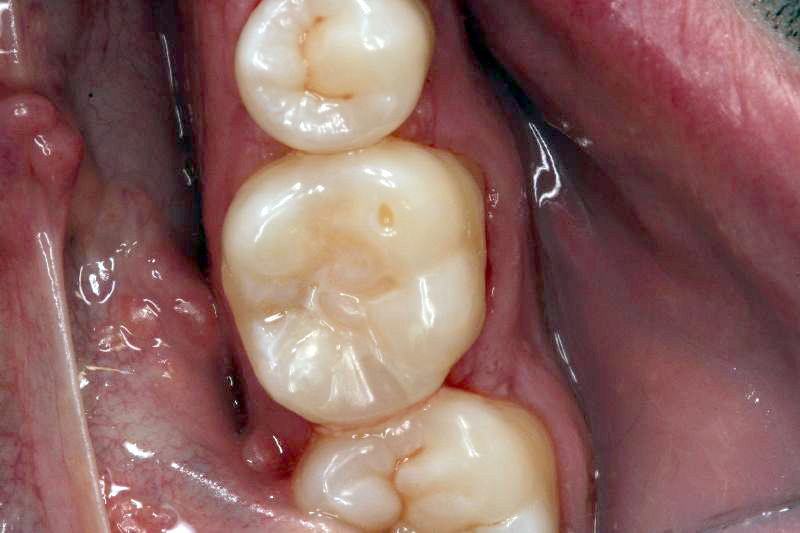
Figure 9: The final restoration: a combination of life-like esthetics and a strong, enduring dentin/enamel bond.
MMPs, matrix metalloproteinases, are enzymes released from collagen fibers that have been exposed to an acid (i.e. phosphoric acid). Their job is to rid the area of this “damaged” collagen, but its result is the gradual degradation of bond strengths, starting in the first year – another reason one would want to start out with the highest bond strength possible. Some fifth generation adhesives have added a small amount of chlorhexidine to the chemistry. In addition to its antimicrobial effect, 0.02% chlorhexidine has been shown to inhibit the actions of the MMPs. The result: a longer lasting bond.
A carrier is required to take the adhesive to dentin surface and exposed dentinal tubules. Once this is accomplished, the carrier must be evaporated, leaving the adhesive in place. Acetone, ethanol, and water are the main carriers used today. Acetone is very volatile and will easily evaporate, whether intentionally or not. Water is very slow to evaporate even under a steady air stream. Ethanol appears to be the best of both worlds as it is not apt to evaporate unintentionally before it could be useful and it is fairly easily driven off by a steady stream of air. Care must be taken, especially when using an acetone carrier that the adhesive bottle is quickly resealed and should never be pre-dispensed. The volatility may change the chemistry of the adhesive and thus, its effectiveness.
The viscosity of adhesive resin will dictate how many coats or applications of adhesive you must apply. An adhesive with a lower viscosity will be easily dispersed and must be repeatedly applied to enable the obturation of the dentin tubules and effective coating of the dentin surface. A higher viscosity adhesive resin normally requires only one coat per adhesive surface, vigorously scrubbed into the dentin surface. The air stream is important to help spread and thin the adhesive and drive it into the tubules. This is usually followed by a lighter blast of air to drive off the carrier. One application means less exposure of the bottled adhesive to evaporation as well.
Only when each step of the adhesive process and the materials involved are clearly understood can a choice be made to carry a sole adhesive system in the office. Adhesive dentistry underpins the success of the dental practice so it is worthwhile to take the time to understand which system is best for you and your patients.